 My stepson Joe needed an air abrasive blast cabinet. He preps fossils, mainly fossil fish from the Green River Formation of Wyoming. He uses fine air abrasive tools to remove the matrix and
expose the fossils. It's kind of like sand-blasting, but not as aggressive. However, it is every bit as messy as sand-blasting, and as rough on the lungs. Joe was tired of having to do it
outside while wearing a respirator. He wanted a proper blast cabinet that he could work in inside his workshop. It's a project we have been talking about for a while. We finally all had the
time to come together and build it.
My stepson Joe needed an air abrasive blast cabinet. He preps fossils, mainly fossil fish from the Green River Formation of Wyoming. He uses fine air abrasive tools to remove the matrix and
expose the fossils. It's kind of like sand-blasting, but not as aggressive. However, it is every bit as messy as sand-blasting, and as rough on the lungs. Joe was tired of having to do it
outside while wearing a respirator. He wanted a proper blast cabinet that he could work in inside his workshop. It's a project we have been talking about for a while. We finally all had the
time to come together and build it.
 Here is an example of the sort of work Joe does. More examples can be seen on his Facebook Page, his
Instagram Page and his Ebay Store.
Joe has recently started making murals and kitchen backsplashes with the fossil fish panels. So he needed to ramp up his production. Having his own blast cabinet would
help.
Here is an example of the sort of work Joe does. More examples can be seen on his Facebook Page, his
Instagram Page and his Ebay Store.
Joe has recently started making murals and kitchen backsplashes with the fossil fish panels. So he needed to ramp up his production. Having his own blast cabinet would
help.
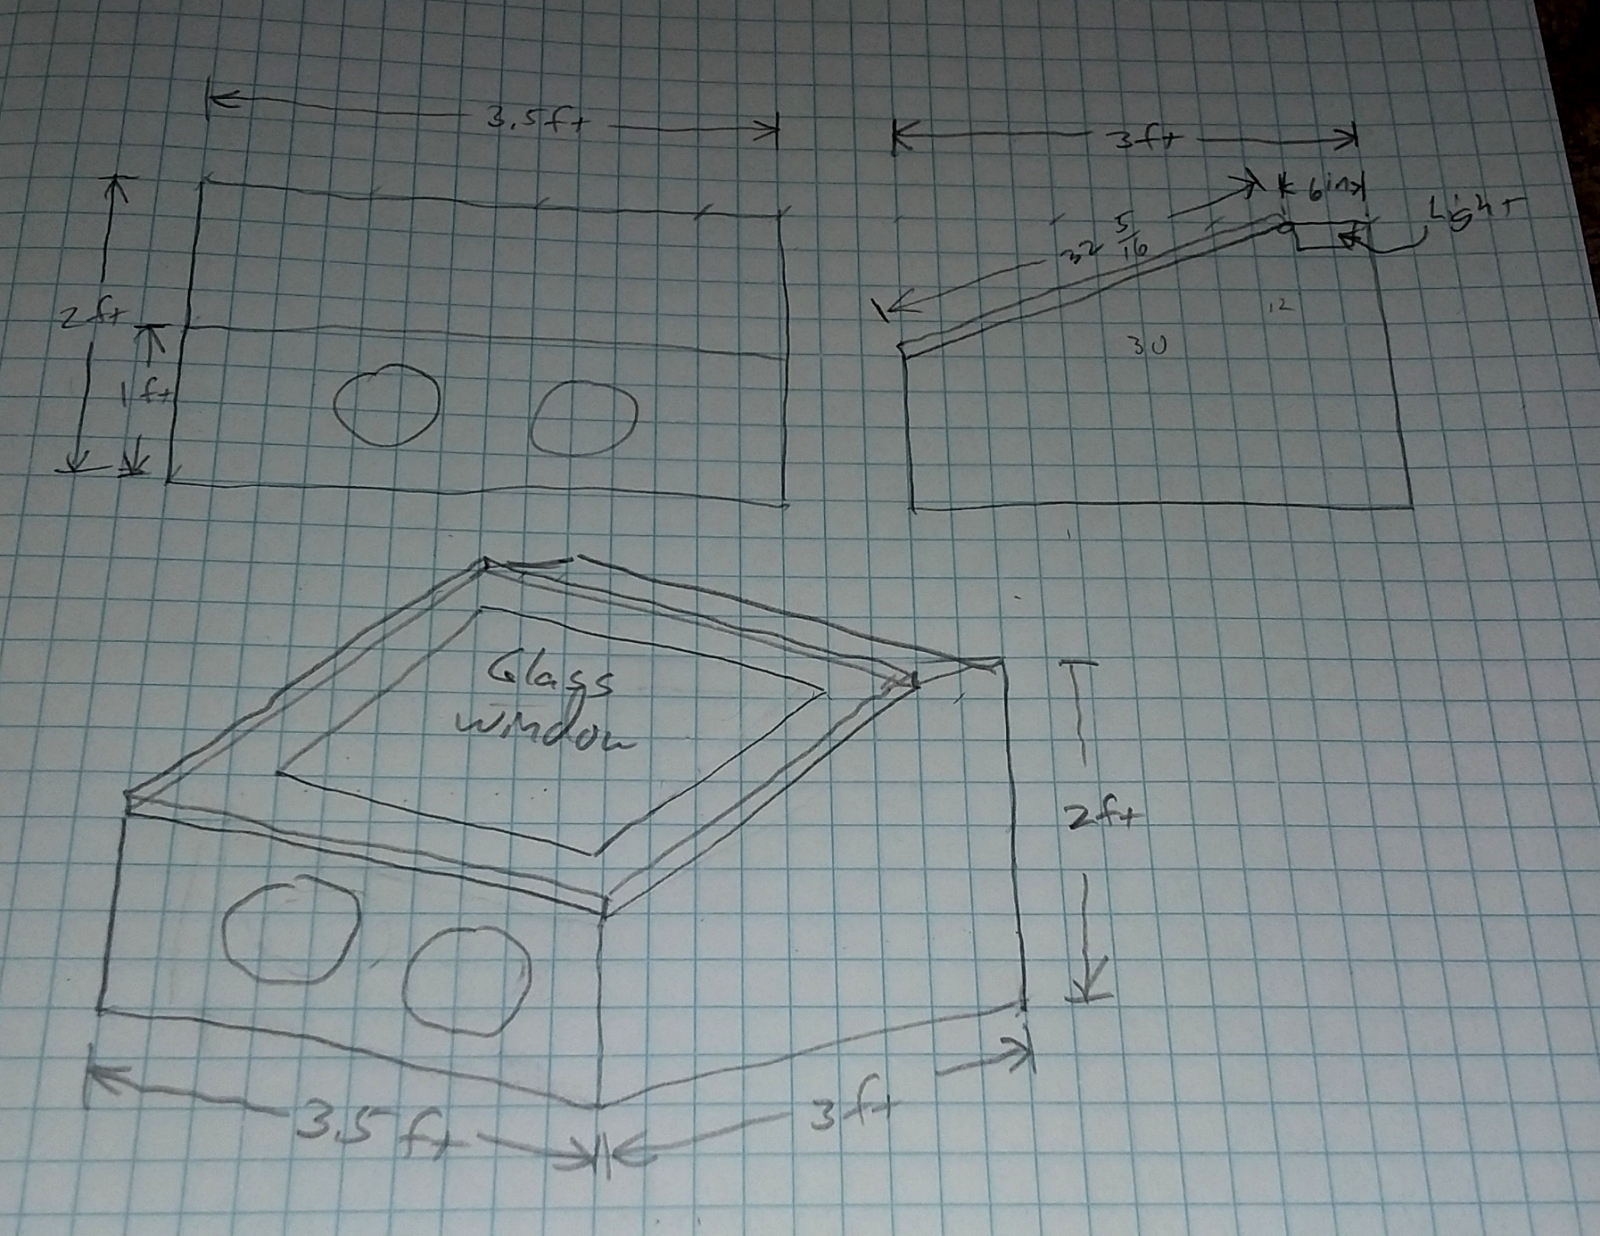 The project began with much texting between myself and Joe. He sent me photos of other blast cabinets he'd seen, and what he needed the inside dimensions to be. I asked questions
and made some simple drawings which I then sent back to Joe for approval. It was going to be a fairly simple project, just large and heavy when done. I worked up a parts list from
the drawings. We made a few minor changes to the design later that aren't shown in these drawings, but on the whole, it was pretty much built as I drew it.
The project began with much texting between myself and Joe. He sent me photos of other blast cabinets he'd seen, and what he needed the inside dimensions to be. I asked questions
and made some simple drawings which I then sent back to Joe for approval. It was going to be a fairly simple project, just large and heavy when done. I worked up a parts list from
the drawings. We made a few minor changes to the design later that aren't shown in these drawings, but on the whole, it was pretty much built as I drew it.
I figured on making the bottom and sides from 3/4 inch plywood, and the front, back and top from 1/2 inch. There would be a big glass window in the top so Joe could see what he is
doing. The window needed to be glass since Lexan or Plexiglass would attract and be obscured by the abrasive dust due to static electricity. There would be arm holes cut in the front
so Joe could stick his hands inside to work. There would be a hole in the side (not shown since we weren't yet sure at this stage of the game where it was going to go) for the hose of
Joe's dust collection system to evacuate the abrasive dust from the box. When we all had a couple
of free days to work on it, we got started.
My parts list consisted of:
1 4x8 sheet of 3/4 inch plywood
1 4x8 sheet of 1/2 inch plywood
1 Piano Hinge
1 Sheet of 1/4 inch glass 28x36 inches
Mirror mounting clips
1 24 inch long fluorescent light fixture
A box of 2 inch screws to put it all together
White paint to make the inside of the box brighter
 The day we got started on this project, our first move was to head over to Lowes and buy the parts we needed. We got most of what we needed on this first stop. The only things they didn't have were
the glass and mirror mounting clips.
The day we got started on this project, our first move was to head over to Lowes and buy the parts we needed. We got most of what we needed on this first stop. The only things they didn't have were
the glass and mirror mounting clips.
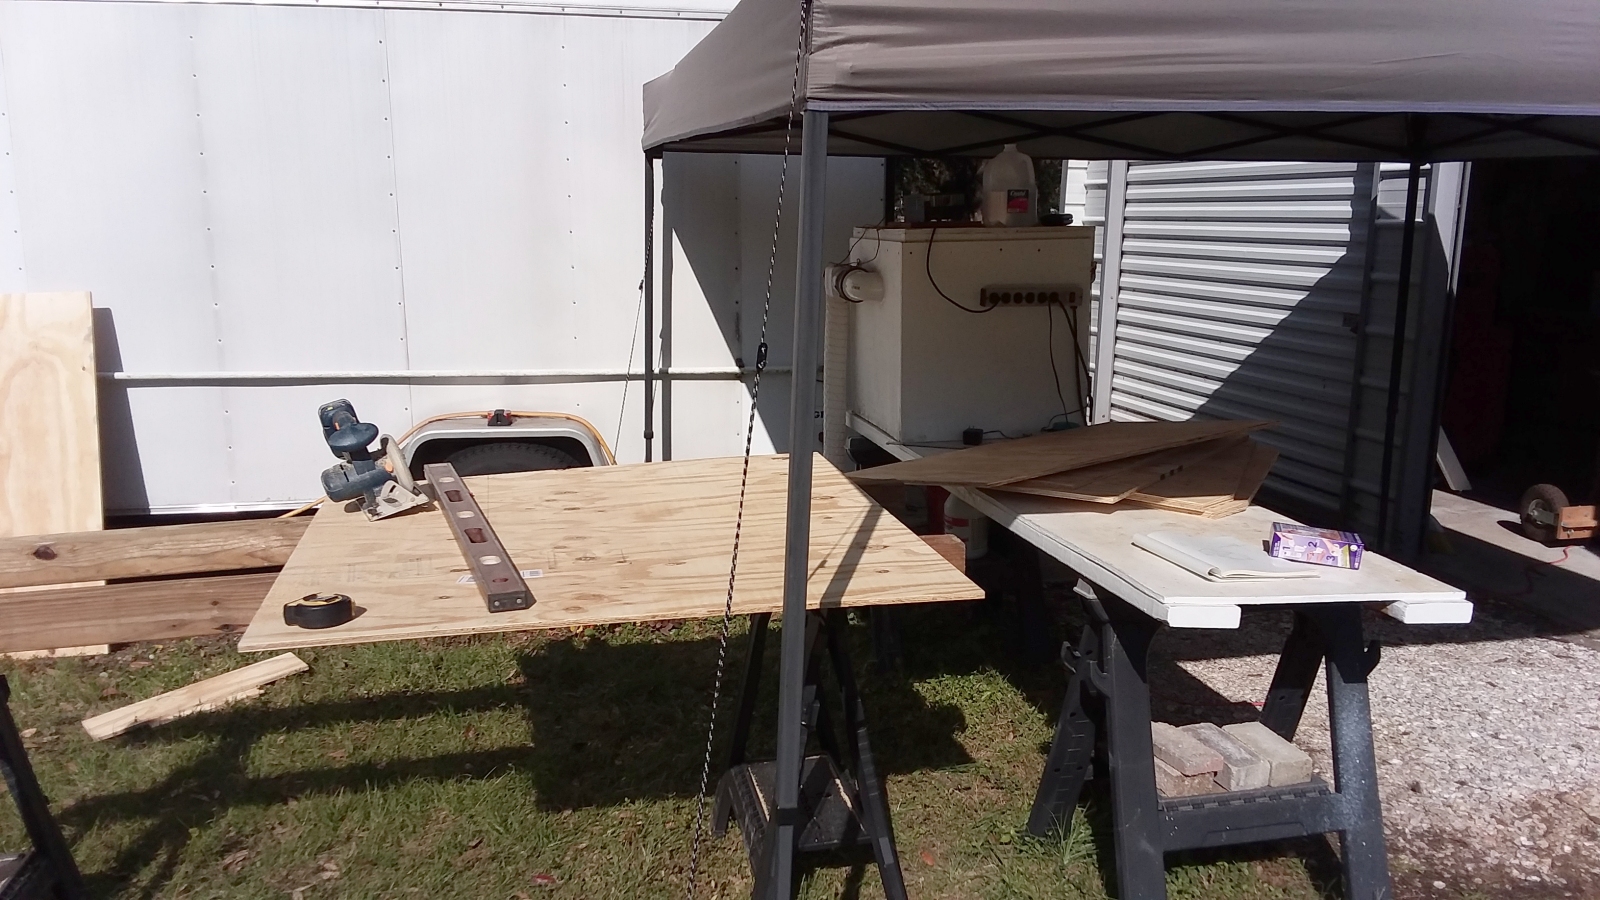
Leslie and Joe went back out in search of the other bits we needed. Meanwhile I set up a work area and began cutting the needed pieces out of the plywood. In no time I had all the pieces cut out and
stacked up ready for assembly. By the time they returned I was starting to put the cabinet together. They had struck out on getting the needed sheet of glass. All the home-center stores were sold
out of sheets of glass as large as what we needed. So they ordered a piece from a glass and mirror shop nearby, but it wouldn't be ready until the next day.
My home-made chemical fume hood can be seen in the background. So I'm no stranger to building my own home-made lab and shop equipment.
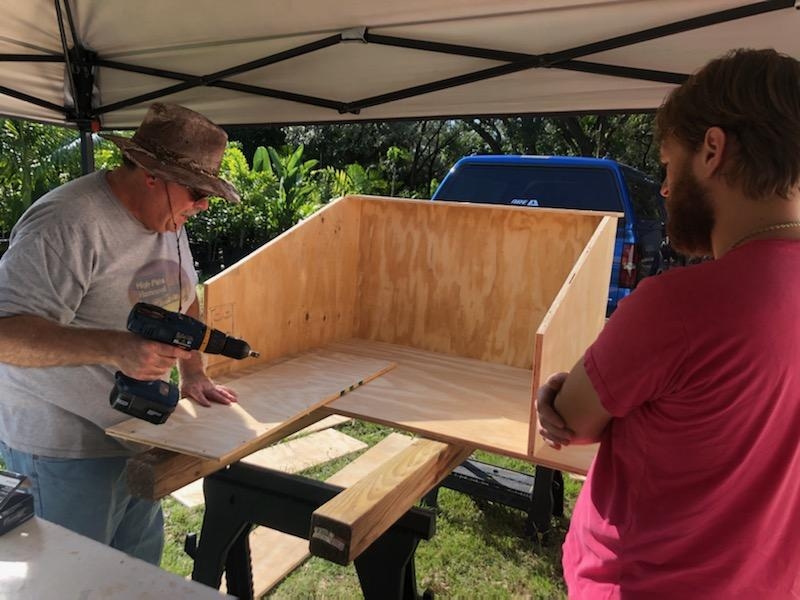 Once Joe and Leslie returned, the assembly went very quickly with the two of them to help. Here Joe and I are contemplating the attachment of the front panel of the box. The two sides, back and
bottom have already been screwed together.
Once Joe and Leslie returned, the assembly went very quickly with the two of them to help. Here Joe and I are contemplating the attachment of the front panel of the box. The two sides, back and
bottom have already been screwed together.
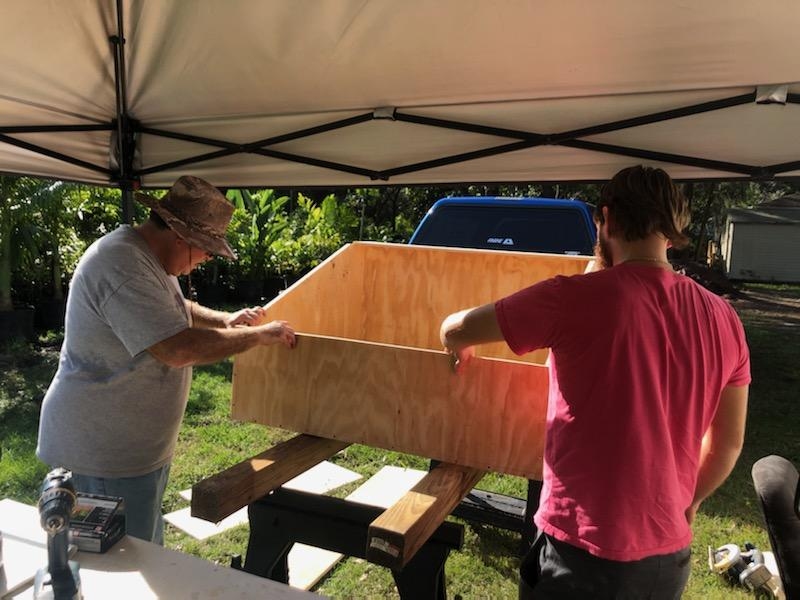 Here Joe and I are mounting the front panel on the blast cabinet.
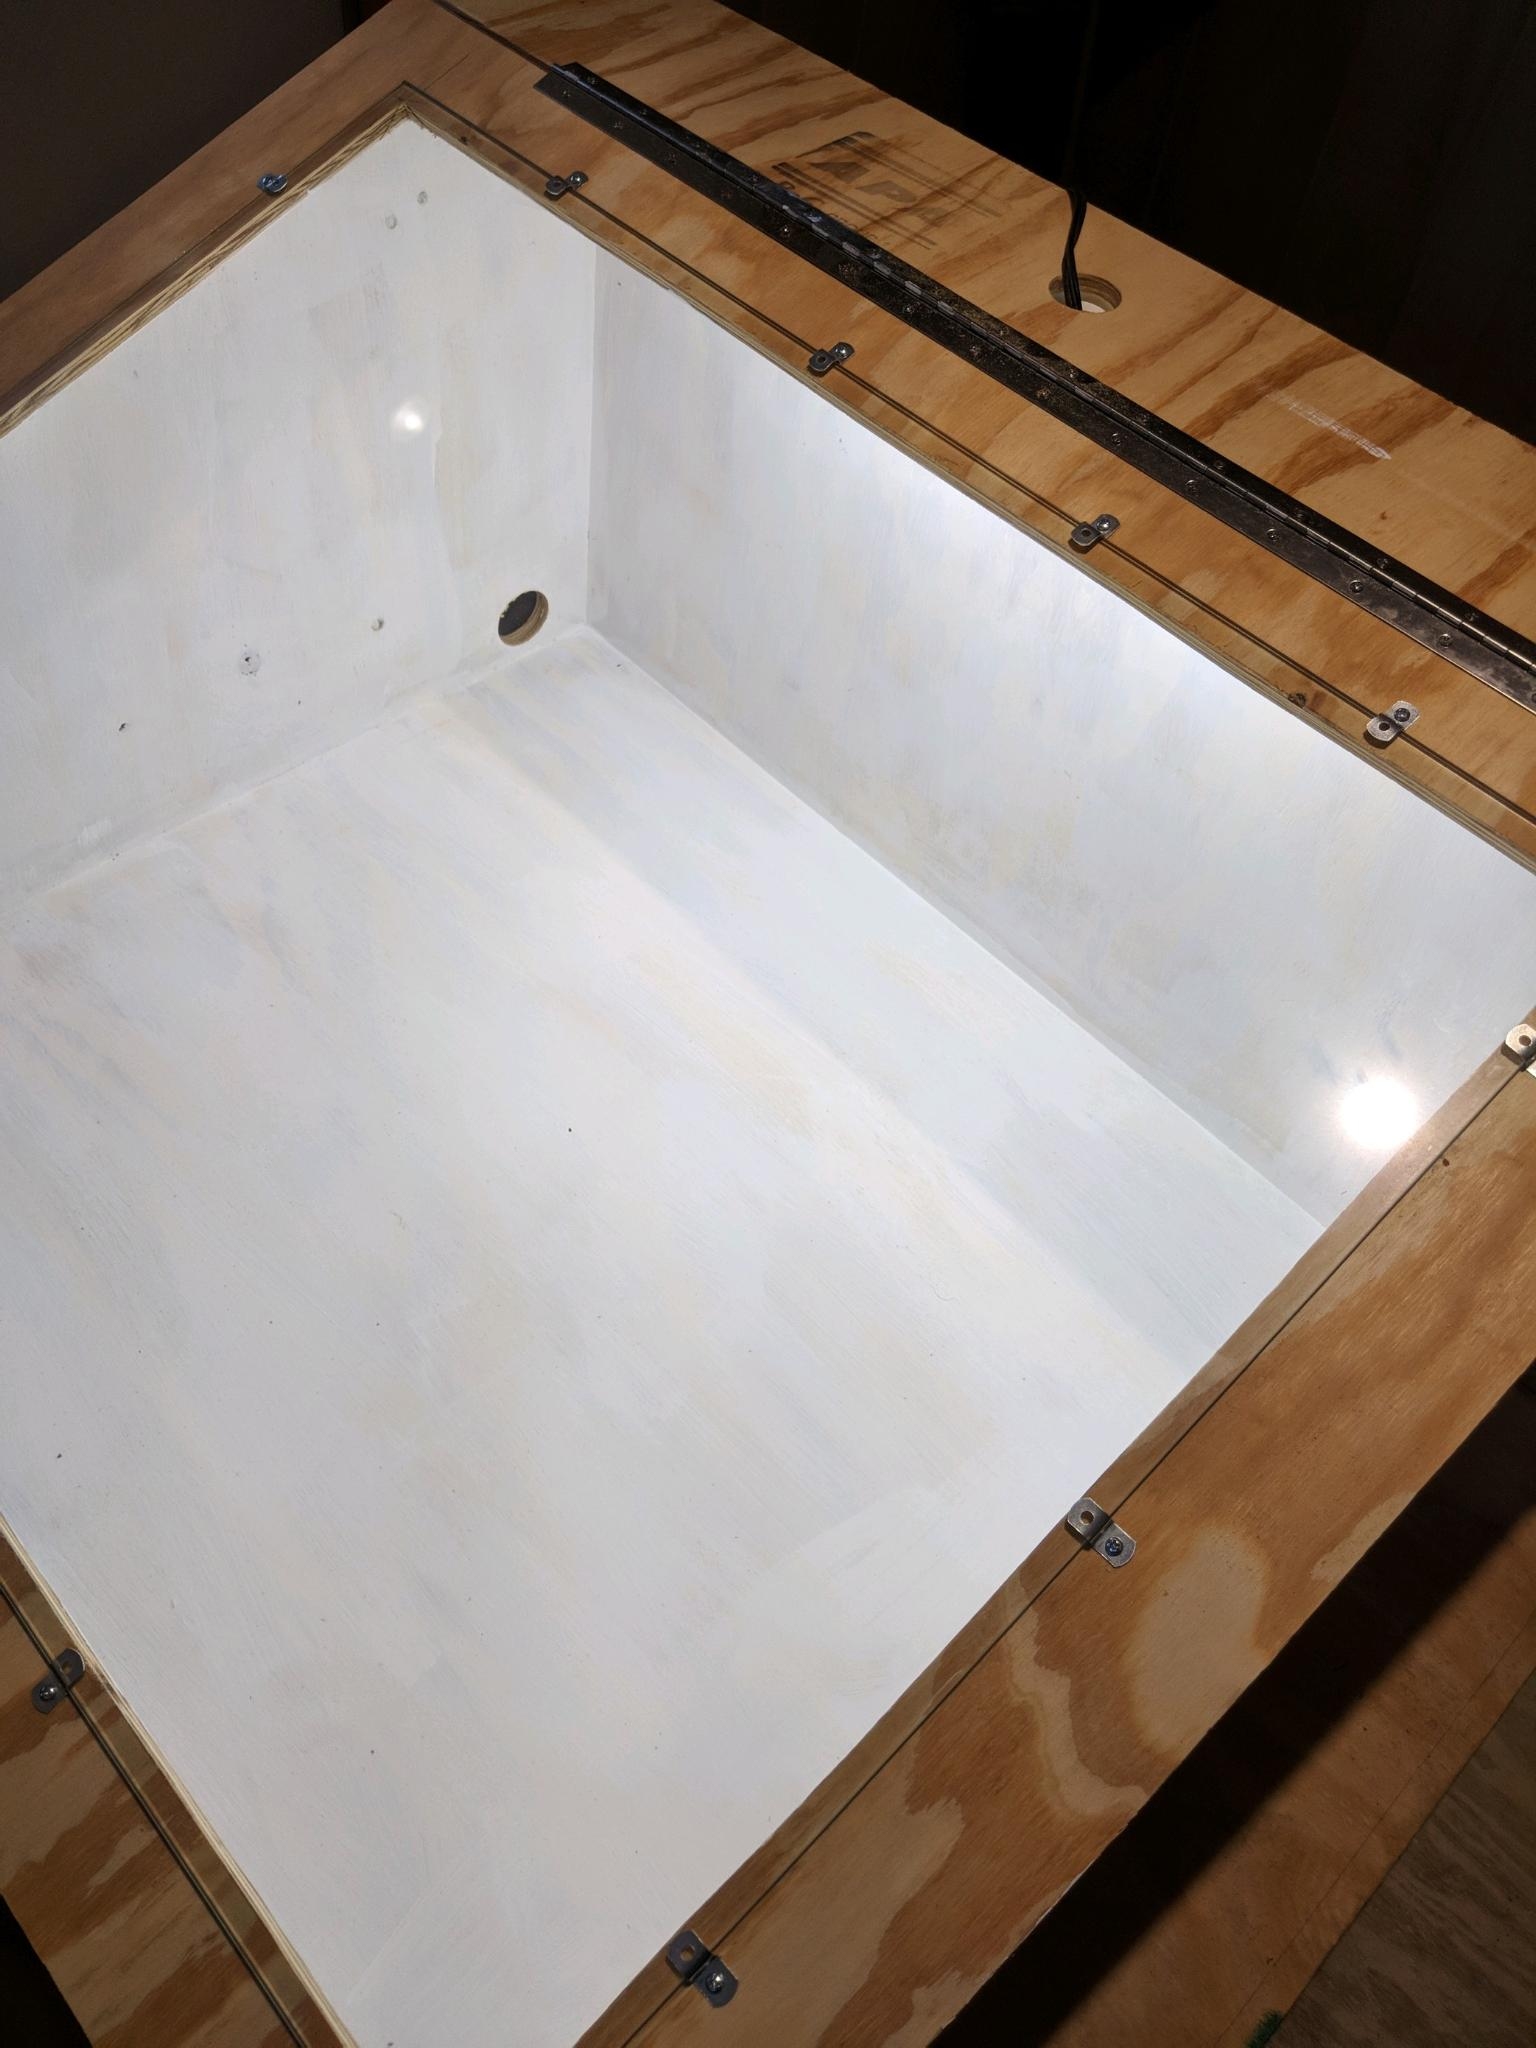
 Once we got the hinged top mounted, we were pretty much at a standstill until we could get the needed sheet of glass for the top. So we decided it was a good time to paint the inside of the box.
Here Leslie and Joe are painting the inside white to make it brighter and easier to see inside. Then we called it a day. We wouldn't be able to do anything else until the paint dried.
Once we got the hinged top mounted, we were pretty much at a standstill until we could get the needed sheet of glass for the top. So we decided it was a good time to paint the inside of the box.
Here Leslie and Joe are painting the inside white to make it brighter and easier to see inside. Then we called it a day. We wouldn't be able to do anything else until the paint dried.
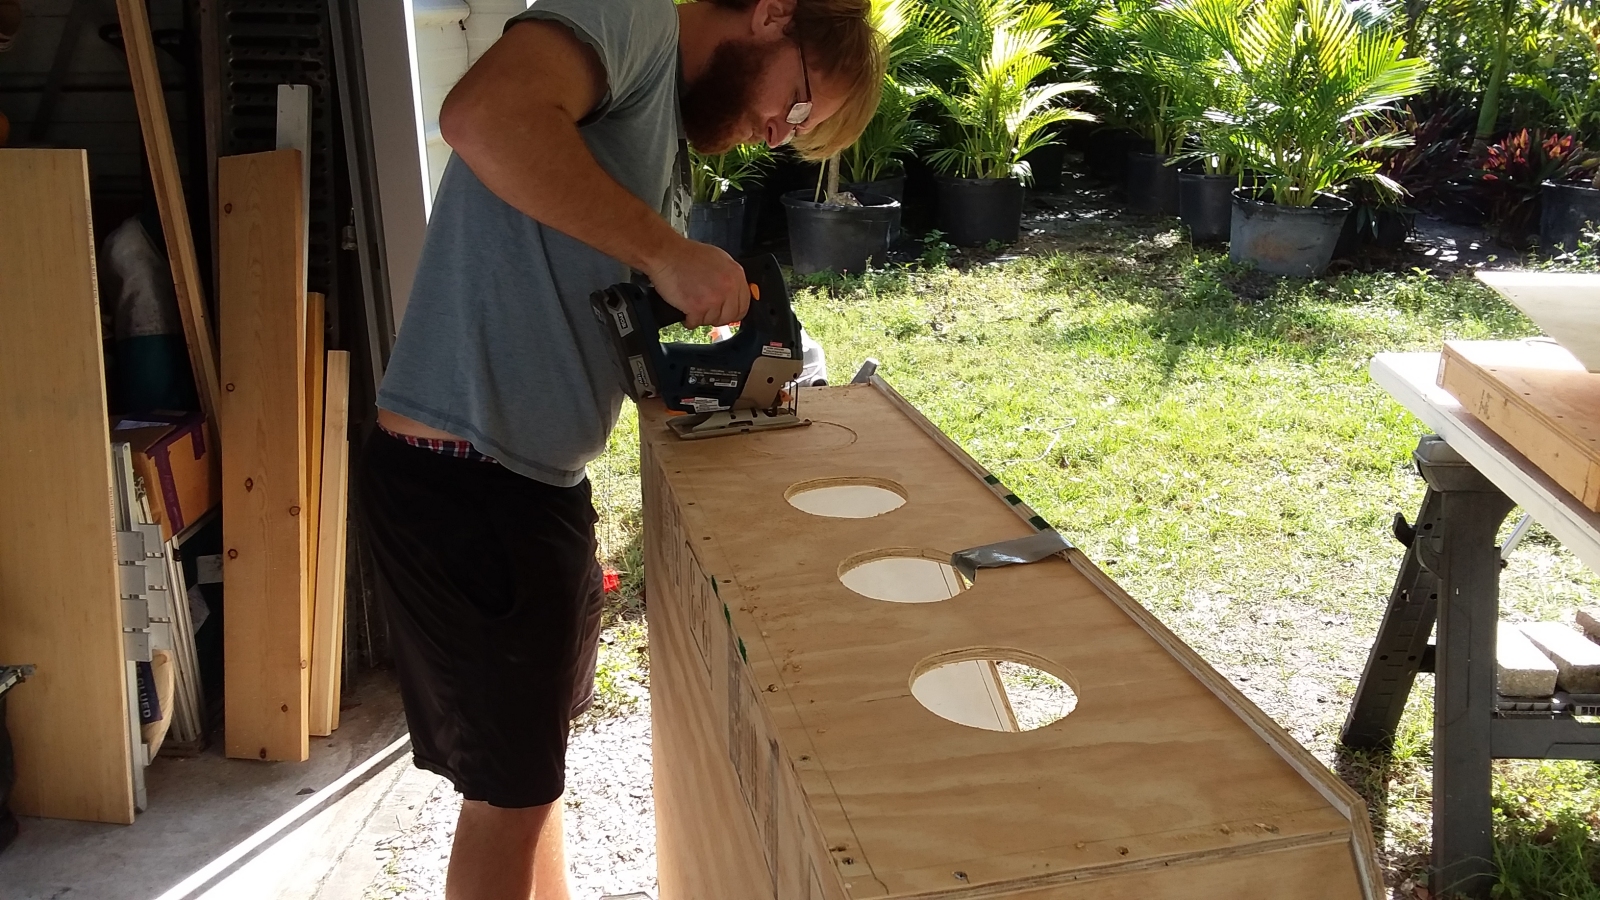 The next day we picked up where we left off. Here Joe is cutting out the arm holes in the front of the box. This is one place where we deviated from my original drawing. We decided four holes
would be better than two. That would make it easier to reach any area in the box. We'd just close off unused holes with air doors to maintain a good air flow around the area being worked. After
some thought, we settled on five inch diameter holes for the arm holes.
The next day we picked up where we left off. Here Joe is cutting out the arm holes in the front of the box. This is one place where we deviated from my original drawing. We decided four holes
would be better than two. That would make it easier to reach any area in the box. We'd just close off unused holes with air doors to maintain a good air flow around the area being worked. After
some thought, we settled on five inch diameter holes for the arm holes.
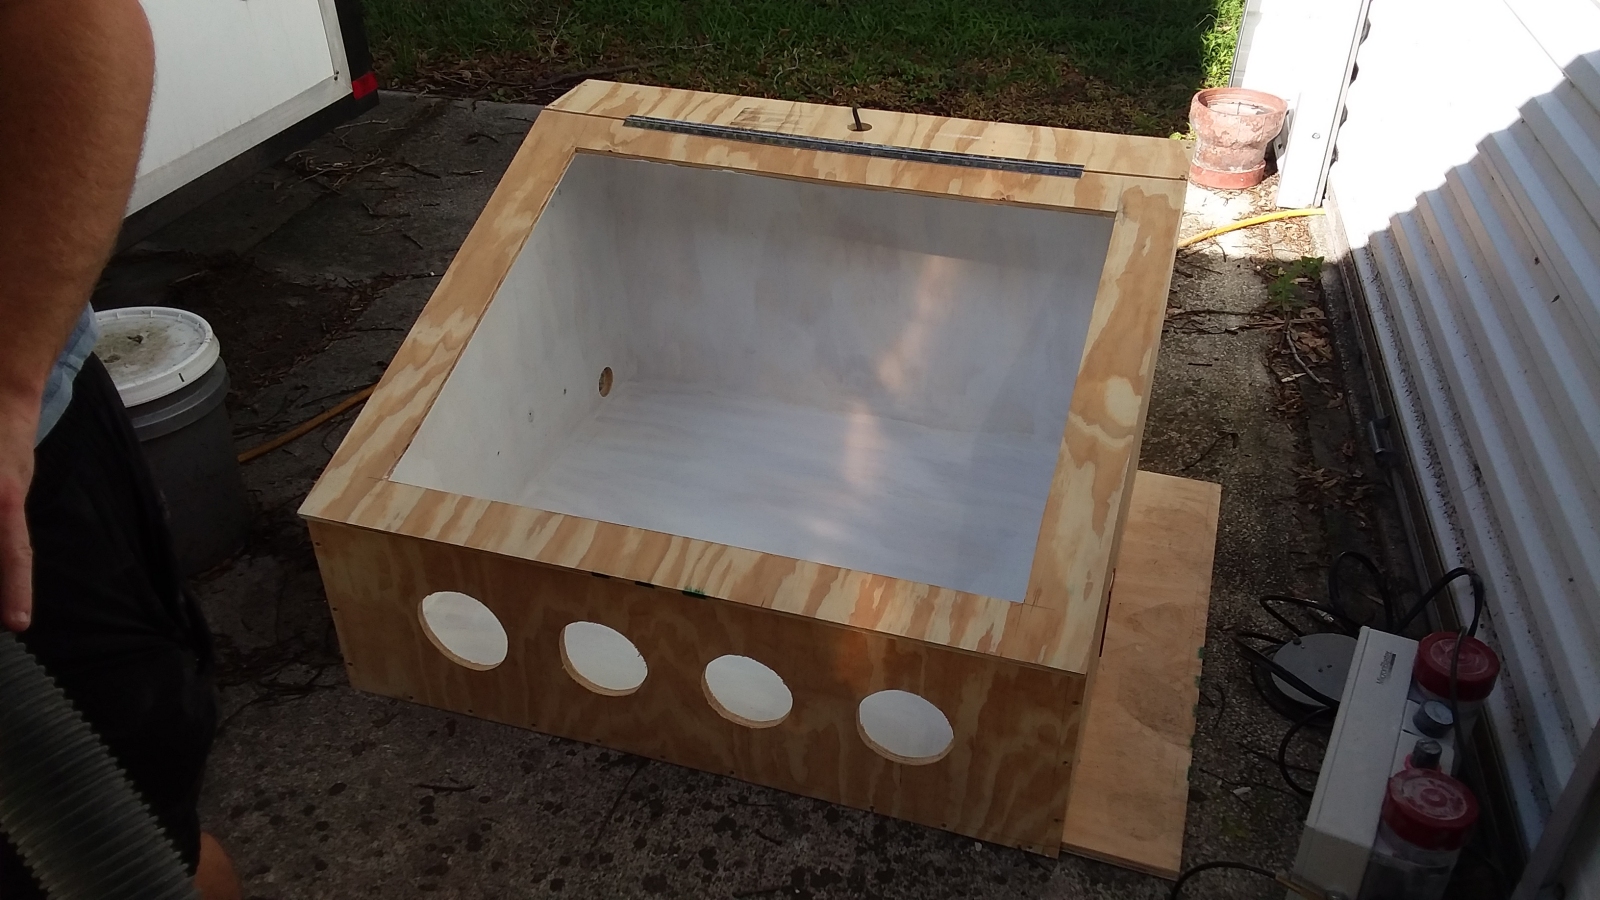 Next we cut a hole in the left rear of the box for the vacuum line from Joe's dust removal system. We aren't 100% positive this is the best location for it, but we can always plug it and cut a new
one if we decide it needs to be in a different spot. This photo also shows another deviation from the original drawing. Joe decided he wanted a six inch wide shelf on the right side to mount the
air abrasive equipment on. I accommodated that during construction by simply making the bottom of the cabinet six inches wider. Not shown is a narrow slit we cut in the right side of the
cabinet to admit the air abrasive hoses. I also attached a power cord to the fluorescent light fixture, and mounted it inside the box, routing the cord out through a hole in top.
Next we cut a hole in the left rear of the box for the vacuum line from Joe's dust removal system. We aren't 100% positive this is the best location for it, but we can always plug it and cut a new
one if we decide it needs to be in a different spot. This photo also shows another deviation from the original drawing. Joe decided he wanted a six inch wide shelf on the right side to mount the
air abrasive equipment on. I accommodated that during construction by simply making the bottom of the cabinet six inches wider. Not shown is a narrow slit we cut in the right side of the
cabinet to admit the air abrasive hoses. I also attached a power cord to the fluorescent light fixture, and mounted it inside the box, routing the cord out through a hole in top.
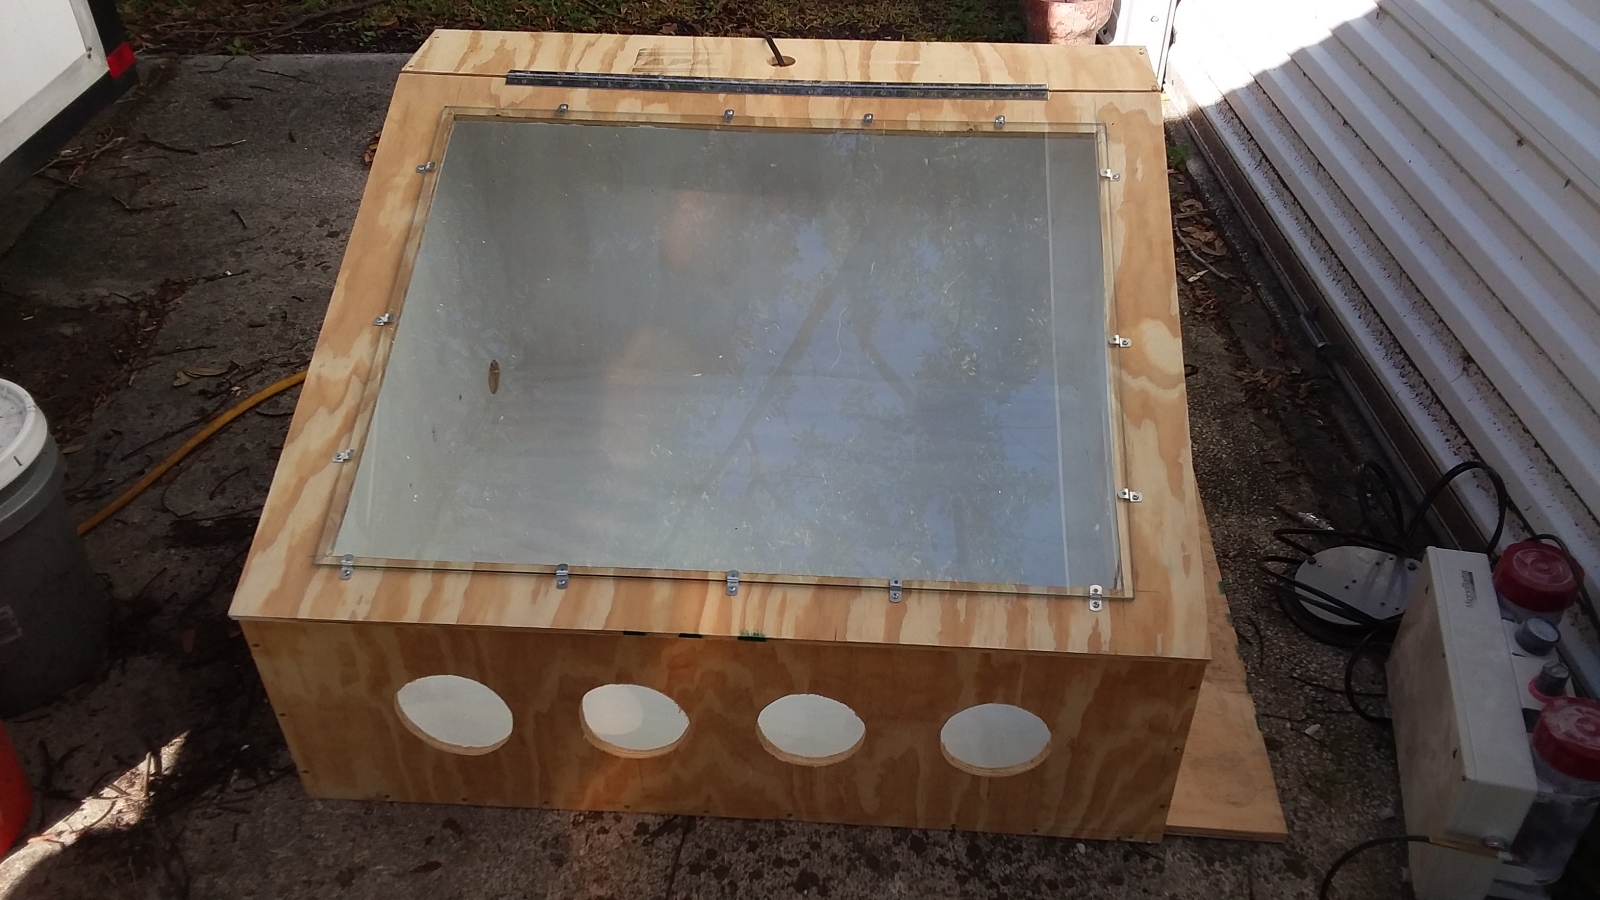
Finally the glass arrived. I wanted to mount it last anyway so we would be less likely to break it during construction. The glass is held on with 1/4 inch tall Z-clips. Mounting it only took a few minutes.
Then the blast cabinet was done!
The cabinet was quite heavy and large. It took a bit of effort for Joe and I to get it into the back of his truck. It filled much of his truck bed.
 Later that evening Joe sent me a photo of the blast cabinet installed in his workshop with the interior light on. There is still more to do. He still needs to hook up the vacuum system and install the
air abrasive equipment. He also wants to build a new table to put the blast cabinet at a convenient height for him to work with. But at least he now has a cabinet, and is on his way to an easier and
more comfortable working environment.
Later that evening Joe sent me a photo of the blast cabinet installed in his workshop with the interior light on. There is still more to do. He still needs to hook up the vacuum system and install the
air abrasive equipment. He also wants to build a new table to put the blast cabinet at a convenient height for him to work with. But at least he now has a cabinet, and is on his way to an easier and
more comfortable working environment.
|
Click on a lady
to learn how to meet her. |