 I have really been bitten by the cooking bug lately. I've been doing a lot of cooking, and getting pretty good at it too, if
I do say so myself. A few months ago I decided to try baking my own bread. It turned out to be easier and more rewarding than I
thought it would be. Now I bake all my own bread. I haven't bought any bread in months.
Bread has been a staple food of humans for over 10,000 years. So don't be intimidated by the thought of making your own bread.
If our ancestors could bake bread with only stone age tools and techniques, it ought to be dead easy
for us to do it here in the 21st century with all our modern kitchen appliances, and it really is easy too. Anyone who is going
to claim to be a good cook, ought to be able to turn out a tasty loaf of bread. Baking my own bread also fits in well with my
general "do it yourself" philosophy toward life. Also, the science behind bread is fascinating. Experimenting with variations
in the recipe is like a chemistry class where you get to eat the results. And your house will never smell better than
when you have a couple of loaves of bread baking in the oven. It's the smell of heaven.
I started my quest for bread, as I do most of my projects, with doing some research on the web. I wanted
to start out with a good, basic, white bread recipe. Once I had that mastered, I planned on branching out to more exotic breads.
I found lots of recipes. They all varied quite a bit in ingredients. some were more complicated than others. I was drawn to
several of the simpler recipes. I just wanted good, honest, bread without any bells & whistles. I decided that my bread
would be made from only flour, water, salt, oil and yeast. I found several recipes that used only these basic ingredients.
I printed them out. There was still some variation between them in amounts and proportions of various ingredients, and method
of preparing the bread. I chose the simplest recipe of the lot and started with it. My first loaves of home-made bread turned
out far better than I expected for a first effort. However, I thought there was some room for improvement. So I tinkered with
the recipe and the method over a period of a month or so, until I had something that worked well for me, and I really liked.
This recipe will make 2 small loaves, or one large loaf. Here are the necessary ingredients:
| 1 1/4 cups lukewarm water |
1 1/4 teaspoons salt (Kosher is best) |
| 2 packets or 1 tablespoon dry yeast |
1 tablespoon sugar |
| 3 cups bread flour |
2 tablespoons light olive oil |
That's it. That's all the ingredients you need to make some tasty bread. You may ask how a few generally bland and flavorless
ingredients can come together into something that smells and tastes so good? Two things. The fermentation by-products of the
yeast, and the heat-driven chemical reactions that take place while baking are what give bread its aroma and taste. Lets get
baking.
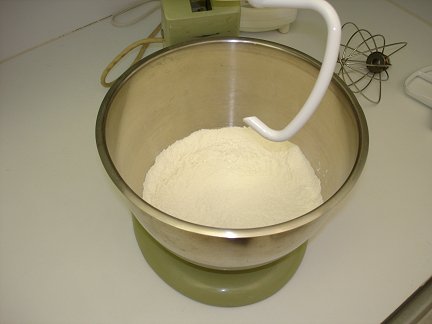 I like to start out by measuring the flour and salt into the bowl of my stand mixer. Install the dough hook in the mixer. If you
don't have a stand mixer, don't worry. You can still mix and kneed the dough by hand. The first few batches of bread I made were done
totally by hand. I didn't have the mixer yet. However, the mixer makes it a lot quicker and easier to make bread dough.
A note on Kosher salt. Kosher salt is generally preferred by cooks
because it doesn't have the anti-caking additives of table-salt. It also generally isn't Iodized. Check the label to be certain.
The anti-caking ingredients and Iodine can throw off the flavor and texture of baked goods. However, Kosher salt is quite a bit more
coarse than table salt. That could be a problem when used in a relatively dry mixture like bread dough where there may not be enough
liquid to dissolve the grains and evenly distribute the salt. Also the coarseness of the
grains will throw off your measurements. So I usually have some Kosher salt on hand that I have ground down to a fine powder in my
spice grinder. I use that in my bread. It's also great sprinkled on popcorn.
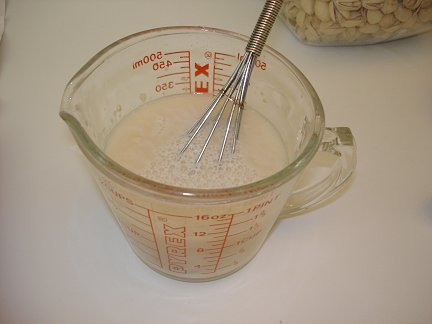 Dissolve the sugar in the warm water and add the dry yeast. Stir it vigorously, and set aside for a few minutes. The yeast is ready to go
when a froth begins to form on top of the liquid. Add the oil to the water / yeast mixture. Now you are ready to make the dough.
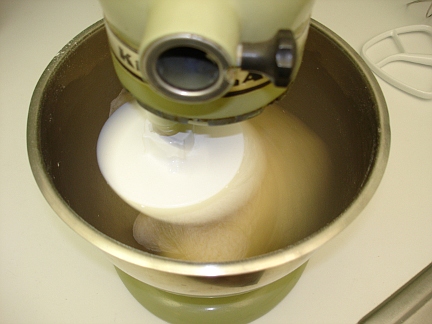 Start your mixer on low speed (or flour will go everywhere) and pour in the liquid mixture. Once the dough comes together into a ball, you can
speed up the mixer and start kneeding the dough. Don't be prissy about it. Speed the mixer up until the hook is really slapping the dough
ball around the bowl. Let it kneed for at least 5 minutes. Make sure your mixer doesn't walk off the counter during the kneeding.
If you have to kneed by hand, turn out the dough onto a floured surface and just fold the dough then flatten it out and fold
it again. Repeat this over and over again for 10-12 minutes, applying just enough flour to prevent the dough from sticking
to your hands or the kneeding surface. It's good exercise.
Don't skimp on the kneeding. It is a necessary step in the bread making process. Kneeding produces gluten in the dough, which is a
stretchy and rubbery protein that makes up the basic structure of bread and traps the gas bubbles generated by the yeast. Inadequate
kneeding could lead to bread that doesn't rise properly, or has a poor texture.
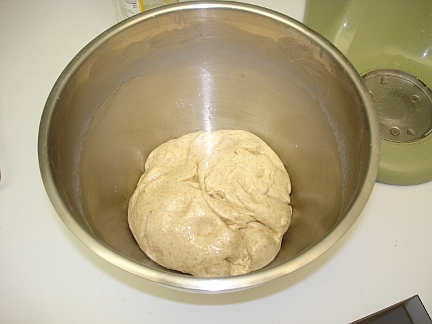 Once you are done kneeding, drizzle a little olive oil in the bowl and turn the dough ball several times to completely coat it, and the
inside of the bowl. That way it won't stick to the inside of the bowl as it rises.
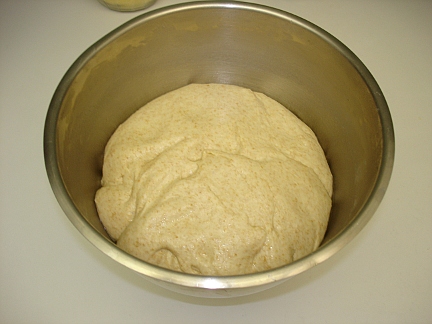 You should cover the bowl with a damp cloth and stash the dough someplace warm for 45 minutes to an hour to let it rise. I used
to place it on top of my television, which is usually pleasantly warm. Eventually though I learned the trick of turning on my oven
for only a minute or two to warm it up, then leaving the dough inside to rise. Make sure you only warm up the oven a little
above room temperature. Don't get it hot. We aren't ready to cook yet. Here is the dough after rising in the warm oven for
nearly an hour. It has about doubled in size.
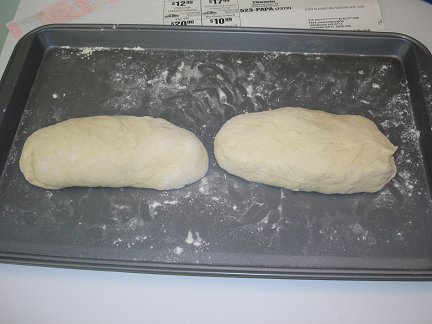 Turn the dough out onto a flowered surface and "punch it down." Basically, you want to flatten the dough with your fingers
and work the big gas bubbles out of it.
Divide the dough into two more or less equal parts. I just eyeball it and sometimes one loaf winds up a little bigger than the
other. I don't worry about it since this is hand-made bread, not an industrial assembly line. Each loaf should be a little different.
However, if you are a stickler for uniformity, use a kitchen scale to get the two halves exactly equal. Shape them into loaf shapes.
I usually flatten the dough out into a rectangle and then roll it up into a loaf. Make sure the seam is on the bottom and pat
the ends together. Don't worry about trying to make the shape perfect. The dough will shape itself to the loaf pan during the
second rise.
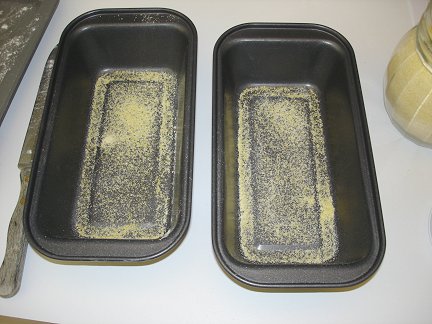 Here are two small loaf pans ready to go. I sprinkle a little course-ground corn meal in the bottoms of the pans. this is an
old baker's secret to prevent the bread from sticking to the pans. You don't need to use loaf pans. You could just make flattened
balls out of the dough and bake up round loaves of bread on a cookie sheet sprinkled with corn meal. I've done that too.
The bread tastes just as good. However, I like to make sandwiches with
my bread, so I prefer the traditional shape you get from using loaf pans.
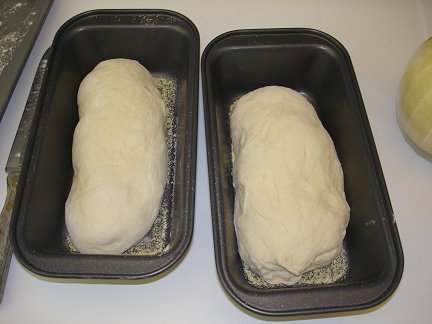 Place the dough in the pans. Now you are ready for the second rise.
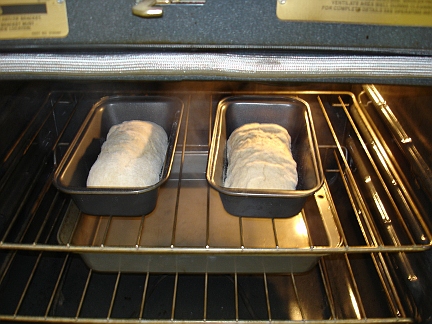 I do the second rise in the oven too. However, I do it a little differently. I place a pan with some boiling hot water on the bottom
rack of the oven, and the two loaf pans above. The hot water provides both heat to accelerate the action of the yeast, and
moisture to prevent the surface of the dough from drying out. Some people advocate just covering the pans with damp cloths to
prevent drying out. I find that the dough tends to stick to the cloths once it rises above the top of the dough pans. This method
works much better for me.
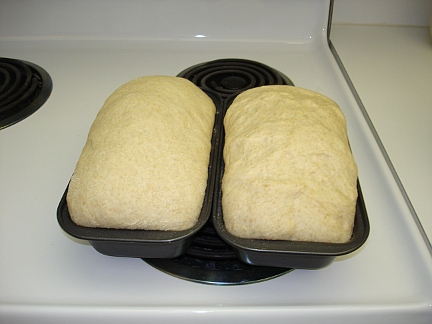 Here are the two loaves after rising in the warm, moist oven for an hour. They are now ready to bake. Remove them from the oven,
but leave the pan of water inside. The bread will be baked at 350
degrees, but I like to pre-heat my oven to about 425. The bread needs to go into a hot oven. But a lot of heat is lost when the
door is opened to put it in. So I pre-heat the oven hotter than I want it, then adjust the temperature down to 350 after the bread
is in.
A note on slashing the dough before baking. Some cooks recommend slashing the dough, some don't. Sometimes I do. Sometimes I
don't. The distinctive slashes in the dough were originally meant to help people tell which loaf belonged to which person when baking
in a village communal oven. Each family would have their own pattern for slashing the dough. These days the slashing is really
just a traditional decoration. Some people say slashing helps the bread expand better while baking because the slashes will open
up. That may be true to some extent. Anyway, I consider slashing optional and leave the choice up to you. If you slash, use a
razor sharp knife dipped in oil, or it will stick to the dough and drag rather than cut. Don't go deeper than about 1/4 inch.
Once the oven is pre-heated, spritz the tops of the loaves with a light mist of water from a spray bottle. This, and the moisture
from the pan of water in the oven will prevent the crust from hardening too quickly. This will allow the dough to have a final
burst of expansion as it heats up. Place the loaves on the top rack of the oven, turn the temperature down to 350, and set your
timer for 45 minutes. After 15 minutes of baking, remove the pan of water from the oven. By then the dough will be done expanding.
Now we want a hard crust to form, so the pan of water needs to be removed. Be careful not to splash the hot water on yourself when
you remove the pan from the oven.
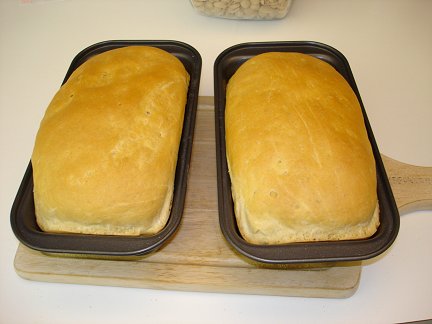 Once your timer goes off at the end of 45 minutes of baking, take a look at the bread. It may or may not be ready to come out.
The crust should be crisp and a golden brown. If you thump the loaves, they should be firm and sound hollow. Ovens vary. You may
need to leave them in a while longer if they seem spongy or not yet brown enough. Once done to your satisfaction, remove them
from the oven and let them cool in the pans until cool enough to handle without burning yourself.
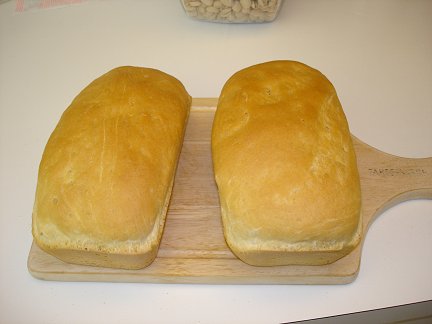 Once cool enough to handle, turn the loaves out of the pans. My loaves usually just fall right out of the pans if I turn them
over. Sometimes they stick a little and I have to grab the loaf and actually pull it out of the pan. The loaves will be firmer
and easier to slice if you let them cool off to room temperature. But who can wait that long with the fantastic aroma of
fresh-baked bread assaulting your nose? I always have to slice off a piece or two while still hot and slather some butter on it
and give it the taste test. There's nothing better than warm bread fresh from the oven.
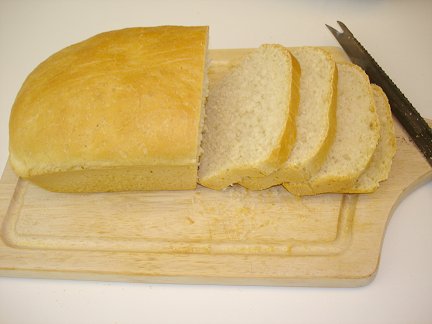
 Slice the bread with a long, serrated knife. Slicing bread by hand takes a little practice to get the slices uniform and parallel.
I learned the hard way that if you plan on making sandwiches with the bread, you need to slice it thin, (thinner than seen here)
or your sandwich my be too thick to eat easily.
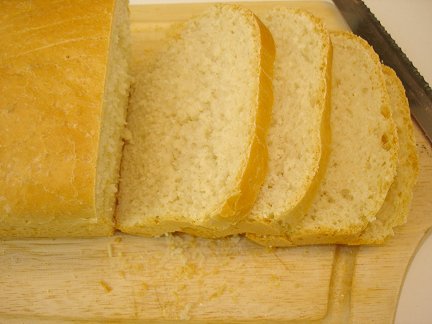 If the texture of your bread looks like this, then congratulations, you did it right. Even if it has a coarser texture and
occasional small voids, you still did good. If the bread has big bubbles and/or very large voids, then you may not have kneeded
it enough.
You can store your bread in plastic zip-lock bags. Wait for it to cool to room temperature first before putting it in the bags,
or condensation will form on the inside of the bags and the crust will get soggy. Remember that your home-made bread has no
chemical preservatives in it. So it will probably go bad quicker than store-bought commercially baked bread. You can extend
the life of your bread by keeping it in the refrigerator. Also, leave loaves un-sliced until you need them. The crust is a
good barrier to mold and staleness and un-sliced bread keeps longer in my experience.
Enjoy!
See Also: My recipes for honey wheat bread, and sourdough bread.
Our excellent online Pass4sure 220-701 and Pass4sure 350-001 test training programs will lead you to success in the Testking 70-680.We also offer latest Testking SY0-301 and Testking 642-832 with 100% success guarantee.
 Here are two small loaf pans ready to go. I sprinkle a little course-ground corn meal in the bottoms of the pans. this is an
old baker's secret to prevent the bread from sticking to the pans. You don't need to use loaf pans. You could just make flattened
balls out of the dough and bake up round loaves of bread on a cookie sheet sprinkled with corn meal. I've done that too.
The bread tastes just as good. However, I like to make sandwiches with
my bread, so I prefer the traditional shape you get from using loaf pans.