On this web page I show how I built this 12 Volt power supply that is powered by Ryobi hand tool, lithium-ion batteries. Here is the finished product. Below I talk about the inspiration for this project,
and each step in the construction. I chose Ryobe batteries because I have a ton of Ryobi hand tools, and a bunch of batteries and several chargers for them. There isn't any reason something similar couldn't
be built using batteries from another company.
Click on any photo for a larger and more detailed image.
UPDATE: This project was recently featured on the HACKADAY tech blog.
 Lugging around this big, heavy, lump of a battery was the main inspiration for this project. Or maybe I should say not having to lug it around any more.
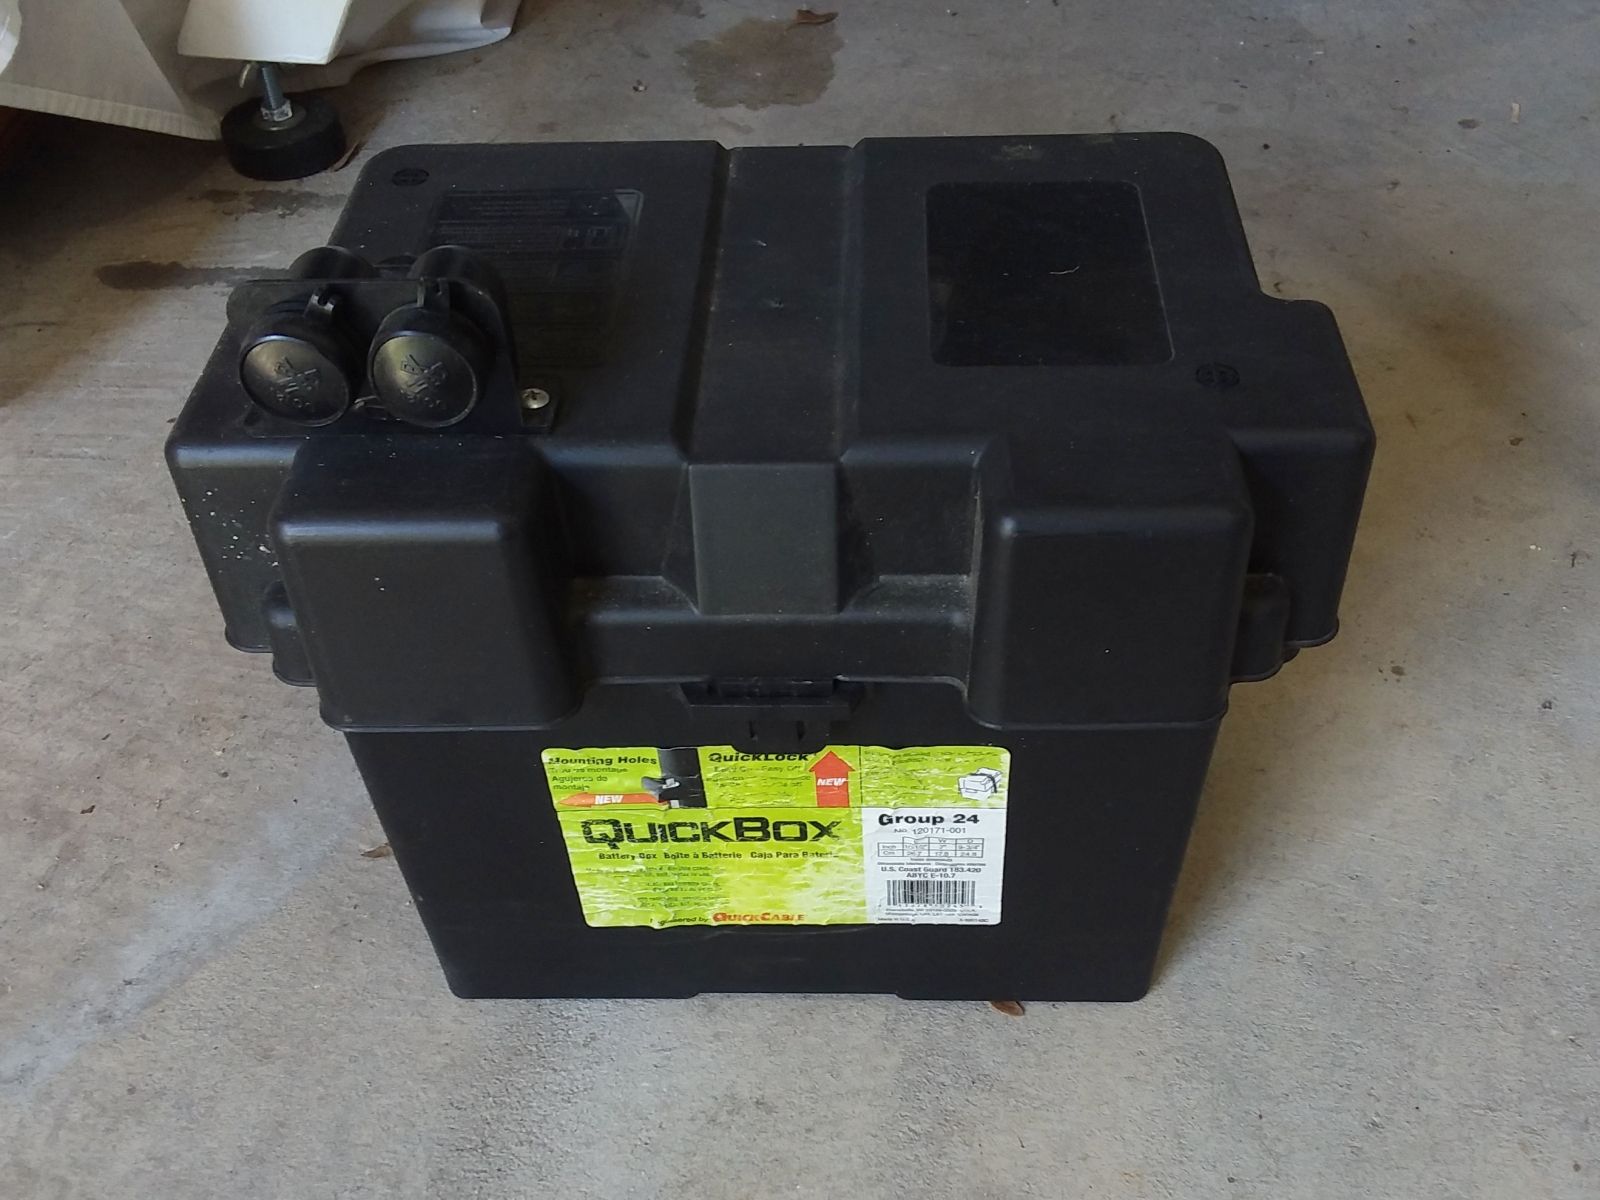
I had been powering my big Dobsonian telescope with a big, deep-cycle, lead-acid battery. It is about the size and weight of a car battery.
It lives in this big plastic case. I mounted a couple of cigarette
lighter style power sockets on the case to plug power cords for telescope accessories into. This battery works great. it has enough oomph to run the telescope for several nights on a single charge. However,
there are some issues. First off, it is no joy to carry around. The thing is bleeping heavy and awkward. Secondly, the cords would get wound up as I moved the telescope from object to object. I'd have
to try to stay conscious of how far I had rotated the scope so I could periodically unwind it before something snagged and either unplugged or got damaged from the strain. This is no easy task since the cords are all but
invisible in the dark. There had to be a better way.
Lugging around this big, heavy, lump of a battery was the main inspiration for this project. Or maybe I should say not having to lug it around any more.
I had been powering my big Dobsonian telescope with a big, deep-cycle, lead-acid battery. It is about the size and weight of a car battery.
It lives in this big plastic case. I mounted a couple of cigarette
lighter style power sockets on the case to plug power cords for telescope accessories into. This battery works great. it has enough oomph to run the telescope for several nights on a single charge. However,
there are some issues. First off, it is no joy to carry around. The thing is bleeping heavy and awkward. Secondly, the cords would get wound up as I moved the telescope from object to object. I'd have
to try to stay conscious of how far I had rotated the scope so I could periodically unwind it before something snagged and either unplugged or got damaged from the strain. This is no easy task since the cords are all but
invisible in the dark. There had to be a better way.
Back in January, before the pandemic, at a gathering of fellow amateur astronomers, a friend of mine showed off his new battery system. He had bought a 3-D printed connector for a certain brand of 12
Volt hand tool battery. He used the small
battery to power all the systems on his scope. Plus the battery was small and light enough to mount on the scope itself. So there was no issue with cables winding and tangling as the scope rotated. Nice, I thought.
So I immediately started scheming how to make something similar for myself. I Googled around, looking for someone selling 3-D printed connectors for the type of Ryobi Lithium-ion batteries all my hand tools use,
since I have a bunch of them. I couldn't find anything that looked like it would work for my application. I didn't want to buy a different battery type and charger. So I decided to try making my own adapter.
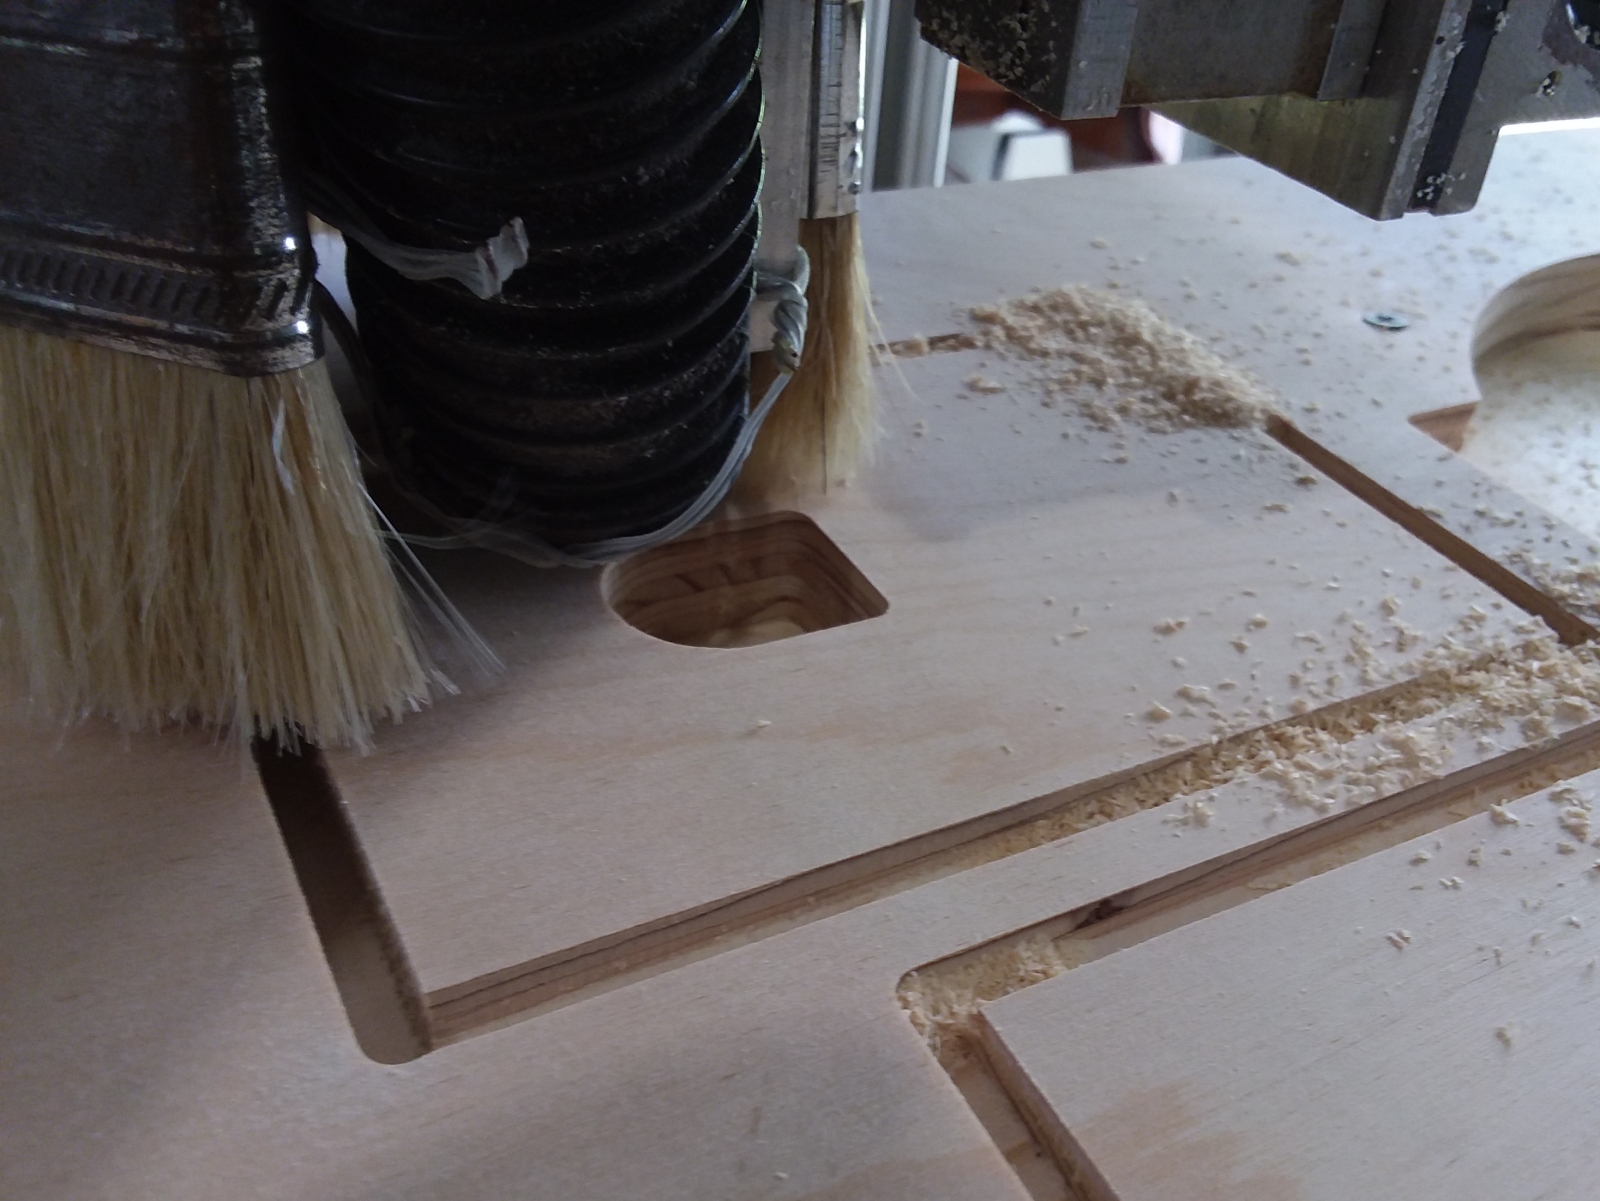 Instead of 3-D printing the adapter, I decided to use good, old subtractive manufacturing to make mine. I have a home-made CNC router, and I'm not afraid to use it.
In fact, I am always looking for an excuse to cut
something on it. This looked like a perfect project for it. I measured up the shape and dimensions of a Ryobi battery post, figured up how much internal volume I'd need for the rest of the parts, and cut out
an adapter plate from a piece of 3/4 inch thick birch plywood. It only took me two tries to get a perfect fit for the battery. That was only because I made a bonehead mistake in the g-code the first time.
Instead of 3-D printing the adapter, I decided to use good, old subtractive manufacturing to make mine. I have a home-made CNC router, and I'm not afraid to use it.
In fact, I am always looking for an excuse to cut
something on it. This looked like a perfect project for it. I measured up the shape and dimensions of a Ryobi battery post, figured up how much internal volume I'd need for the rest of the parts, and cut out
an adapter plate from a piece of 3/4 inch thick birch plywood. It only took me two tries to get a perfect fit for the battery. That was only because I made a bonehead mistake in the g-code the first time.
 Here is a view of the Mach3 cutting screen on my laptop as the CNC Router cut out the adapter plate.

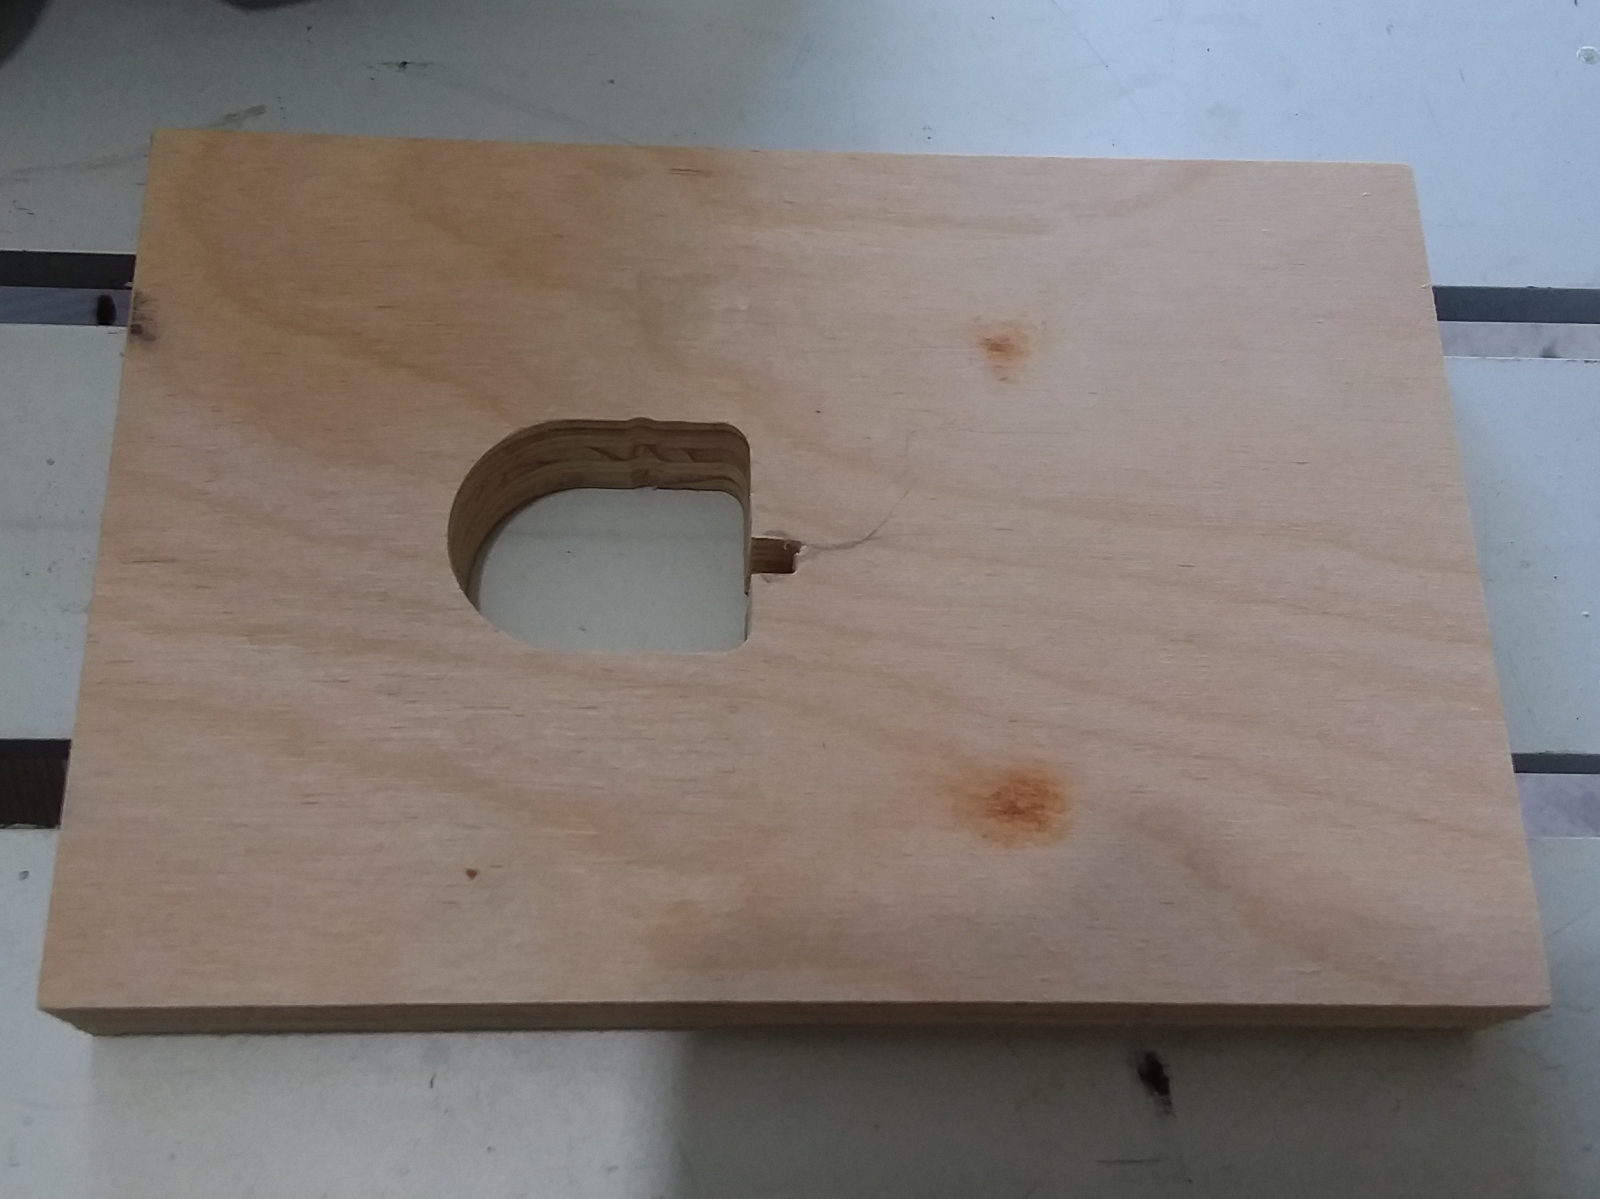 And here is the finished adapter plate, hot off the CNC Router. There is a skinny alignment tab on the battery post that I had to cut a matching notch for by hand with my jig saw since it was narrower
than the diameter of my router bit.
And here is the finished adapter plate, hot off the CNC Router. There is a skinny alignment tab on the battery post that I had to cut a matching notch for by hand with my jig saw since it was narrower
than the diameter of my router bit.
 And here is the proof of the pudding. The battery actually fits. Snug but not tight. Now I just needed to add some electrical contacts to tap into all the lovely Watt-Hours hiding within the battery.
|
Click to learn how
to meet them
|
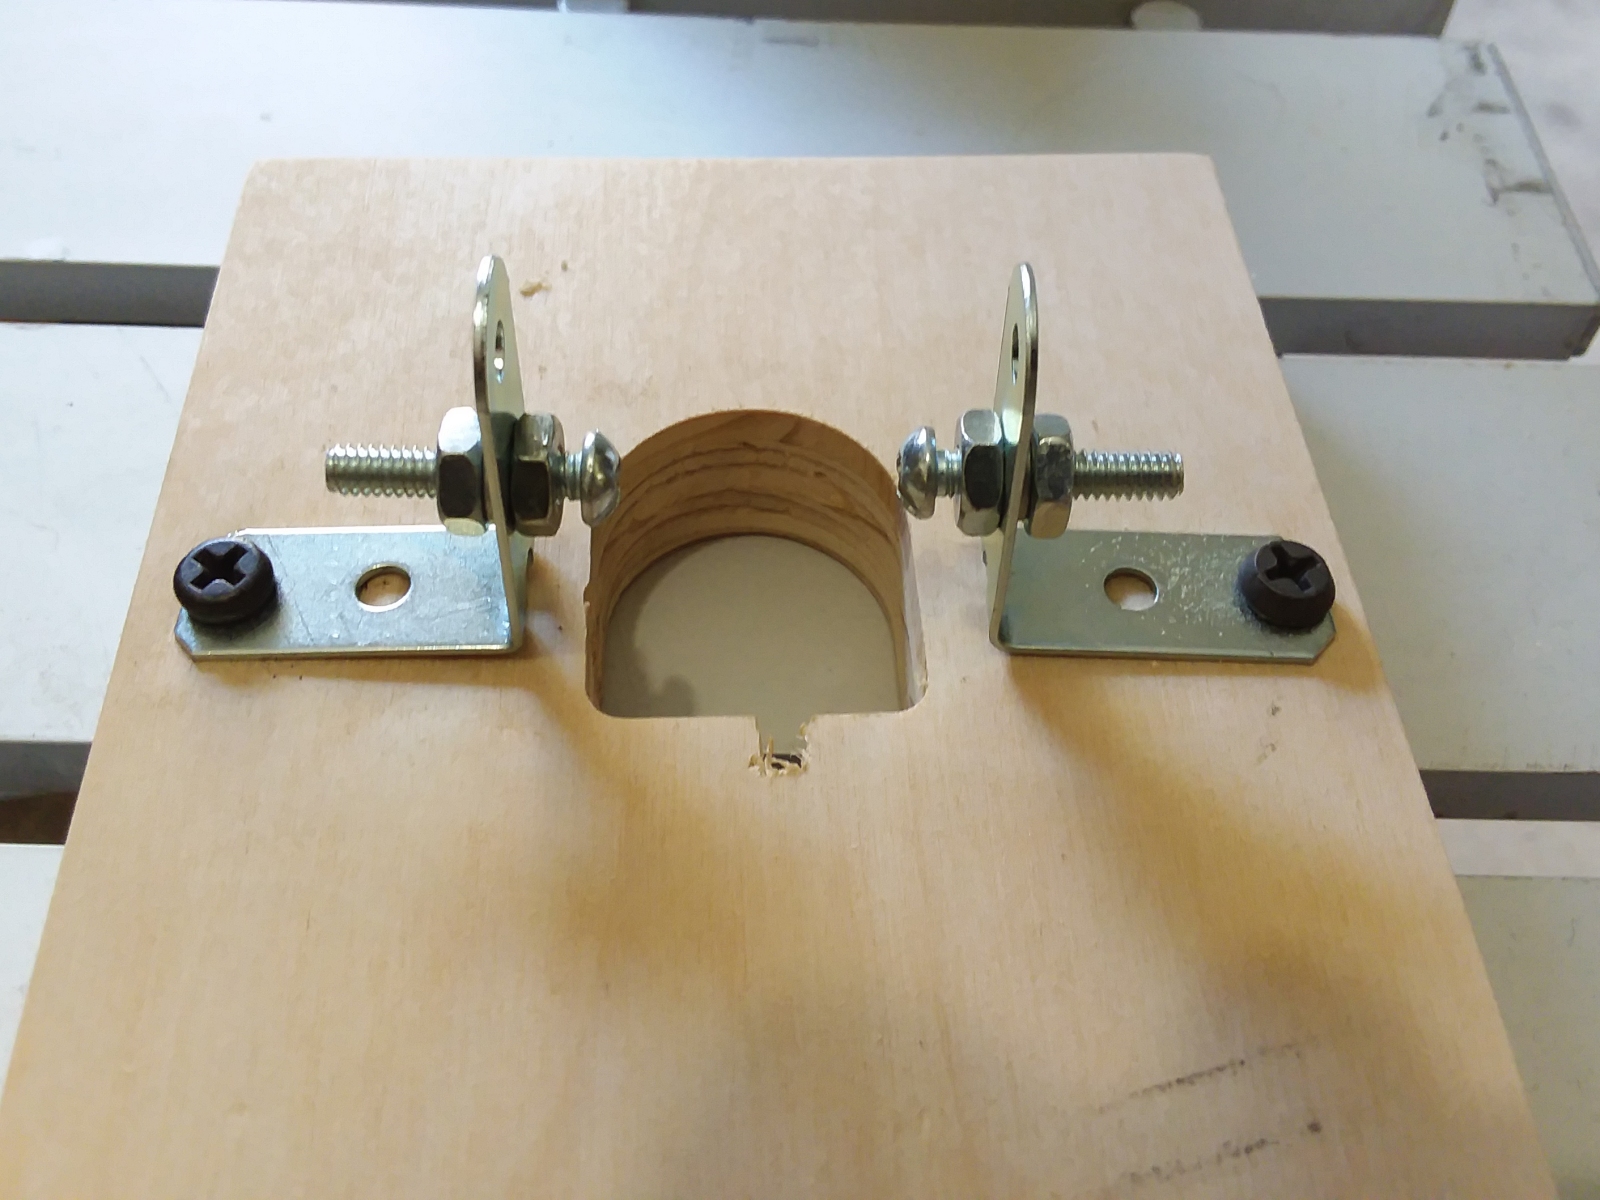 Here is what I came up with for contacts. I used a couple pieces of pre-drilled strut. The technical name for them is Mending Plates. You can find this stuff at places like Lowes in the specialty hardware
section. It is basically looks like spare parts for erector sets. I find these things useful for lots of things, and always have some on hand. I cut a couple of pieces to length and bent them at a 90 degree angle.
Then I screwed them down and added some bolts to act as electrical contacts for the battery.
Here is what I came up with for contacts. I used a couple pieces of pre-drilled strut. The technical name for them is Mending Plates. You can find this stuff at places like Lowes in the specialty hardware
section. It is basically looks like spare parts for erector sets. I find these things useful for lots of things, and always have some on hand. I cut a couple of pieces to length and bent them at a 90 degree angle.
Then I screwed them down and added some bolts to act as electrical contacts for the battery.
 The heads of the bolts make perfect contact with the terminals on the battery. I purposely made the distance between the bolts adjustable and set it to be a bit tight. So that inserting the battery bends the
contacts out a bit and the bolts press tightly against the electrical contacts.
The heads of the bolts make perfect contact with the terminals on the battery. I purposely made the distance between the bolts adjustable and set it to be a bit tight. So that inserting the battery bends the
contacts out a bit and the bolts press tightly against the electrical contacts.
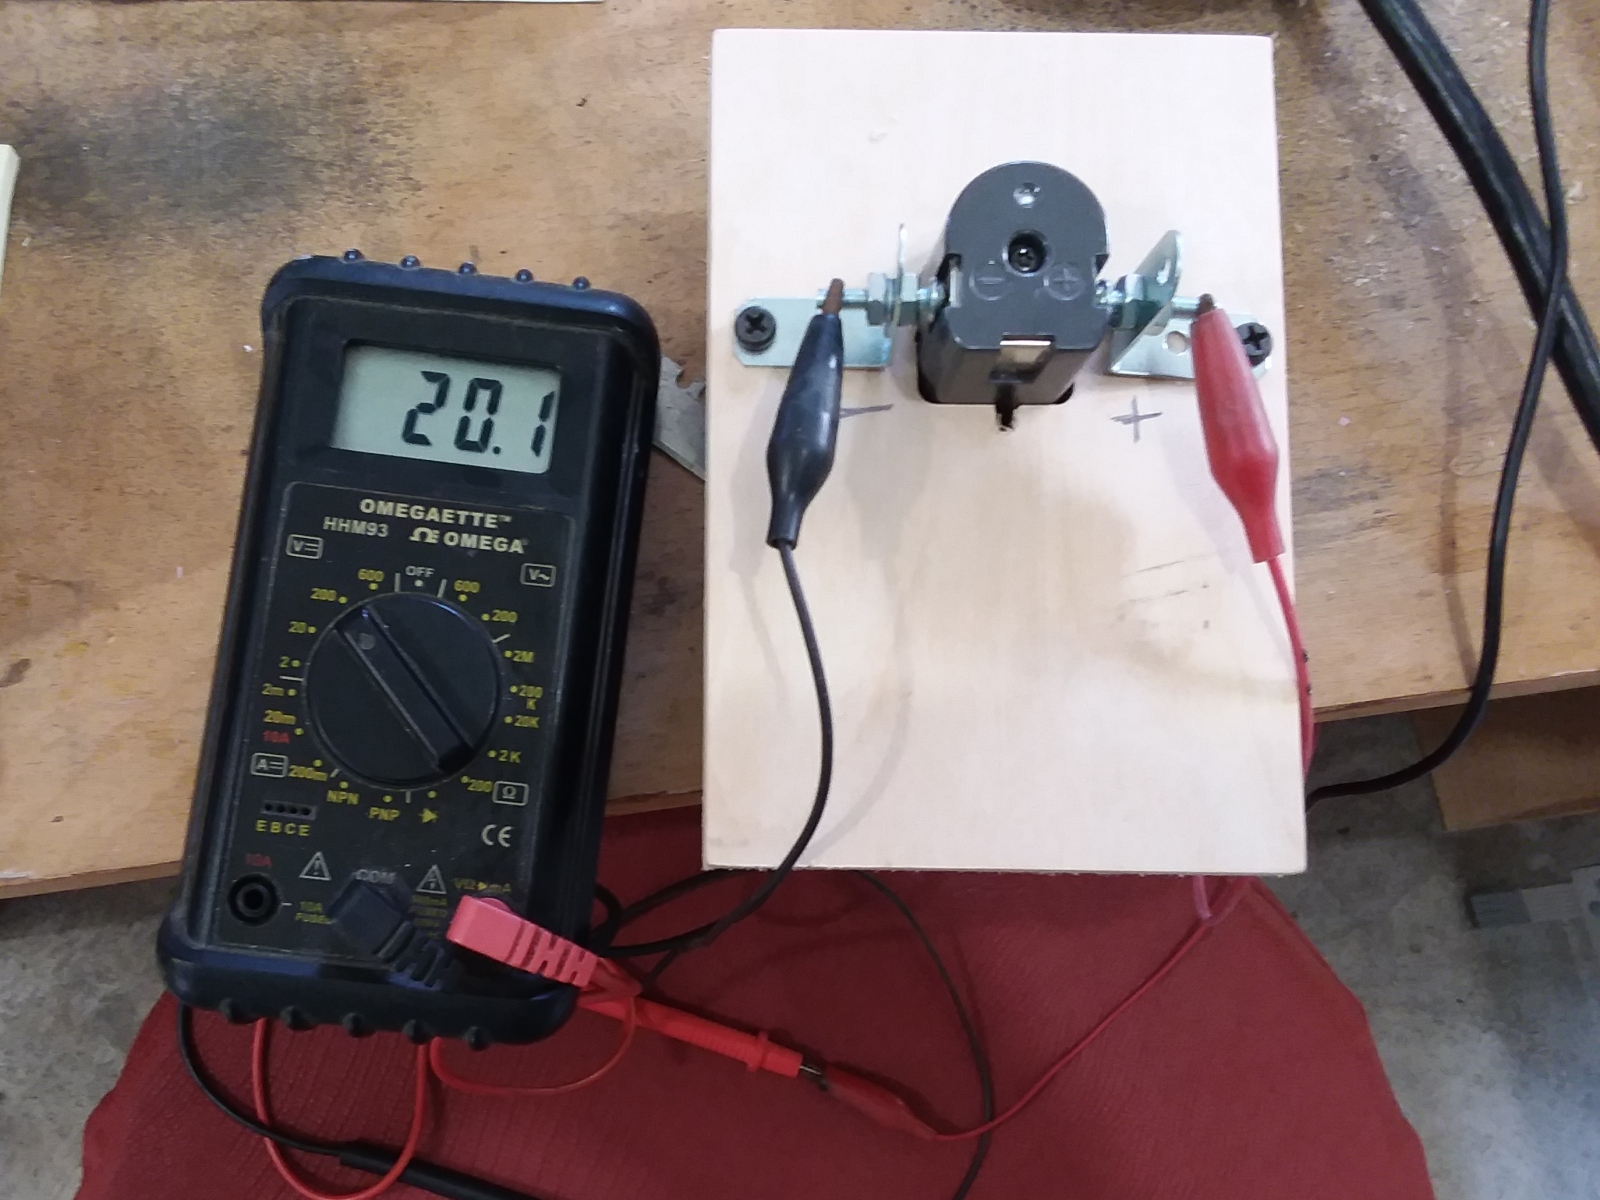 The electrical contact is good! We'll deal with the problem of how a 20 Volt (18V nominal) battery will power 12 Volt accessories further down the page.
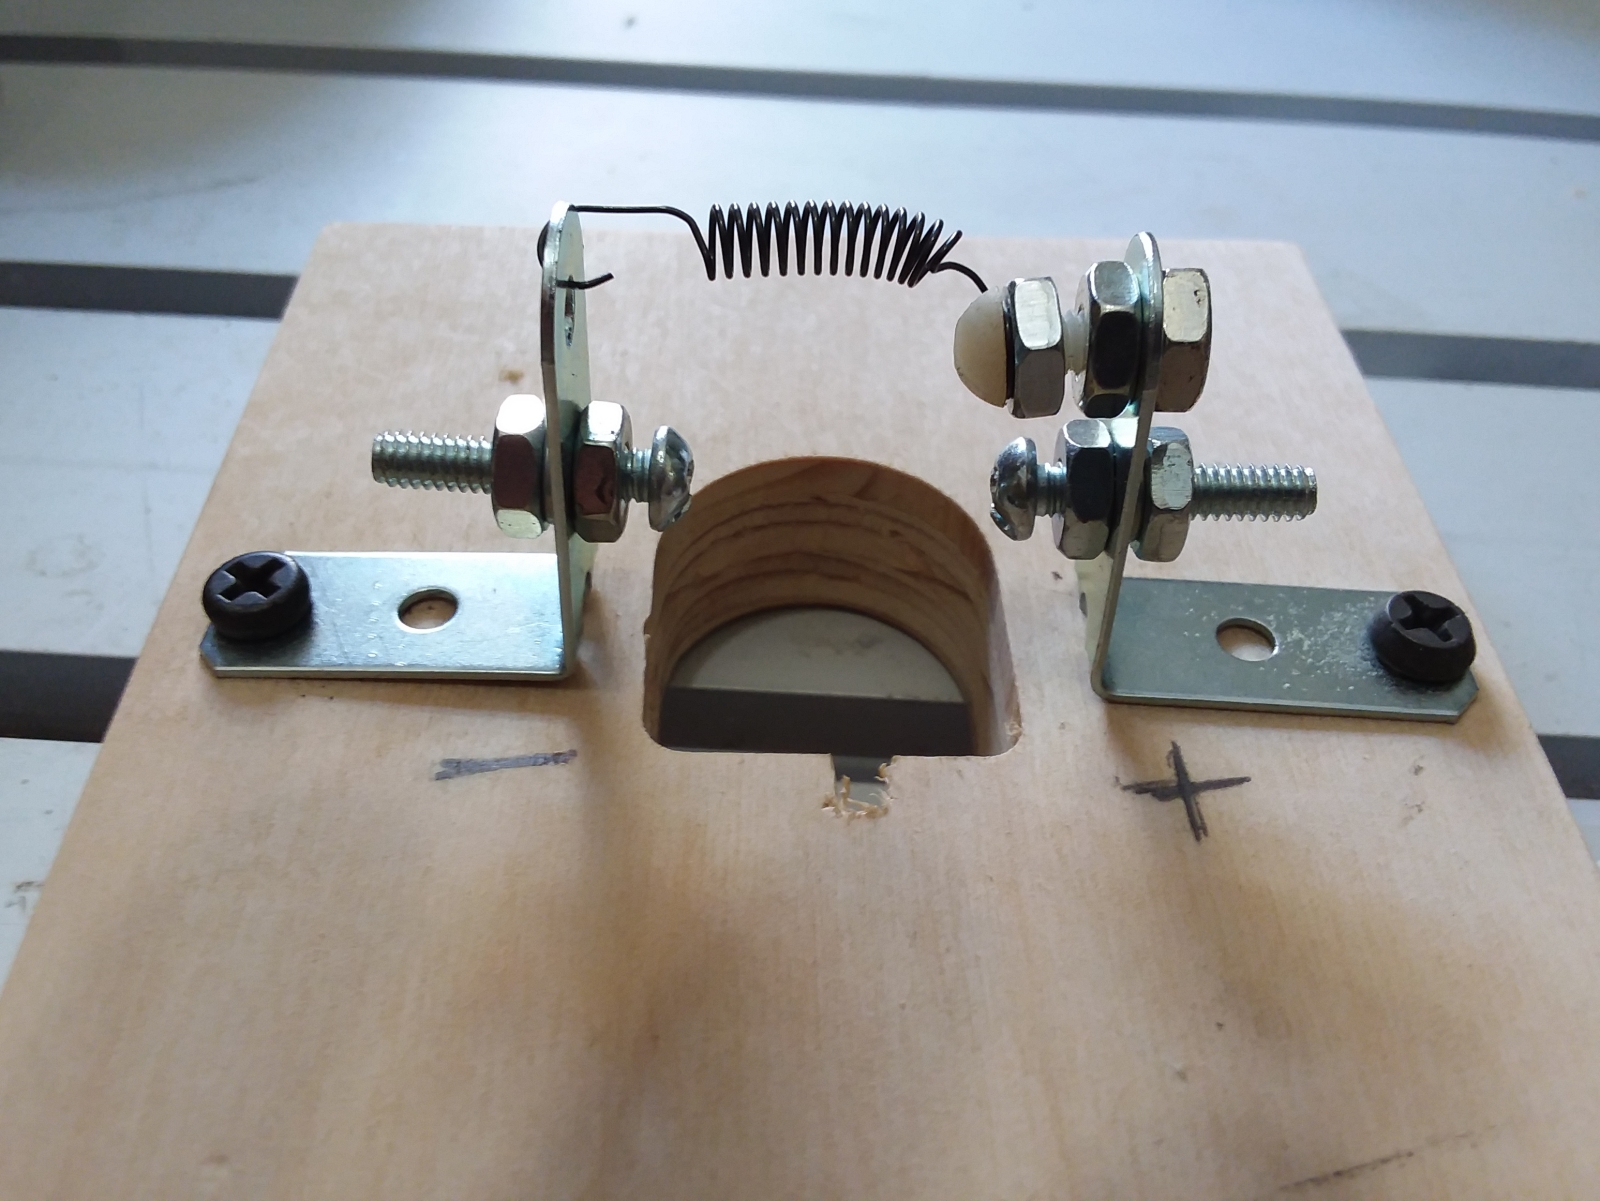 After a couple of insertions and removals, I began to worry that the contacts weren't very springy and would tend to stay bent outwards eventually. So I added a spring to pull the contacts toward each other
and keep them in contact with the battery terminals. I used a nylon bolt to ensure that the spring didn't short out the battery terminals.
After a couple of insertions and removals, I began to worry that the contacts weren't very springy and would tend to stay bent outwards eventually. So I added a spring to pull the contacts toward each other
and keep them in contact with the battery terminals. I used a nylon bolt to ensure that the spring didn't short out the battery terminals.
 Much better. Now there is really good and firm contact with the battery terminals. There is also a good ergonomic slotting into place feel to the battery when it is inserted. It also takes a good tug
to remove it. No worries about it falling out or only making intermittent contact because it wasn't inserted all the way.
Much better. Now there is really good and firm contact with the battery terminals. There is also a good ergonomic slotting into place feel to the battery when it is inserted. It also takes a good tug
to remove it. No worries about it falling out or only making intermittent contact because it wasn't inserted all the way.
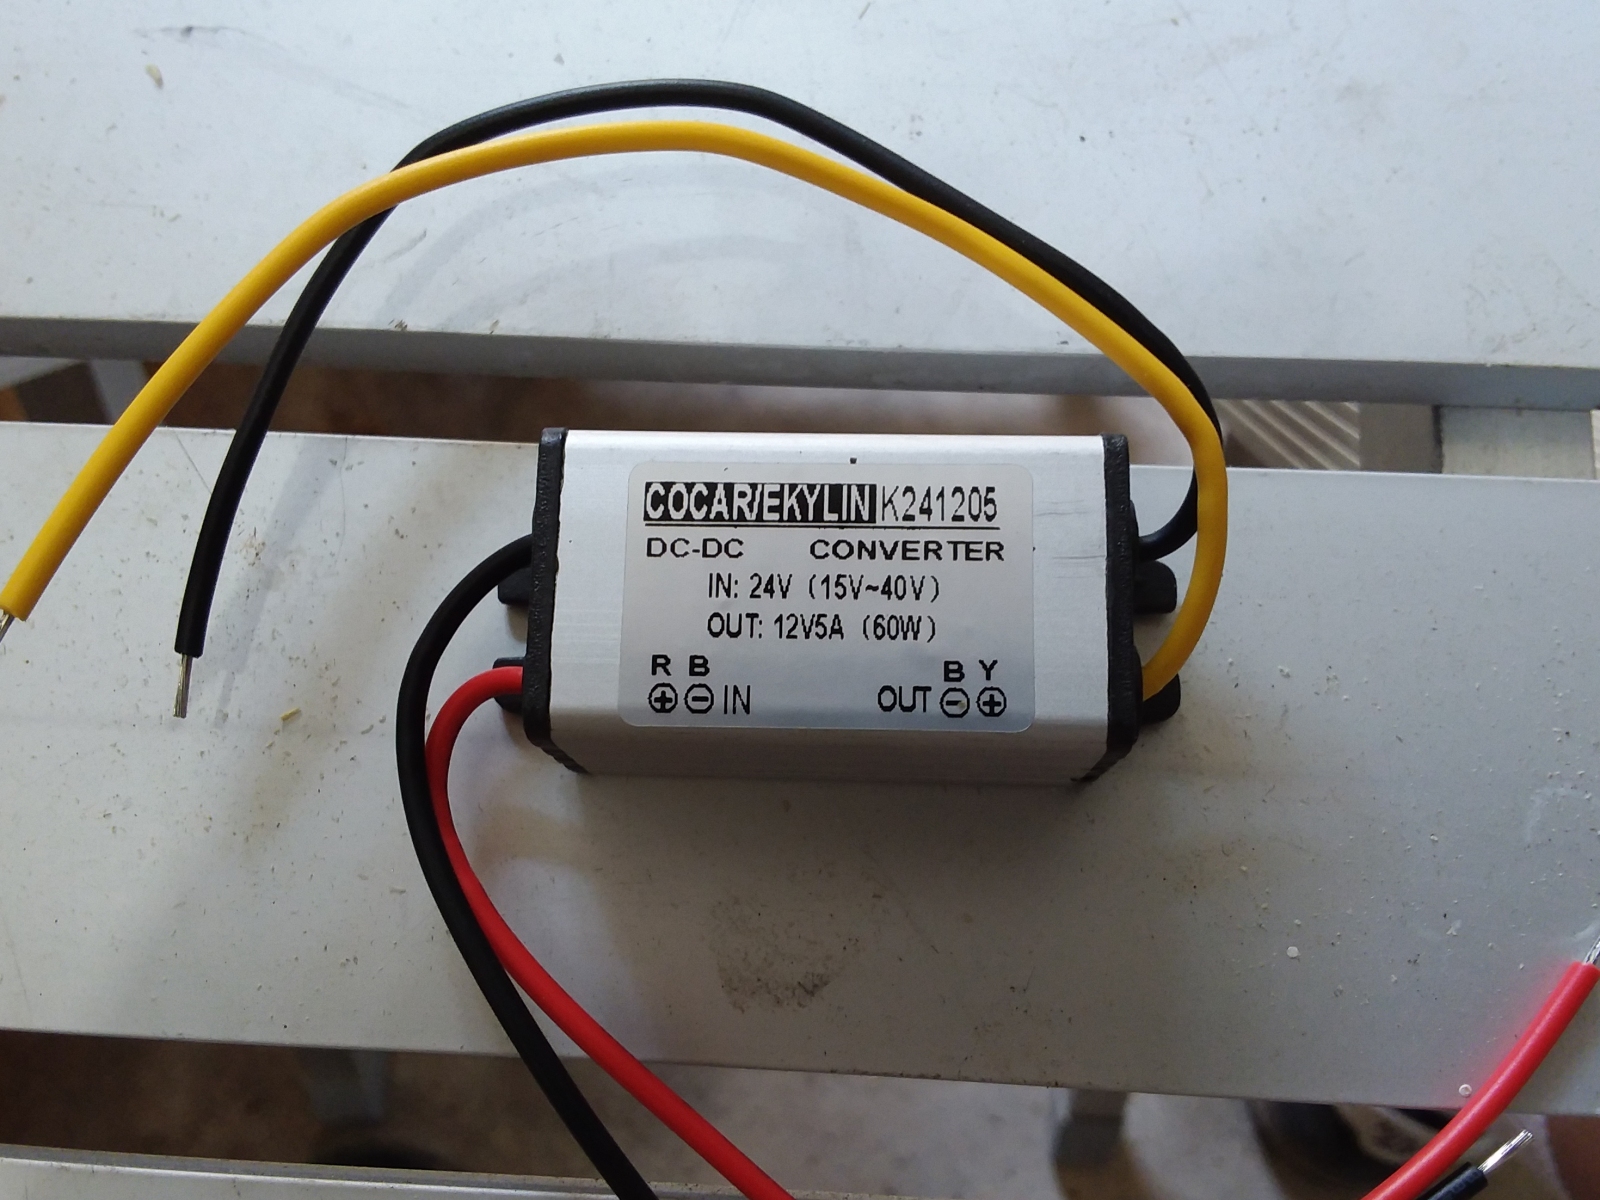 I found a perfect DC-DC converter to produce 12 Volts from the 18 (ish) Volt battery on Amazon. It has a wide input range of 40-15 Volts and outputs 12 Volts at up to 5 Amps. The unit is also very compact.
It would fit nicely inside the little box I'd build around the adapter plate.
I found a perfect DC-DC converter to produce 12 Volts from the 18 (ish) Volt battery on Amazon. It has a wide input range of 40-15 Volts and outputs 12 Volts at up to 5 Amps. The unit is also very compact.
It would fit nicely inside the little box I'd build around the adapter plate.
 It took a while to accumulate all the parts needed. Amazon was prioritizing food and medical supplies during the pandemic. A project that I normally could have knocked out in a weekend actually took about
a month to complete because I was waiting on parts to arrive. The DC-DC converter actually got here very quickly, but things like the cigarette lighter style power sockets and the fuse holder took a long time.
It took a while to accumulate all the parts needed. Amazon was prioritizing food and medical supplies during the pandemic. A project that I normally could have knocked out in a weekend actually took about
a month to complete because I was waiting on parts to arrive. The DC-DC converter actually got here very quickly, but things like the cigarette lighter style power sockets and the fuse holder took a long time.
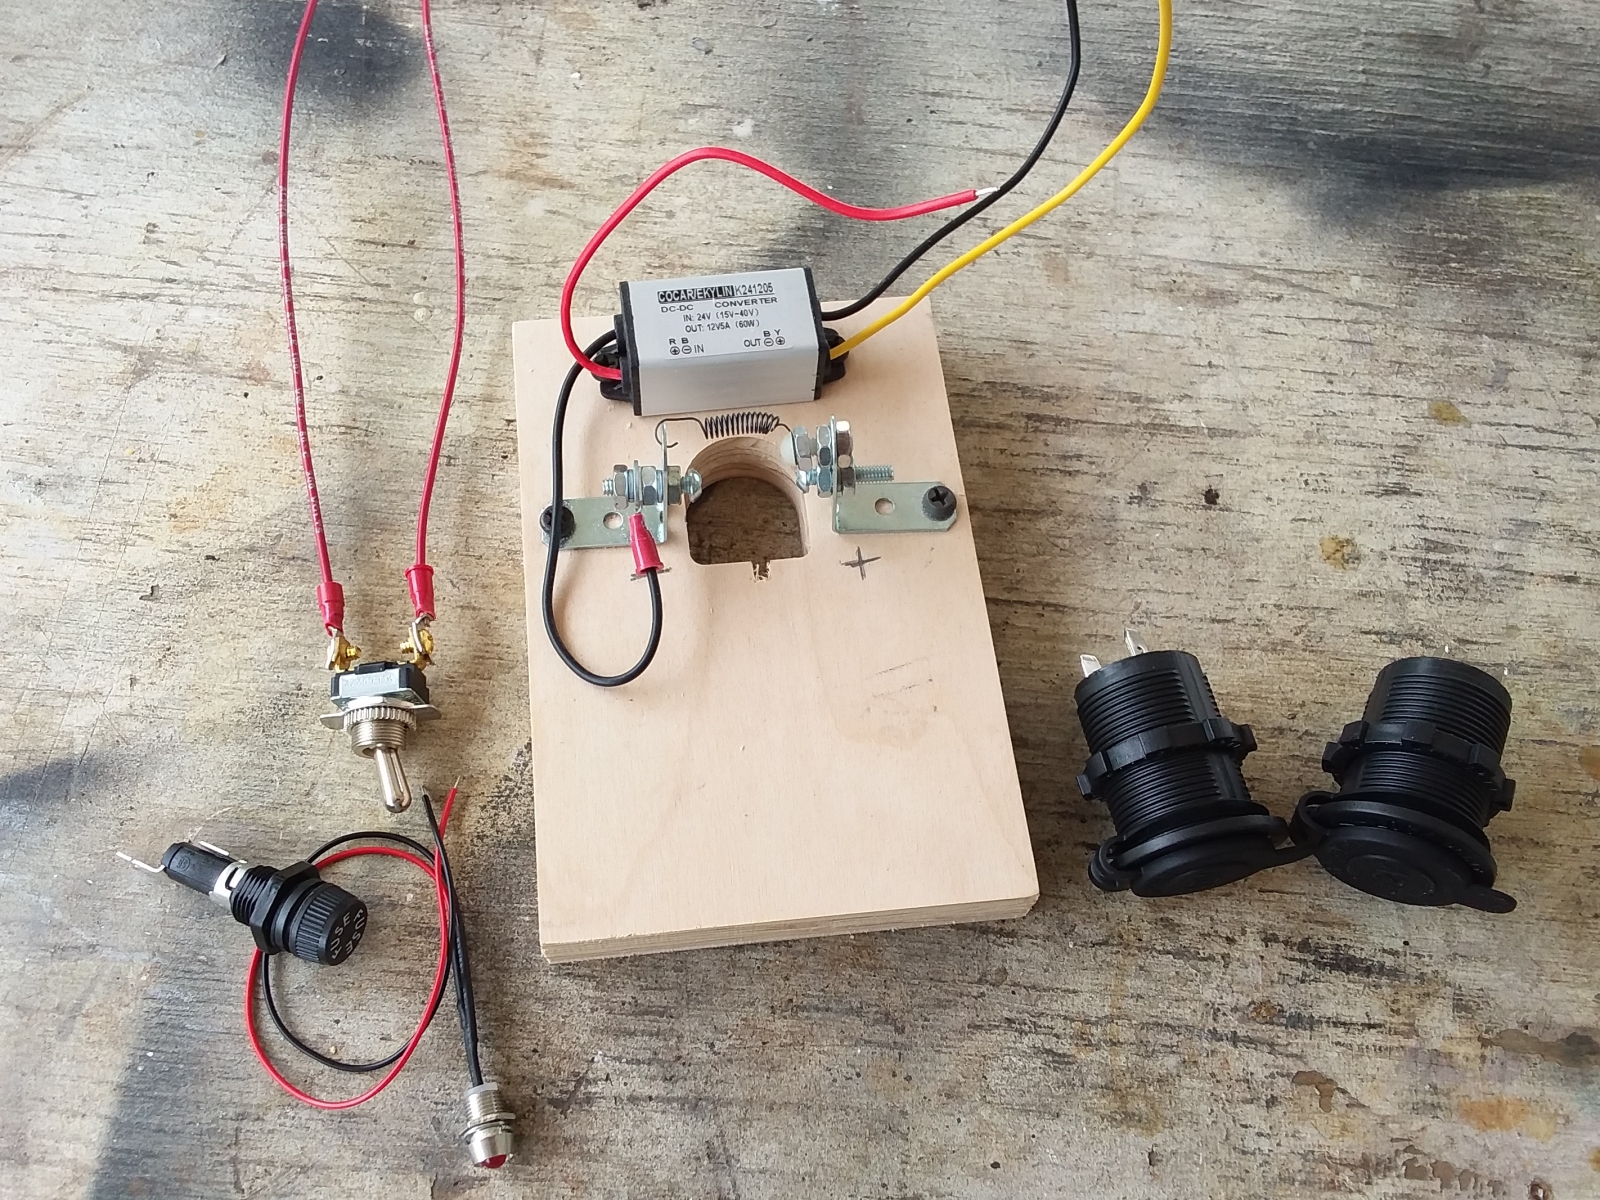
So here are all the required parts finally accumulated:
The DC-DC converter
An on/off power switch
A fuse holder and 5 Amp fuse
A 12 Volt LED lamp
2 cigarette lighter style power sockets
Not too many parts at all. Along with a few crimp connectors and hookup wire, there really isn't too much to this project.
 In this photo I had been experimenting with how to lay out all the parts. Eventually I found an arrangement that suited me.
 I cut out four pieces of 1/4 inch plywood and glued them on to the sides of the adapter plate to form a box. I didn't bother firing up the CNC router to make them
(though I thought about it). I just cut them out on my band saw. I glued in four blocks in the corners for screwing on a bottom piece later.
I cut out four pieces of 1/4 inch plywood and glued them on to the sides of the adapter plate to form a box. I didn't bother firing up the CNC router to make them
(though I thought about it). I just cut them out on my band saw. I glued in four blocks in the corners for screwing on a bottom piece later.
Once I had the sides of the box in place, I could drill holes and mount all the parts and wire them together. Here is the completed interior of the power box. I made sure to route all the wires so that they would be
out of the way of the battery post when it is inserted.
I didn't get around to drawing up a schematic for this project, but there isn't much to it. The power switch and fuse holder are in line with the positive input line of the DC-DC converter. The outputs of the converter
go to the two cigarette lighter sockets, which are wired in parallel. Power for the indicator lamp is tapped off one of the cigarette lighter sockets. That's all there really is to it. I chose a 5 Amp fuse
since it is the rated output of the DC-DC converter. The accessories on my telescope don't draw much power. If the load ever exceeds 5 Amps, then there is a problem somewhere. Better to blow a cheap fuse than
to let the magic smoke out of something expensive.
|
Click to learn how
to meet them
|
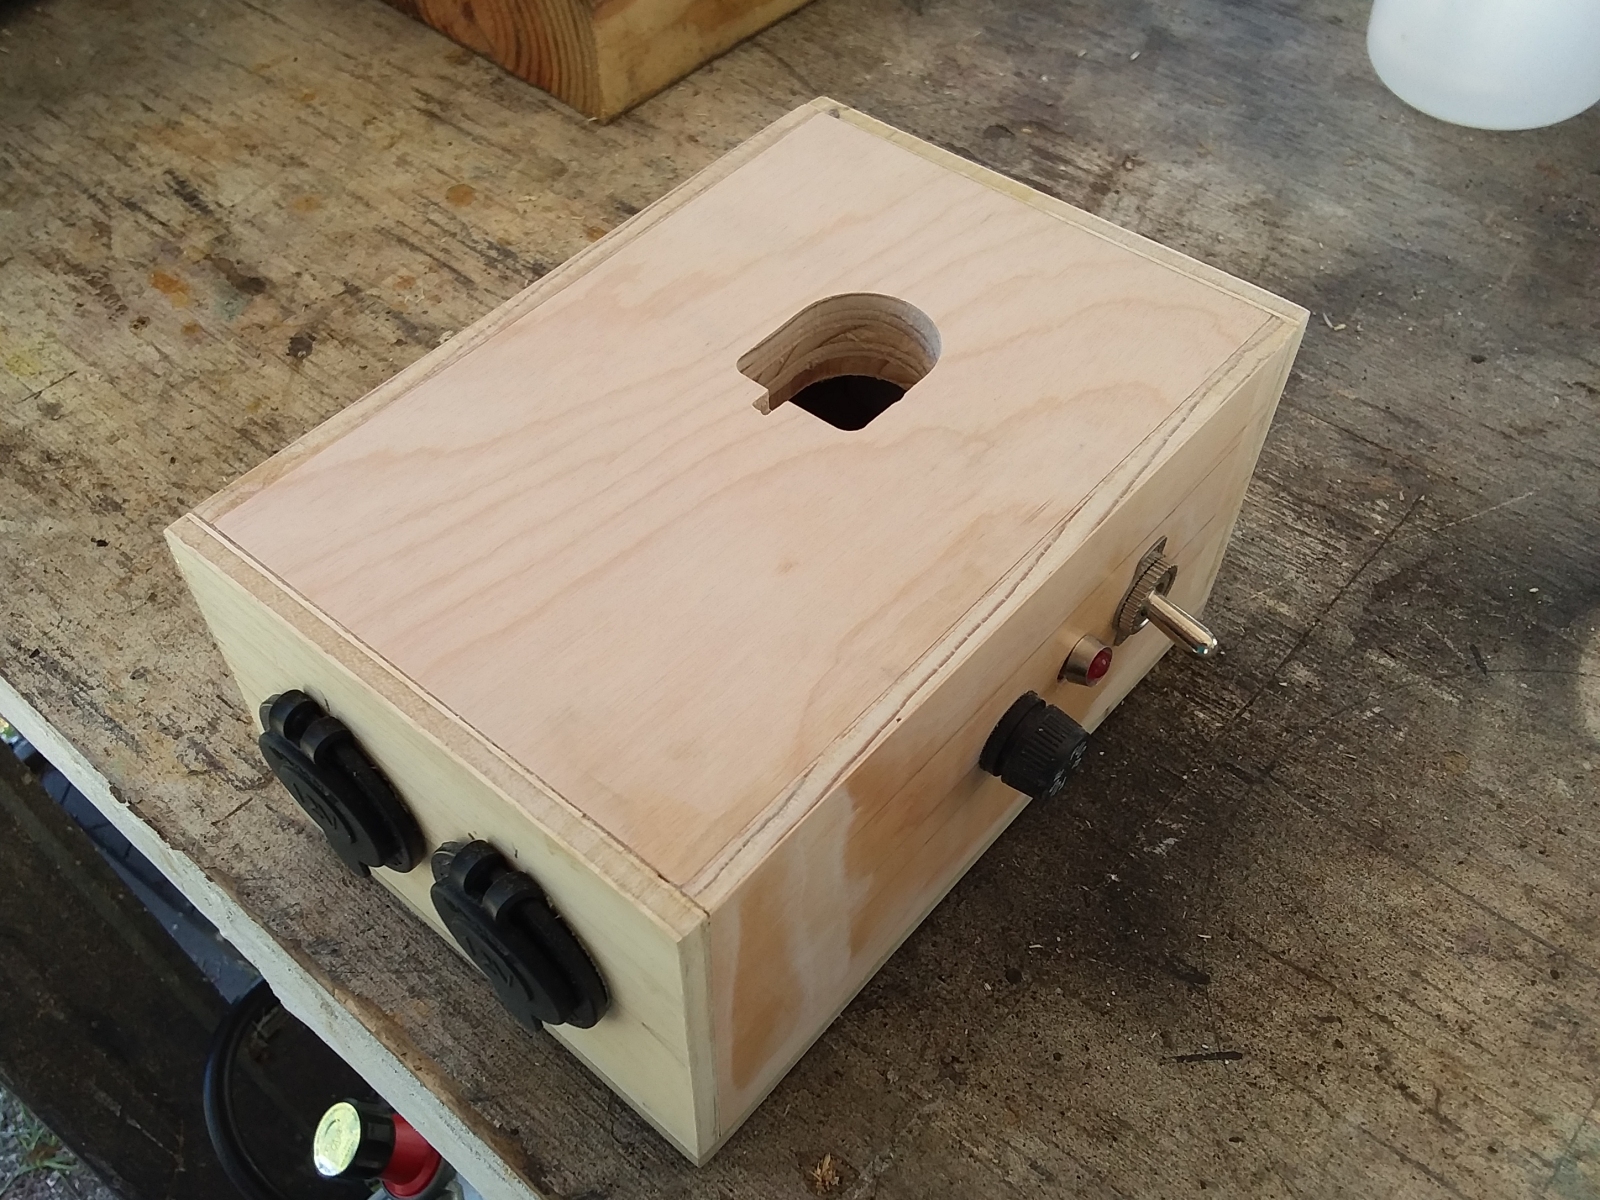 Here is the finished product. It works great. Now it just needed to be prettied up and dew-proofed with a few coats of paint.
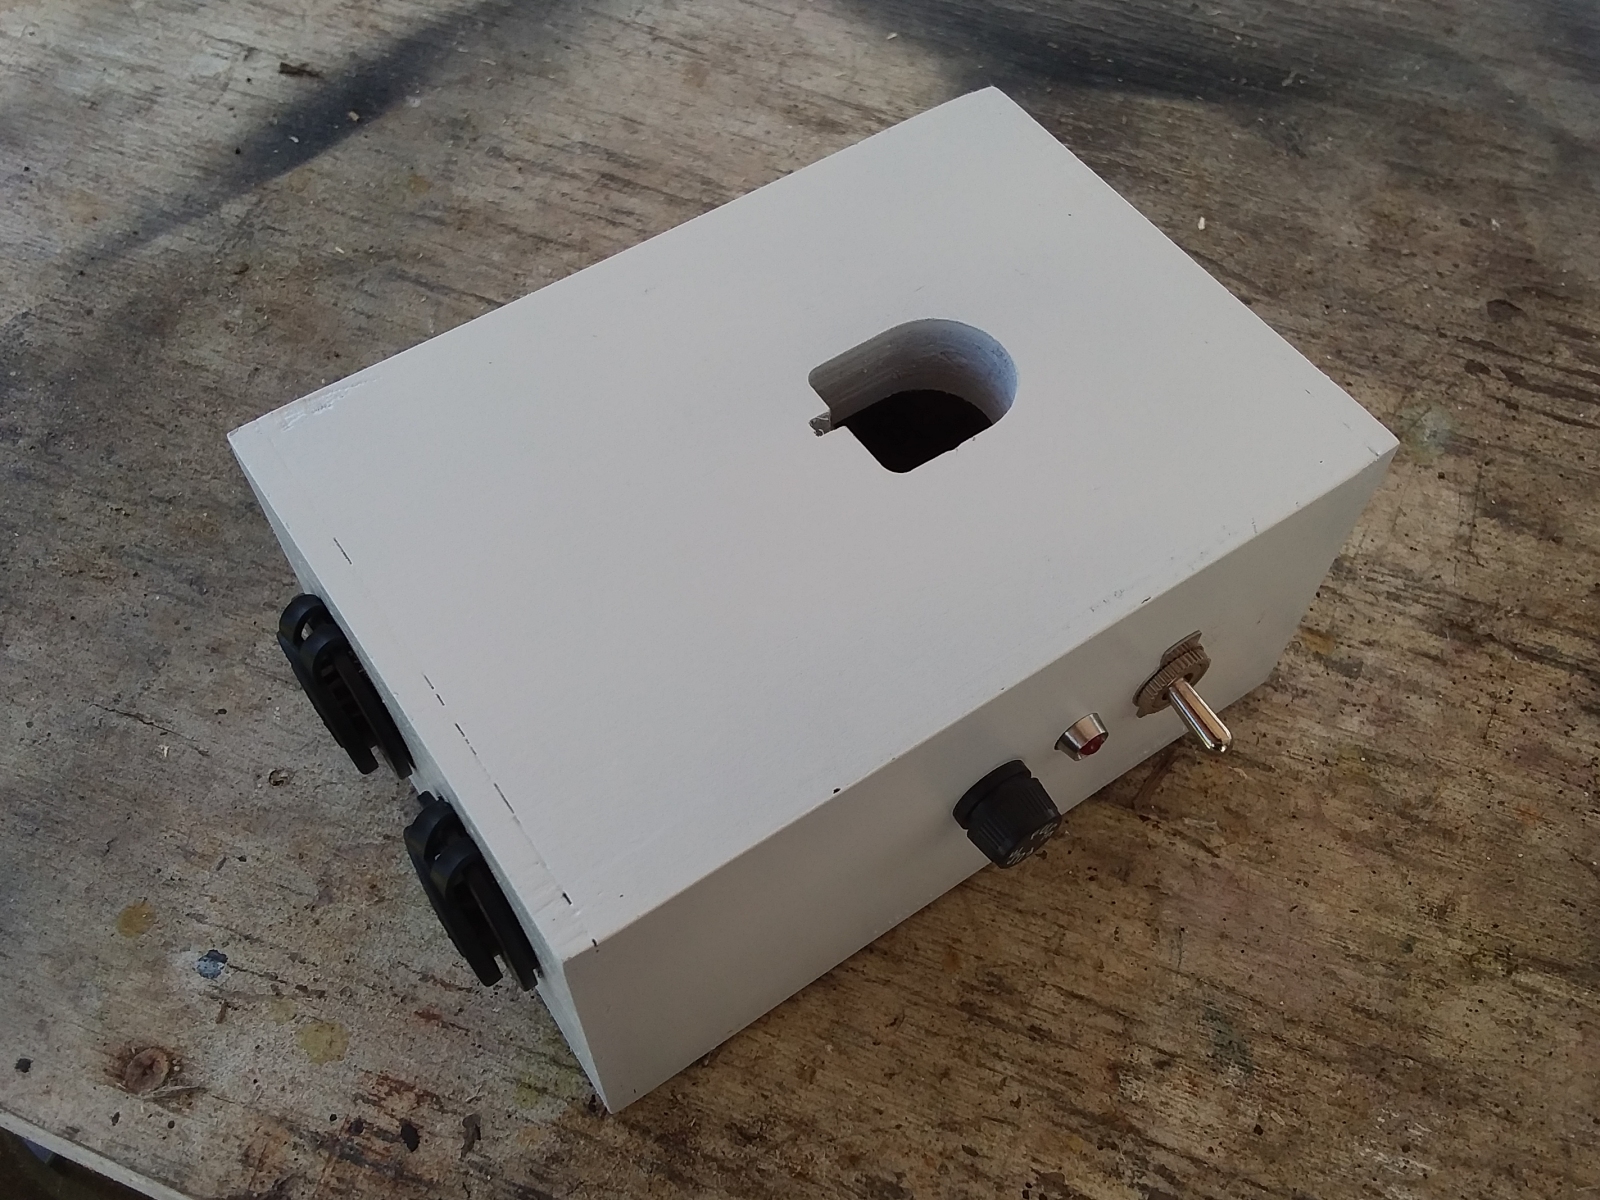 I primed and then painted the box white. It looks gray for some reason in this photo, but it is actually bright white. I find that things painted white are a lot easier to see in the dark. I wouldn't want to pack
up my equipment in the middle of the night and leave this in the field because I missed seeing it in the dim beam of my astronomer's red flashlight.
I primed and then painted the box white. It looks gray for some reason in this photo, but it is actually bright white. I find that things painted white are a lot easier to see in the dark. I wouldn't want to pack
up my equipment in the middle of the night and leave this in the field because I missed seeing it in the dim beam of my astronomer's red flashlight.
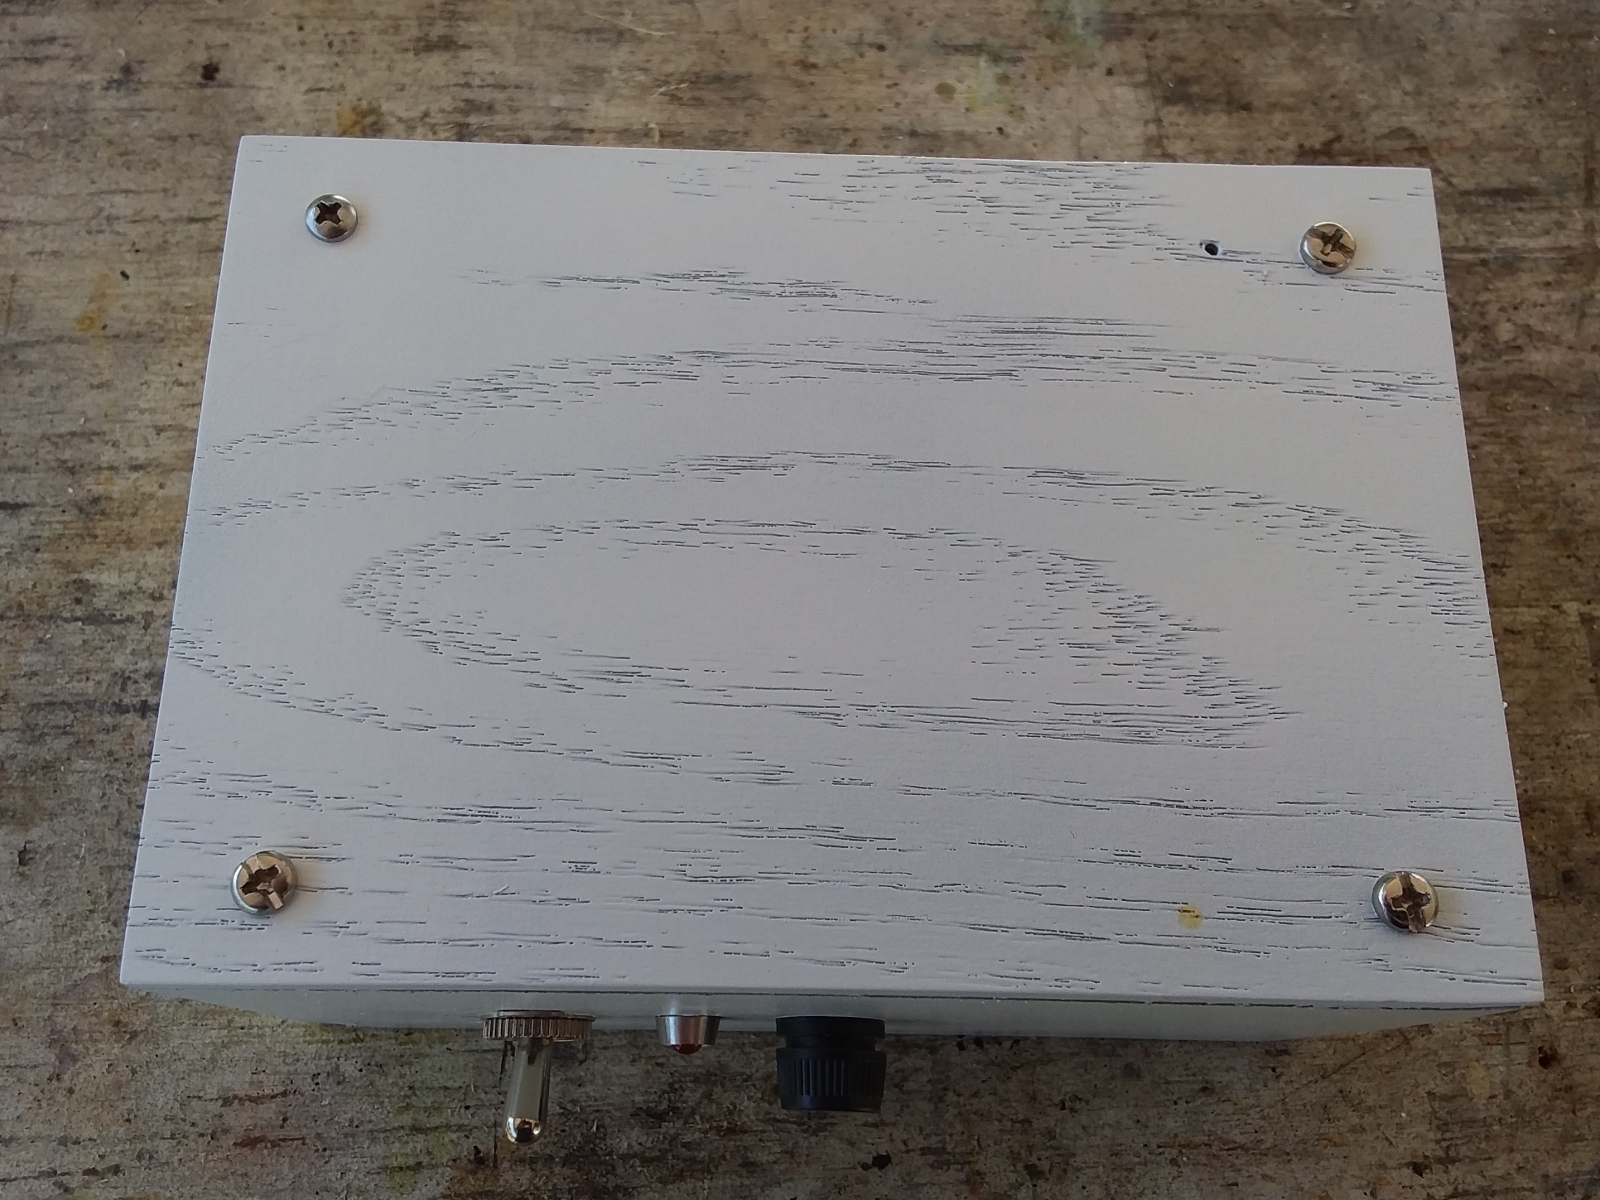 The bottom of the box is just another rectangular piece of 1/4 plywood, primed and painted like the box. I didn't have four matching screws to mount it with. I built this during the tail end of the Corona Virus
lockdown. So there was no running out to the hardware store for something as minor as matching screws. I also plan to put non-marring rubber feet on it too, as soon as I can get some. UPDATE:
The feet have been installed.
The bottom of the box is just another rectangular piece of 1/4 plywood, primed and painted like the box. I didn't have four matching screws to mount it with. I built this during the tail end of the Corona Virus
lockdown. So there was no running out to the hardware store for something as minor as matching screws. I also plan to put non-marring rubber feet on it too, as soon as I can get some. UPDATE:
The feet have been installed.
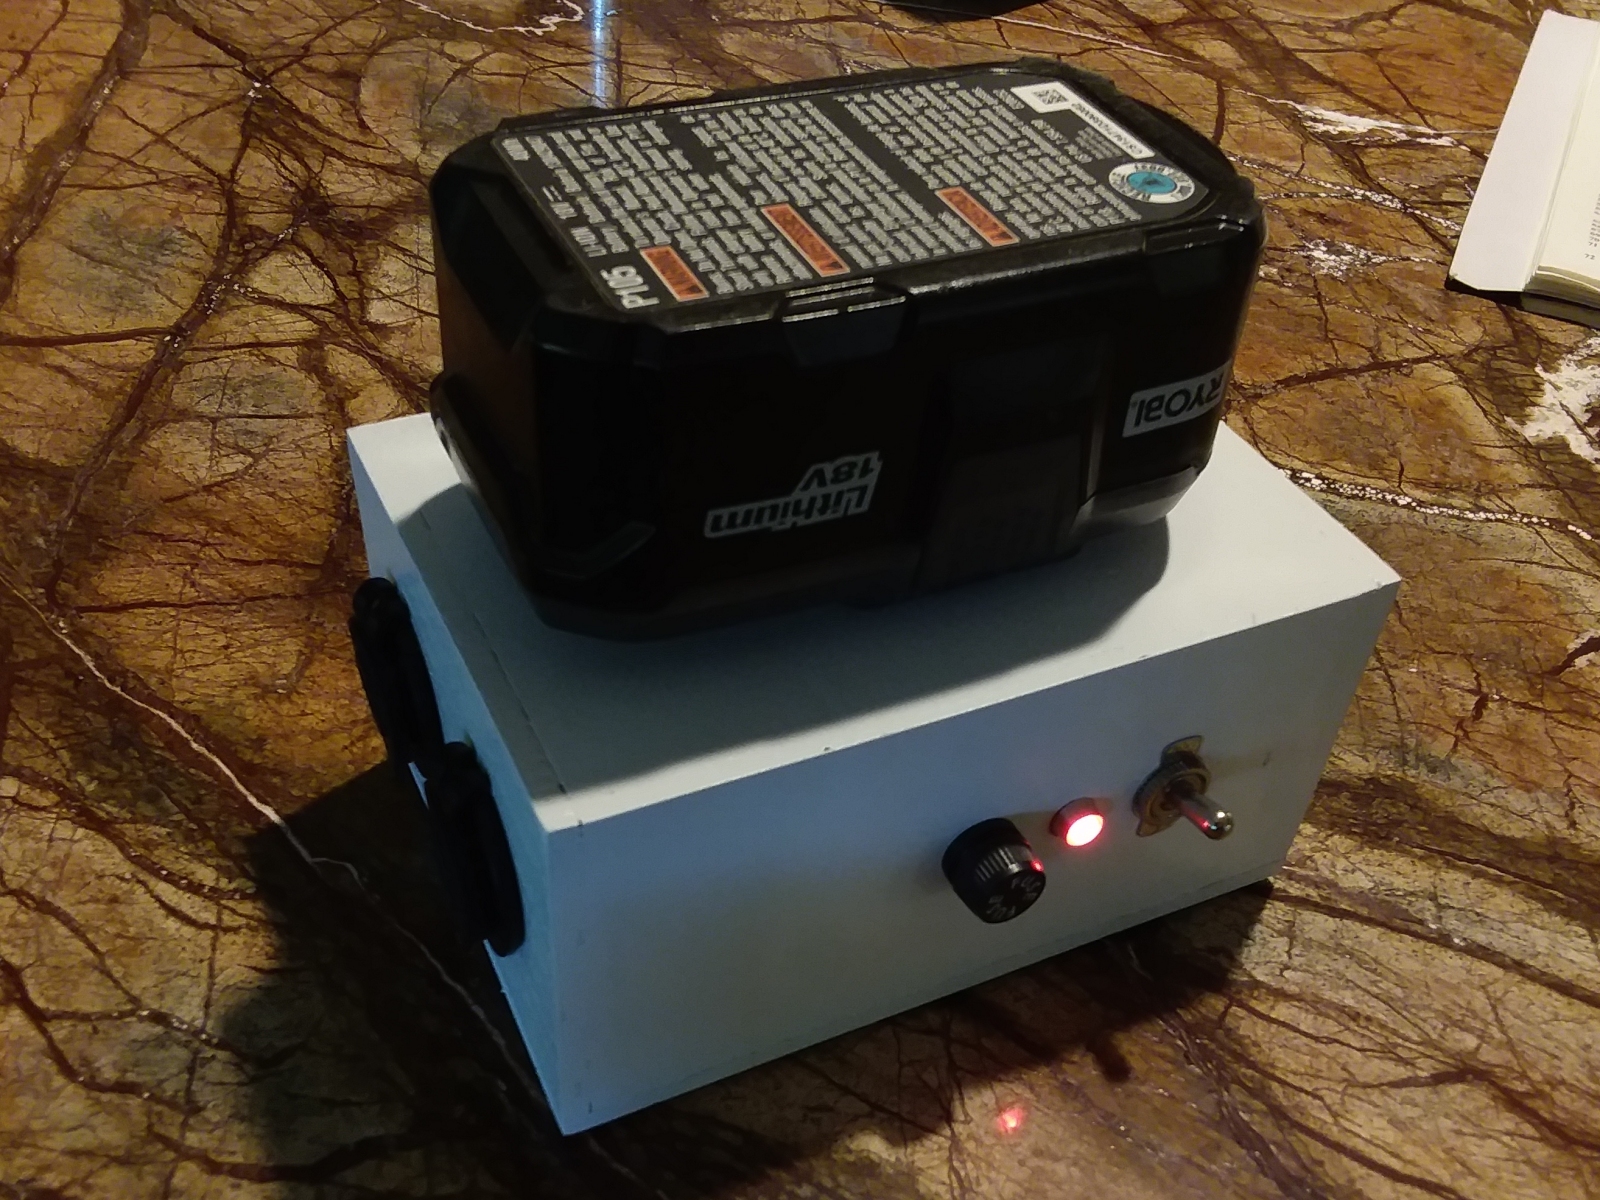 Here is a photo of the completed unit turned on with the power lamp glowing. The light almost looks white to my phone camera, but it is really red. It is brighter than I was expecting. I may need to up the value of the
inline resistor that came with the LED lamp. Don't want to blind people with it at night. Astronomers get irate about excessively bright lights. Even red ones.
Here is a photo of the completed unit turned on with the power lamp glowing. The light almost looks white to my phone camera, but it is really red. It is brighter than I was expecting. I may need to up the value of the
inline resistor that came with the LED lamp. Don't want to blind people with it at night. Astronomers get irate about excessively bright lights. Even red ones.
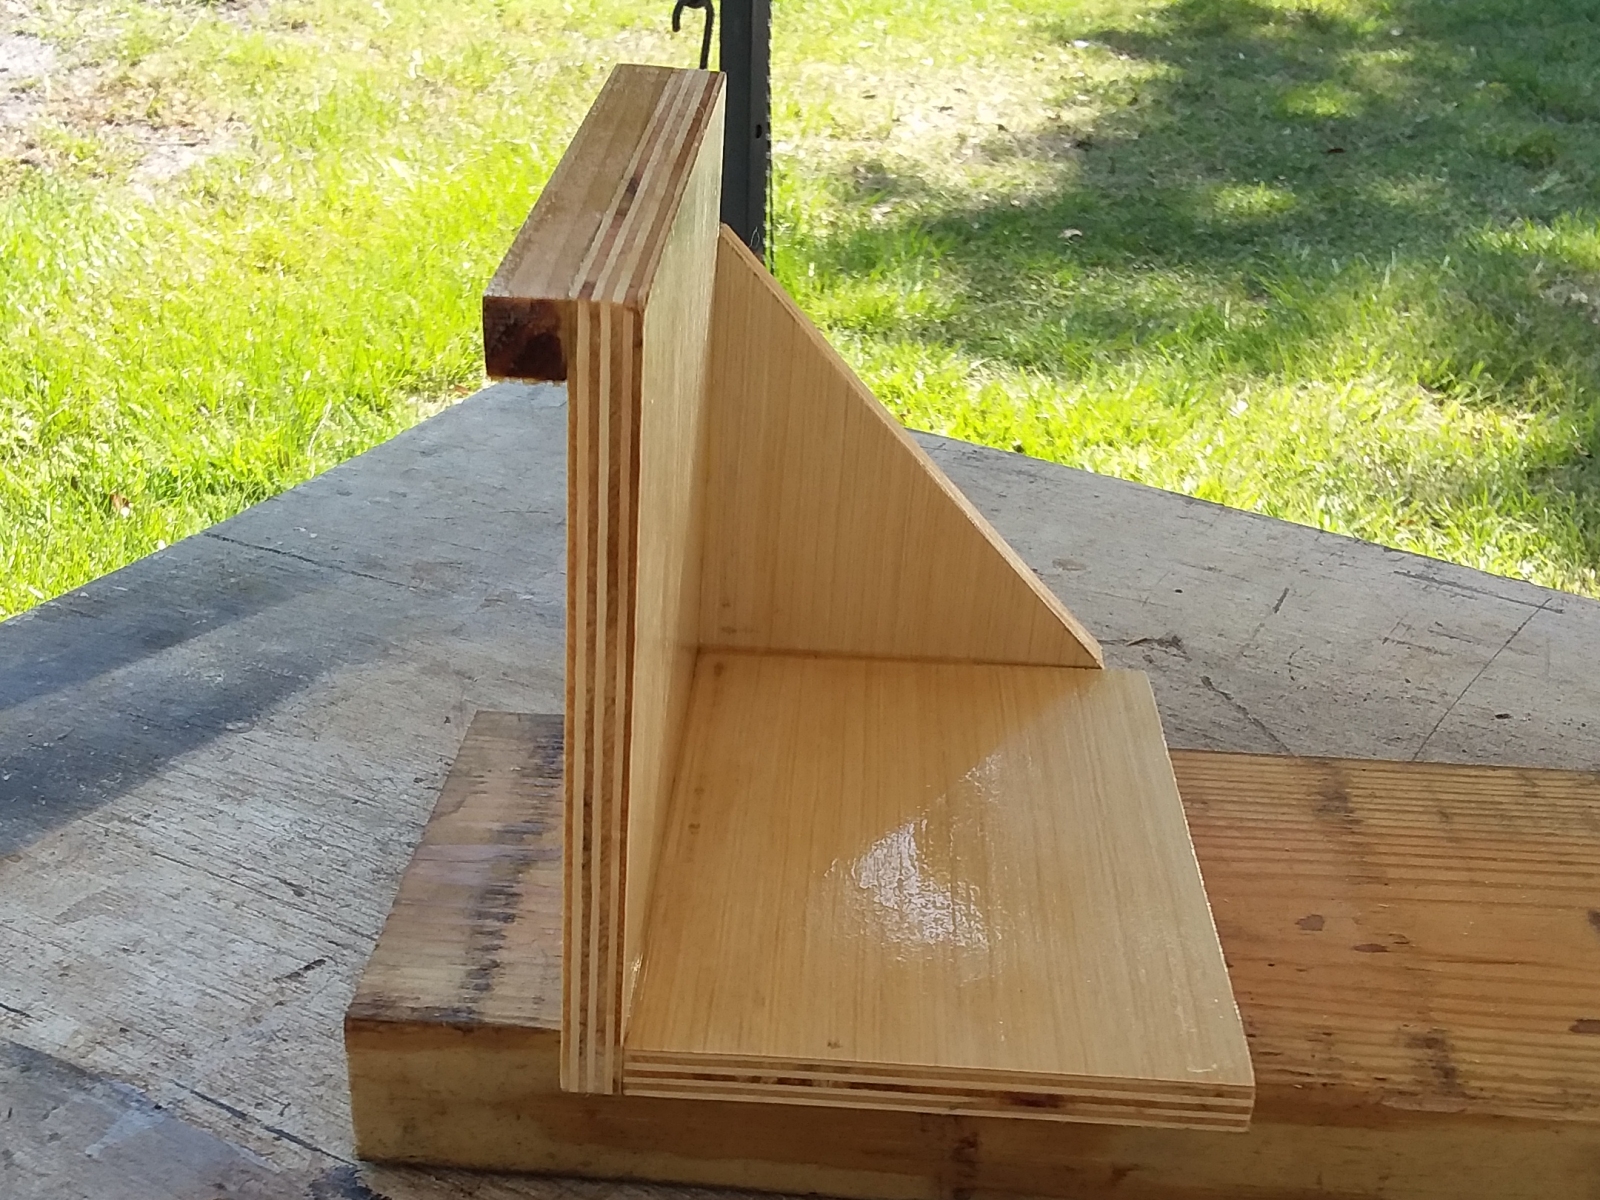 Next I needed a shelf on the side of my big Dobsonian telescope for the power box to sit on. So I knocked one out of some scrap plywood I had laying
around my workshop. Here it just got a coat of polyurethane to protect it from dew. It'll get a couple more coats with fine sanding between coats. The shelf will be held in place with some Velcro,
so it can be removed when I breakdown the telescope for transport and storage.
Next I needed a shelf on the side of my big Dobsonian telescope for the power box to sit on. So I knocked one out of some scrap plywood I had laying
around my workshop. Here it just got a coat of polyurethane to protect it from dew. It'll get a couple more coats with fine sanding between coats. The shelf will be held in place with some Velcro,
so it can be removed when I breakdown the telescope for transport and storage.
So here is the finished product, all ready to go.
Of course now the weather has gone to pot. It's the curse of owning new equipment. I can't wait to give it a proper tryout in the field, but the weather gods are going to keep it cloudy and rainy for
a while out of spite, and I'll just have to twiddle my thumbs waiting. So I haven't got any photos of it powering any of my
telescopes. The power supply was mainly built to run the accessories on my big 17.5 inch diameter Dobsonian telescope. However, there's no reason it couldn't also power my
Losmandy G11 equatorial mount with either one of my refractors on it, or Big Al the astrograph. No more need for long extension cords or lugging a 40 pound battery around.
I should have done this years ago.
I'll add some photos and update this page on what sort of battery life I get from the unit once the weather relents. It may be a while though. The rainy season seems to have arrived early. In the mean time,
I'll put it to use anywhere I need 12 Volts to power something.
|
Click to learn how
to meet them
|
a lady to
learn how
to meet her