I have been involved in amateur telescope making (ATM) for over 30 years. In that time I have built many different telescopes and other instruments. This web page chronicles just a few of them. ATM is a great and very rewarding hobby. You can build a better telescope than you can buy. After you build your first telescope you'll never buy another mass-produced scope. You'll be hooked for life. It's really not as complicated as you might think. Click on the photos for more information on the various projects.
The Projects
This Old Telescope: Rehabbing an old, home-built DOB scope part 1
Here I begin the process of rehabbing an old, heavy and unloved home-built telescope to turn it into a modern instrument to be raffled off by the St. Petersburg Astronomy Club.
This scope needs lots of work, and I only have a limited amount of time to do it. In this first video of the series I look over the scope as I got it and discuss how to make it
into a better, lighter and more usable instrument.
This Old Telescope: Rehabbing an old, home-built DOB scope part 2
Here I continue the process of rehabbing an old, heavy and unloved home-built telescope to turn it into a modern instrument to be raffled off by the St. Petersburg Astronomy Club.
In this video I completely disassemble the scope to it's parts, sort the keepers from the tossers, and work up a final design for how to make it into a better, lighter and more
usable instrument. The STL files for the 3D printed parts used in this project will be made available once the designs are finalized.
Cutting telescope mirror blanks out of a thick glass tabletop
Here is a video I made of how I cut telescope mirror blanks out of thick glass tabletops. The video has created quite a buzz on Youtube. I got a total of seven blanks
of various diameters out of this 40 inch diameter by 3/4 inch thick tabletop. There were one 16 inch, two 14 inch, two 12 inch and two 10 inch blanks hiding within
that big tabletop. It was just a matter of cutting them out. Check out the video to see how I did it.
I'm finally getting pretty good at cutting glass. Now all I need is to find a good source of inexpensive thick glass and I'll be set.
Casting a light weight telescope mirror (all steps in the process)
In this video I show how I designed, cast, slumped and coldworked a light-weight telescope mirror blank prototype. The blank is 10 inches in diameter,
but only weighs 4 lbs 13 oz. It has a ribbed back design for rigidity, and is pre-slumped to f/4.9. This video shows the entire process, from design,
to 3D printing a positive mold, to casting and burning out a negative refractory plaster mold, to casting the glass, to pre-slumping it to f/4.9 and
final cold-working. This was only a prototype to prove that the process has potential, and that I could make every step along the way work. I have never
done so many different processes to one piece of glass before. It turned out nice, but even better designs than this one will be coming in the future.
Stay tuned for further developments.
|
Click to learn how
to meet them
|
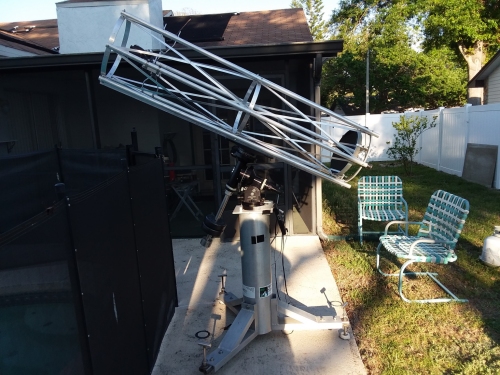 I have recently completed a 12.5 inch diameter, f/4.5, pure astrographic camera. I affectionately call him Al, because of all the aluminum that went into his construction. Al uses one of my light-weight,
honeycomb-back mirrors. Al has been a labor of love for quite some time. He is a departure from my usual DOB type construction techniques in that he is entirely made from metal, and he is
mounted on a German equatorial mount. Al is a purely photographic instrument. There is no secondary mirror or eyepiece. A camera is mounted at the prime focus. Al is showing great potential.
He still needs a little tweaking and smartening up, but he is getting there. Al is going to be an observatory-grade instrument when all the tweaking is done.
Click to see the whole project.
I have successfully slumped a 16 inch mirror blank to f/3.75. This video shows a lot of the steps in the process. It compresses weeks of effort into less than 15 minutes of video.
This is by far the best looking mirror blank I have ever slumped. Using a smoother mold and a lower processing temperature resulted in a near perfect slump. I will eventually put
together an entire web page on mirror slumping with more information and sharing more details, including the firing schedule, here in
the Scopeworks section of my web site. Watch for it. This blank is going to make a great telescope mirror. I can't wait to start working on it.
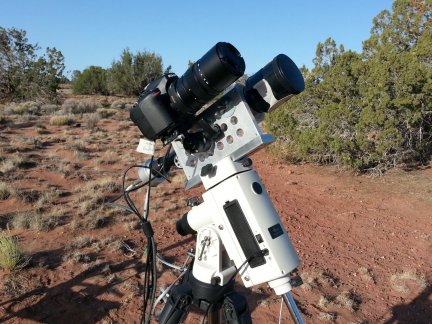 I have posted a new project. It is a autoguiding rig I built to allow me to take long-exposure photos using regular camera lenses. I wanted to to do some wide-field astrophotography
but had problems with guiding errors showing up in long exposures of more than a minute or two. So I figured out a way to mount both my camera and my guide scope and autoguider
on top of my telescope mount so I could get auto guided exposures. It was super simple to build and it works great.
Click to see the whole project.
|
Click to learn how
to meet them
|
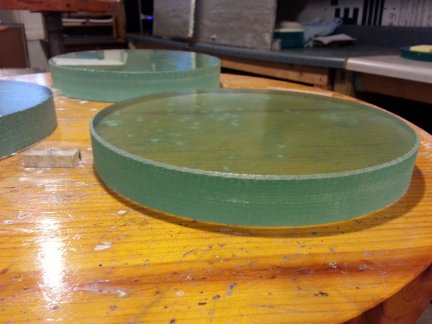 I have posted an updated page showing my current method for fusing thinner sheets of glass together to make high-quality telescope mirror blanks. Over the last couple of years I have really perfected
this method. I am can turn out as many as two blanks per week using this technique. It is easy and economical. Check it out.
Click to see the whole project.
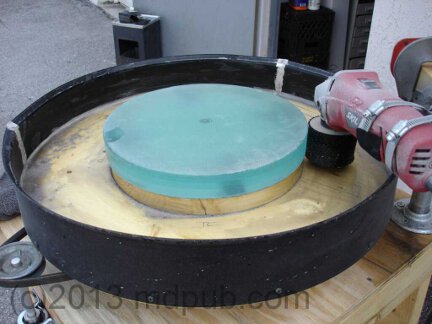 Since I've been casting my own telescope mirror blanks for several years now. I finally decided it was time to
build a machine to help me grind the edges of the blanks true and round. This is my home-built edge grinding machine for grinding down my
home-cast mirror blanks.
Click to see the whole project.
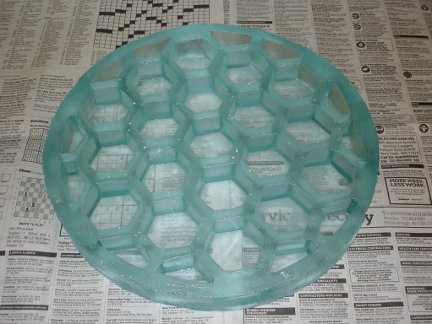 This is a 12.5 inch diameter, 1.5 inch thick, light-weight honeycomb-back telescope mirror blank that I made myself. The blank only weighs 10 lbs, 4 oz. I
am very excited about this process. It makes nice looking and very light blanks. Click the photo to see how I did it.
Click on the photo to see how I made it.
|
Click to learn how
to meet them
|
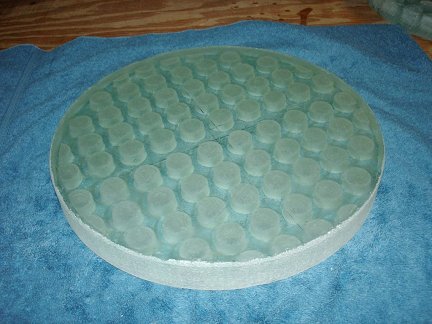 This is a 12.5 inch diameter, 1.5 inch thick, light-weight telescope mirror blank that I made myself. The blank only weighs 11 lbs, 15 oz. This is a
process I call The Waffle-Back Design, because the finished
mirror
blank looks like a big waffle. I have pretty much abandoned this design in favor of the honeycomb design above.
Click on the photo to see how I made it.
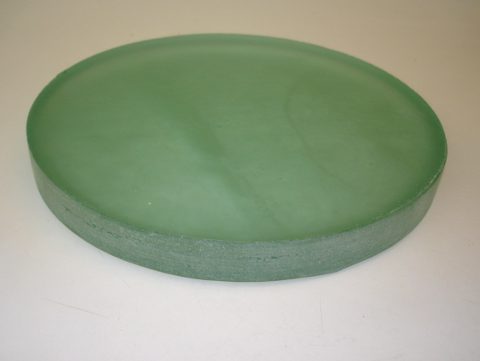 I have been experimenting with making telescope mirror blanks by fusing together disks of thin glass in my kiln to make
the full thickness blanks. I am having quite a bit of success with this project. Check out how I do it.
Click on the photo for more information on how I do it.
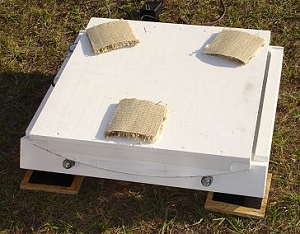 Here is my latest creation, fresh out of the workshop. It's a large and sturdy equatorial platform for the 17.5
inch Dobsonian telescope. It gives me 40 minutes of tracking time. The platform was surprisingly easy to build.
It only took a couple of weeks and it works great.
Click on the photo for more information on how it works.
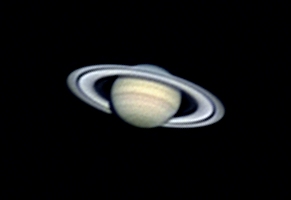 I'm getting interested in astrophotoghaphy again after many years of avoiding it like the plague.
Cheap web cams are making it easy to capture images of brighter objects without a lot of the hassle that
I used to have to go through with film photography. They can't do faint nebulae and galaxies, yet, but they
do a pretty good job on planets. This is a photo of Saturn taken on 03/04/06, using the 16 inch Meade SCT
at the Carol Samuels Observatory, at prime focus (4000mm fl) using a Philips ToUcam. It's a 500 frame
video capture stacked with RegiStax. The seeing was exceptionally fine that night and only minimal
post-processing was needed to bring out the detail in the cloud bands on the planet.
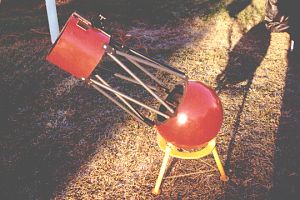 This is the "Cookie Jar" telescope. It is an 8in. f/4.5 Newtonian scope on a ball
mounting. The truss design reduces the weight of the upper section and helps keep the center of
gravity low. The short focal length keeps the eyepiece low to the ground even at zenith, making
the Cookie Jar a very "kid friendly" telescope. The ball mounting allows smooth movement
in azimuth, altitude and rotation.
Click on the photo for more information.
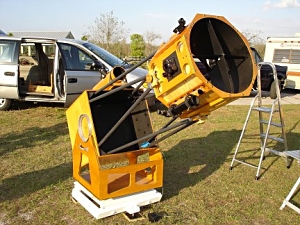 This is the 17.5in. f/4.5 Dobsonian telescope I built for the St. Petersburg Astronomy Club.
The scope was designed and built to be rugged and easily transportable. It collapses into a cube that
can be moved easily by one person once its wheels are strapped on. One person can setup or breakdown
the scope in about 10 minutes. The scope even maintains reasonable collimation from setup to setup.
UPDATE! I have refinished and remodeled this scope. Click the photo to see new pictures.
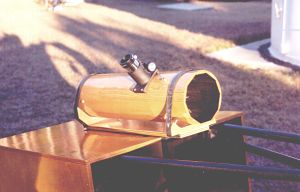 This is a 4.25 in. Newtonian reflector with a wooden tube. I designed it to be a matching finder
scope for the 17.5 in. Dob above. I decided that something larger than the little 50 mm refractor
I had been using as a finder would be helpful in hunting down faint objects. But I wanted the new
finder to look like it belonged on the 17.5 in. Dob.
Click on the photo for more information.
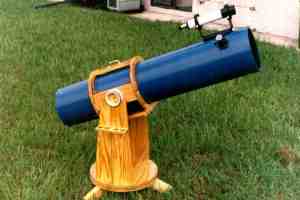 This 8in. f/6 Dobsonian telescope is one of several nearly identical scopes built from the same set of
jigs for some of my friends. Several of my
friends asked me if I could design and build scopes for them that had all the features they
wanted but could not find in the mass-produced scopes. The design goals were to create a scope that
was beautiful but functional, and lightweight yet rugged.
Click on the photo for more information.
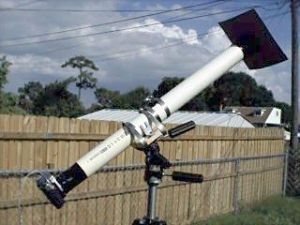 This is a solar camera I built out of an old 70mm refractor and some PVC pipe and an old Pentax K1000
camera. I also made my own solar filter. For a quickly thrown together camera made from improvised
parts it works very well.
Click on the photo for more information and to see photos taken with this camera.
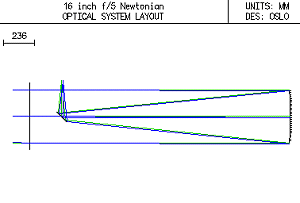 Click the blueprint to visit my growing gallery of "paper telescopes." These are
telescope designs that I haven't gotten around to building yet because I lack either the
skills or the time to execute them. Designing them is an interesting intelectual exercise
though, and maybe someday at least some of them will get built.
Click on the image to go to the "paper telescope" page.
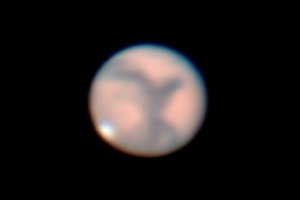 This is a photo of Mars taken about a week and a half past the closest opposition in 60,000 years.
The photo was taken with a web cam I modified for astrophotography. The photo shows a wealth of
detail including, Syrtus Major, the Hellas Basin, Hellespontus, Sabaeus Sinus, Meridini Sinus,
and of course the very prominent South Polar Cap. Not bad for a cheap web cam.
Click the photo for more information.
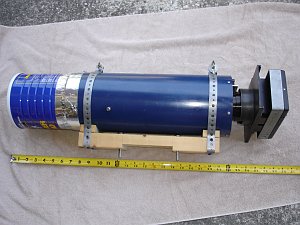 This is an astrographic camera I built many years ago using the lens out of an old Opaque Projector
and a Polaroid oscilloscope camera. It produced instant, large-format astrophotos.
Click on the photo for more information.
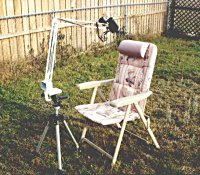 This is a quick and easy binocular stand I whipped together out of found materials and my
photographic tripod. It adjusts so it can be used while sitting or standing. Anyone can easily make
one like it.
Click on the photo for more information.
I would be happy to answer as many questions as time permits that other ATMs may have about how these scopes were built. I can be reached by email at: astronomermike @ gmail.com (remove spaces).
[Mike's home page]
[Mike's home-built jet engine page]
[Mike's home-built wind turbine page]
[Mike's Home-Built Solar Panel page]
to learn how to
meet her.
to learn how to
meet her.