How I built a folding 15 Watt Solar Panel
It was easy. You can do it too
Several years ago I built a 60 Watt solar panel. It's a great panel. I still use it a lot.
However, it is big, and heavy,
and I don't always need 60 Watts of power. Sometimes I just need a little power for a portable device or two. I'd like to be able to
charge up my cell phone, or MP3 player without having to lug around the big solar panel. I'd also like
the panel to be more compact and easier to pack when I am traveling light. So I decided to build a 15 Watt Solar panel that folds up to be more compact.
This web site explains and shows how I did it.
Here is a video of the solar panel set up and in use on my remote, off-grid property.
Let me state up front that I probably won't be able to help you out much if you decide to build your own solar panel(s).
This web site has become insanely popular, often taxing the bandwidth limits of the server. I get dozens of requests for
help each day. I simply don't have time to answer the majority of them. Most of the questions and requests I get are the
same ones over and over again. I have crated a FAQ to handle these repetitive questions.
Please read it before emailing me.
Simple questions, not covered by the FAQ,which only require a quick and simple answer
may get replies if time permits. However, there is no way I can help you out with complex issues, teach you electronics
theory, help you locate parts, build a charge controller for you, or custom design a system for you. There just aren't enough
hours in the day. Sorry.
The main stumbling block to building solar panels is acquiring solar cells at a reasonable price.
New solar cells are very expensive, and can even sometimes be hard to find in quantity at any price.
Blemished and damaged solar cells are available on
and other places at a fraction of the cost of new perfect cells.
These second rate solar cells can be used to make a solar panel that will work just fine.
My first solar panel used 3 X 6 inch monocrystalline silicon solar cells.
They are highly efficient and produce a lot of current. But they are
also big and delicate and difficult to work with. For this project I decided to use a different kind of solar cells. I used 40
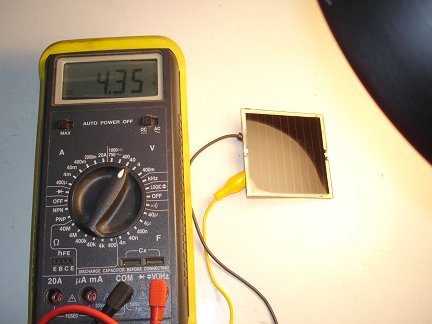
thin-film Copper Indium di Selenide (CIS) solar cells. Each cell is actually a miniature solar panel 60mm x 60mm x 2mm thick,
that will produce a little over 4.5 Volts and 80 mA in bright sunlight, that only comes out to about 0.375 Watts per cell, but
40 of them together produce the 15 Watts I was targeting. I would wire them together in groups of 4 cells in series to get about
18 Volts, and then wire the groups of 4 cells in parallel. I would divide the 40 cells into two groups of 20 and build a folding
box to mount them in.
I bought 40 of the (CIS) solar cells off of
and got to work.
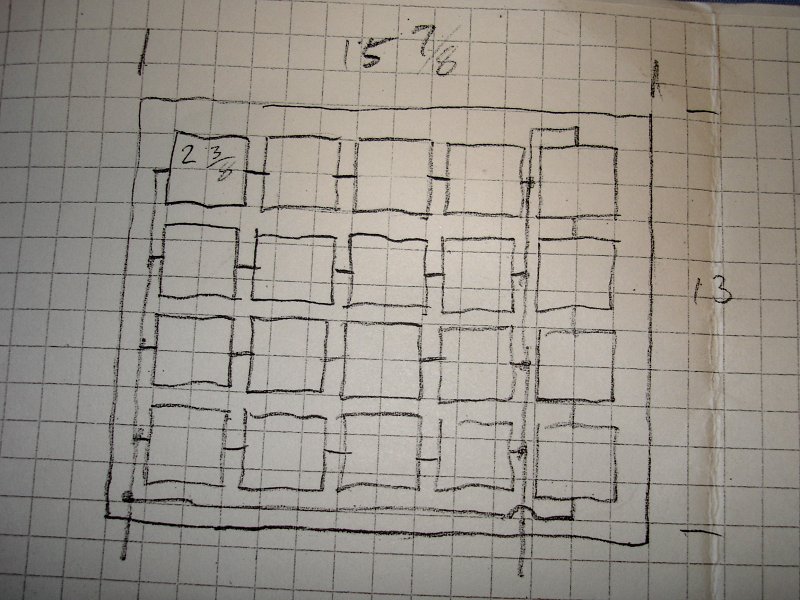
I drew up a layout for 20 of the solar cells and rough dimensions of half of the folding solar panel. The other half would just
be a mirror image of this. I did things a little differently when I actually wired the cells together, but I followed this initial
plan fairly closely. Click for a larger view.
The solar cells arrived from
well packed in foam and all intact.
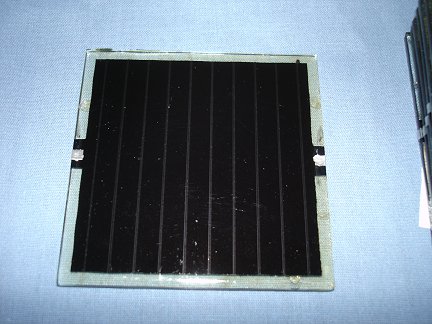
Here is a close-up photo of the front of one of the solar cells. The cells are encapsulated in glass. They are delicate, but
not nearly as delicate as the paper-thin silicon solar cells I used in my first
solar panel.
Here is a close-up photo of the back of one of the solar cells. These cells come with wiring tabs already soldered in place and
taped down. Also, the negative terminal is marked, though it is hard to see in this photo.
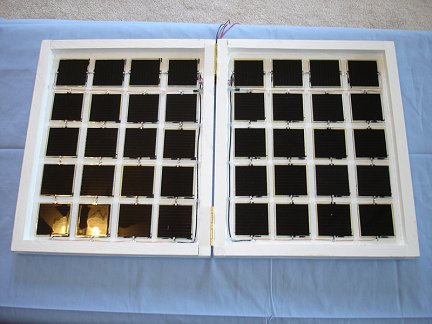
Here I am testing one of the solar cells under my bright workbench lamp. It is producing 4.35 Volts. Not bad.
Now that I had solar cells in hand, it was time to start building the panel. I used similar construction technique to what
I used on my first solar panel, just scaled down to a smaller size and hinged
in the middle. I built two shallow wooden boxes 15 7/8 by 13 inches, using 1/4 inch thick plywood and 3/4 x 3/4 wood side rails.
I hinged the the two halves together. I didn't bother mortising out for the hinges. I just mounted them flat against the sides
of the boxes.
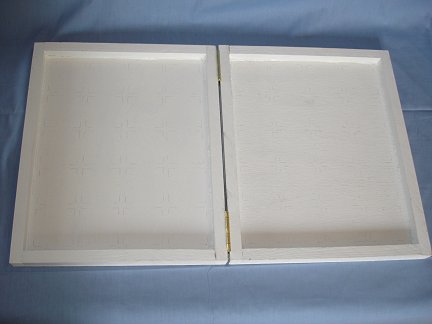
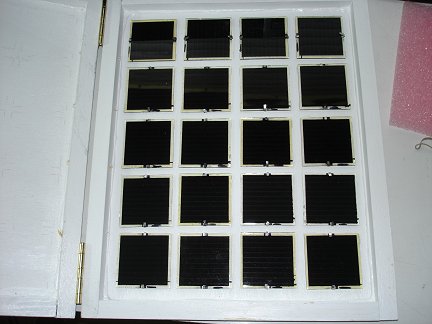
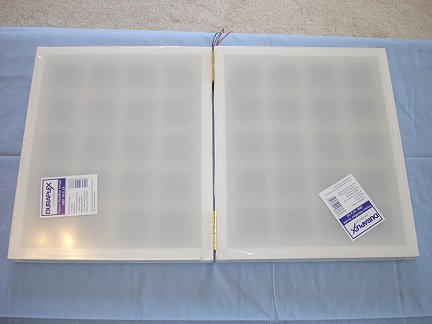
Here is the finished hinged box opened up. I painted the box my usual white color that seems to be becoming the signiture
color for all my alternative energy projects.
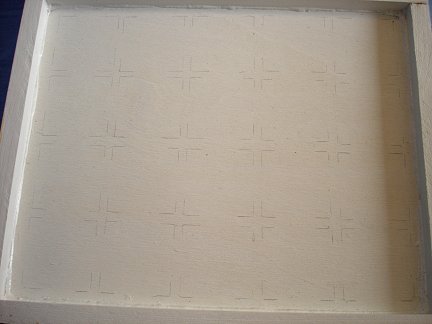
I marked out the position for each of the 20 solar cells in each half of the panel in pencil.
I cut the tape holding down the tabs on the back of each of the cells, and folded the tabs up and over to the top side of the cell.
I also marked the negative side of the cell better so I could see it from the front of the cell. Then I began gluing them down on
the spots I had marked out earlier. I used a small blob of silicone caulk in the center of each cell and pressed it in place.
Click the photo to see a larger version.
After all the cells on one half were glued down, I waited a few hours for the silicone to set up before starting to wire the cells
together. I wanted to complete and debug one half, just in case I ran into problems, before doing the other half.
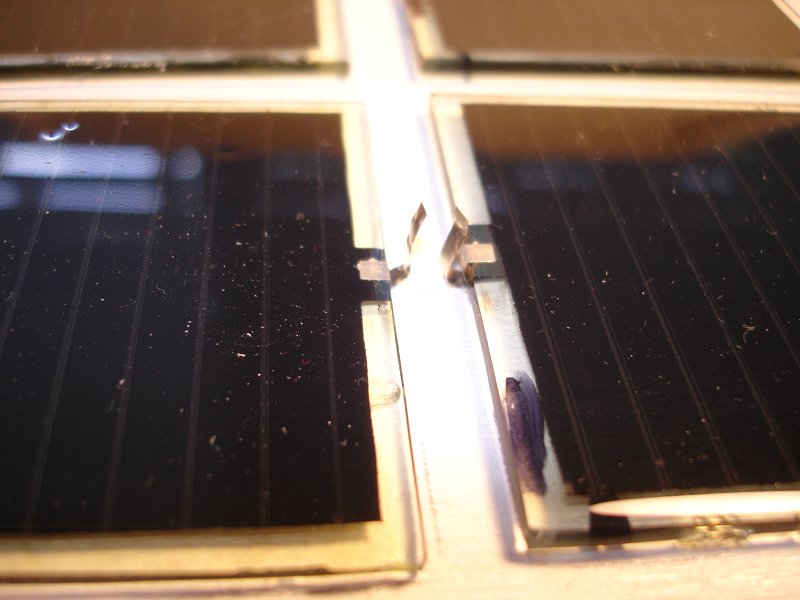
Once the silicone had set up and the cells were firmly stuck down, I started soldering the tabs together. The tabs on adjoining
cells were sticking up like is seen in this photo.
Click the photo to see a larger version.
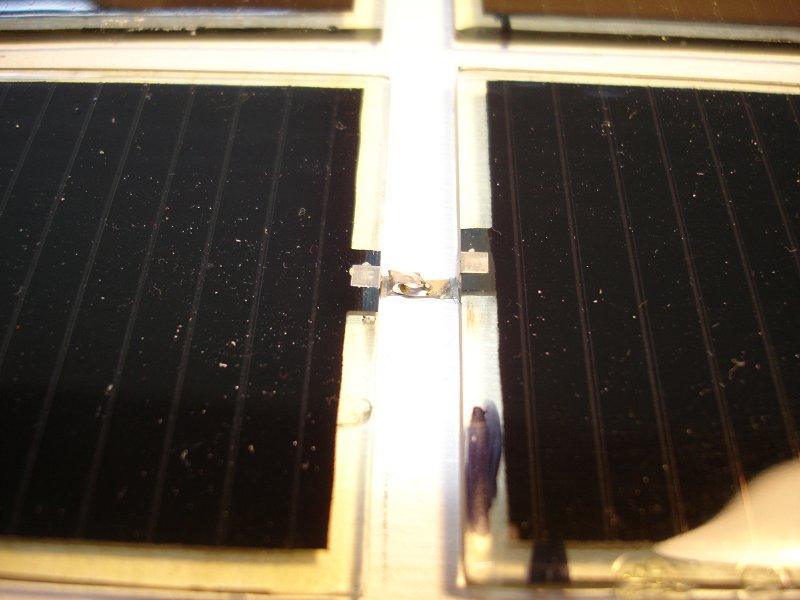
I used my fine needle-nose pliars to grab the tabs that needed to be joined, and rolled them together on the tips of the pliars. Then
I flattened the resulting little roll of foil down to prevent it from unrolling. The tabs are made of thin metal foil. So be
careful since it isn't hard to damage them or rip them off the cells.
Click the photo to see a larger version.
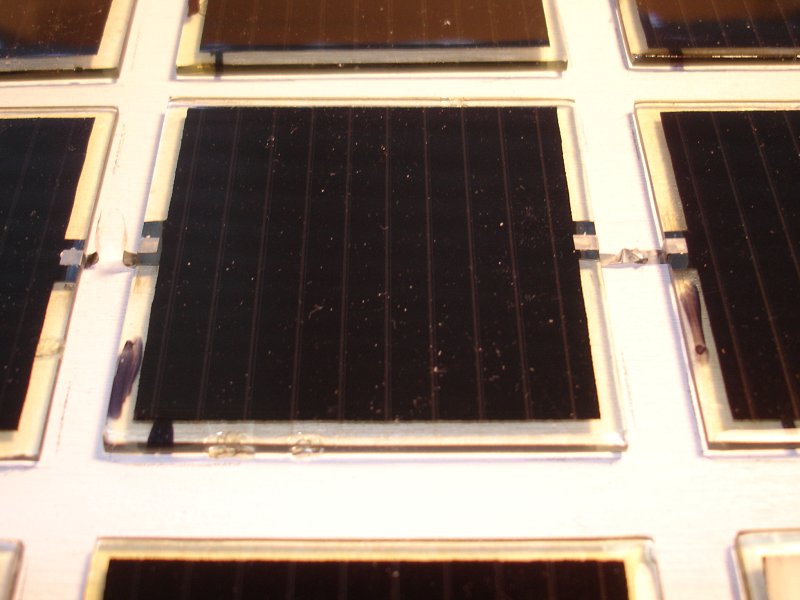
Finally I used my soldering iron and a little solder to finish each joint. Be quick. Don't let your soldering iron linger on the
tabs, or they may unsolder from the cells.
Click the photo to see a larger version.
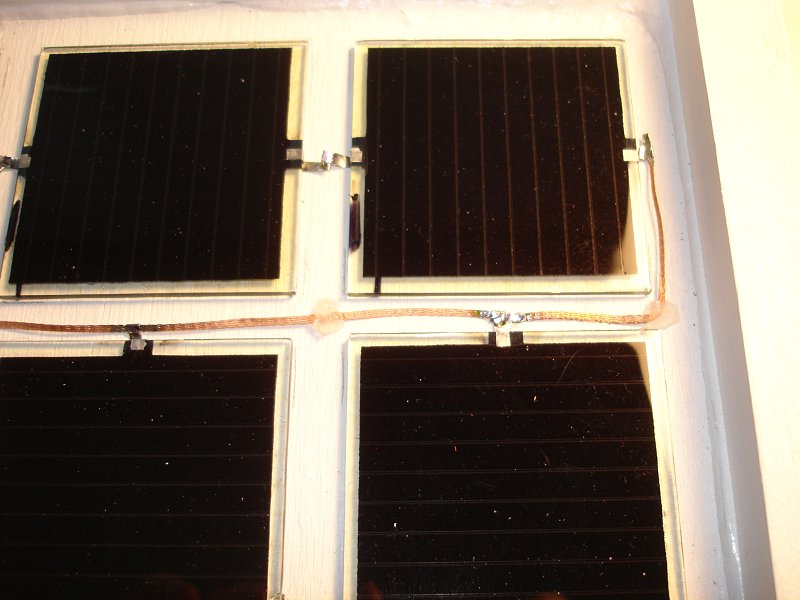
Once I was done soldering all the cells together, I had 5 strings of 4 cells wired in series. Now I had to connect the 5 strings
together in parallel. I used some copper braid I had on hand to wire together all the positive sides of the cell strings. I used
small blobs of silicone to hold the braid in place.
Click the photo to see a larger version.
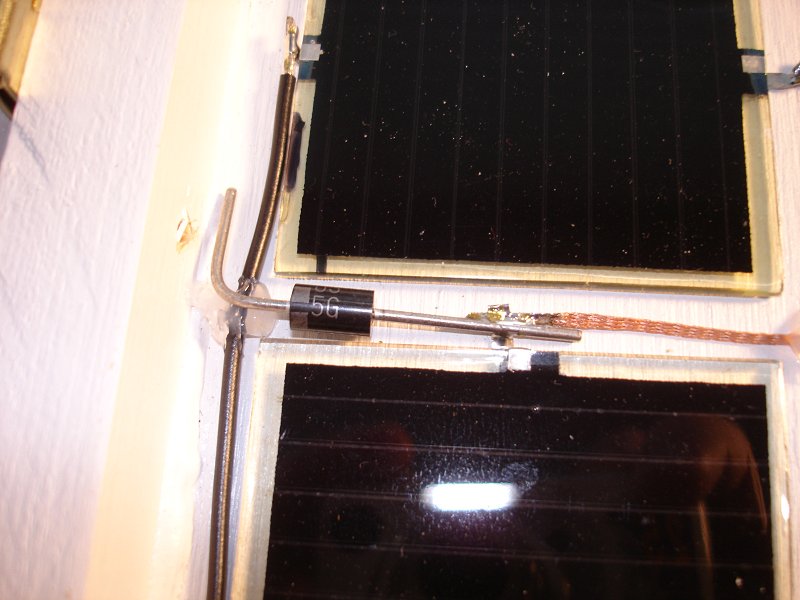
I then soldered the anode of a 31DQ03 Schottky diode to the positive rail. This diode acts as a blocking diode, preventing the solar panel from discharging
my battery bank at night or when shaded. Each half of the panel gets a blocking diode since the two halves will be wired in parallel.
Click the photo to see a larger version.
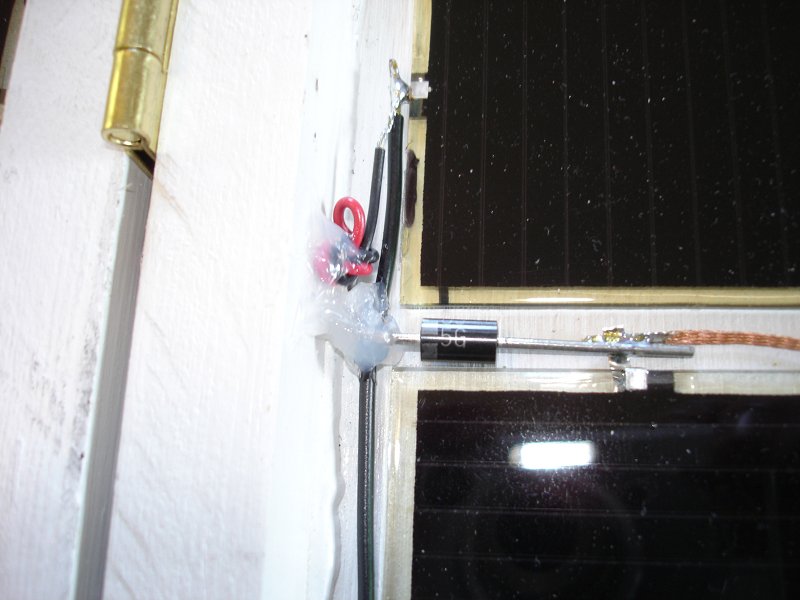
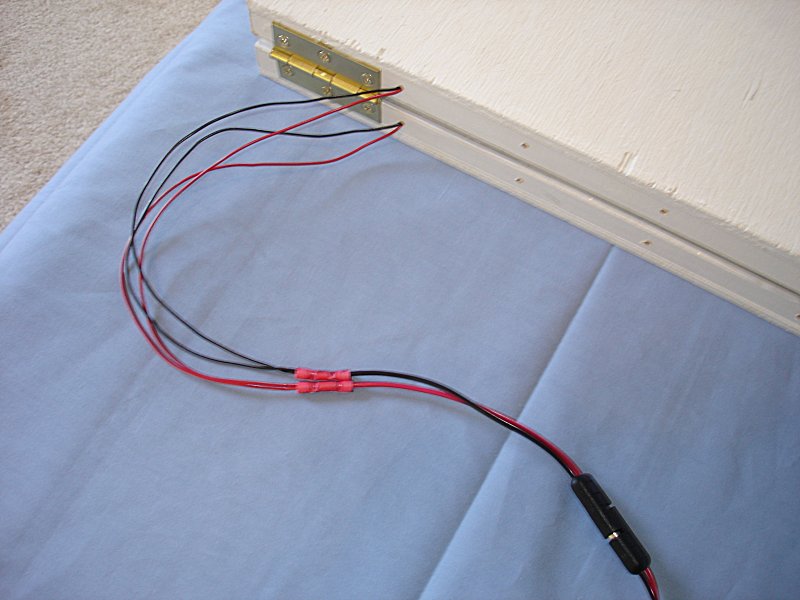
Here I have installed the wires that leave the panel. I ran them out through a hole drilled in the hinge side of the panel. I soldered the red wire
to the cathode of the diode and the black wire to the negative rail.
I tied a knot in the wires for strain relief, and used blobs of silicone caulk to secure everything in place.
Click the photo to see a larger version.
The other half of the panel is a mirror image of the first. I joined the wires for the two halves together outside the panel.
Click the photo to see a larger version.
This photo shows the wires from both halves of the panel joined together and connected to a quick-disconnect plug. You can also see
rows of vent holes I drilled in the hinge side of both panels to vent them once the plexiglass covers are on.
Click the photo to see a larger version.
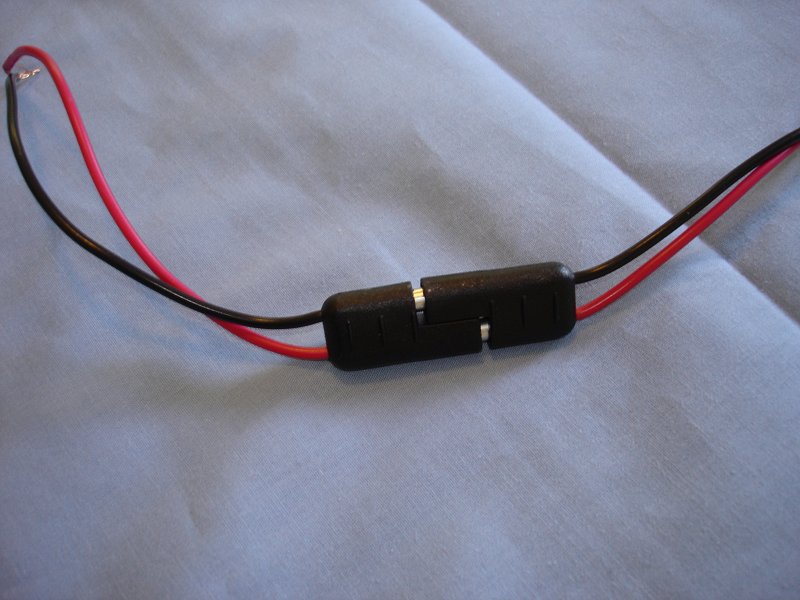
This is the plug connector I used on the panel. It is a polarized quick-disconnect plug available at Radio Shack and other places.
Click the photo to see a larger version.
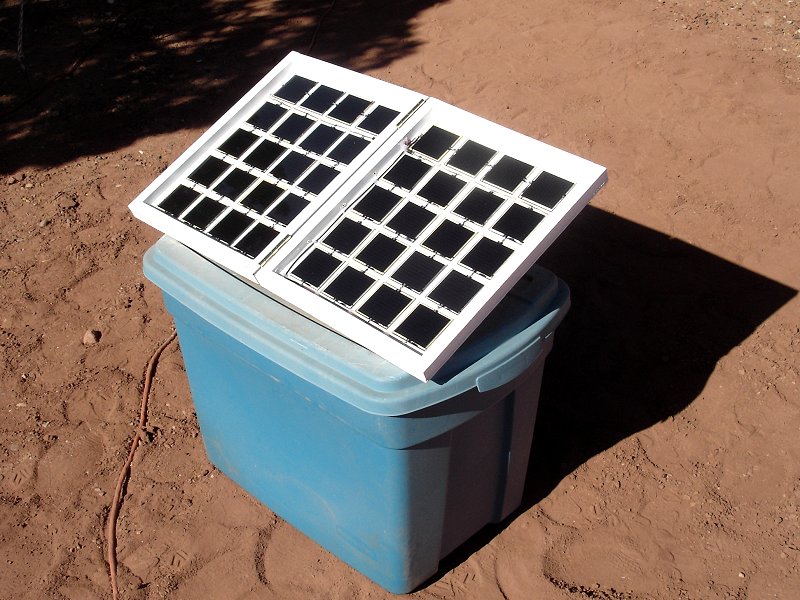
Here is the completed folding solar panel, ready for testing. My testing, outside in bright afternoon sun, showed the panel was producing
about 18.3 Volts at about .82 Amps. It works! I was getting almost exactly the 15 Watts I was targeting. I was very happy.
Click the photo to see a larger version.
My next step was going to be to add plexiglass covers to each half to protect
the cells and the wiring from the elements.
I bought two pieces of plexiglass and cut them to fit the two halves of the panel.
Here I have peeled off the protective film on one side of the plexiglass covers, run beads of silicone caulk all the way around both halves of the
panel, and set the peeled side of the plexiglass in place over each half. I added some weights in the form of stone coasters to press down the plexiglass
overnight until the silicone set up.
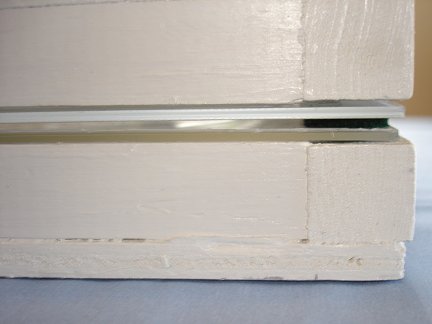
The next day, I peeled the protective film off the other side of the plexiglass. The panel was essentially done at this point. However, I wanted
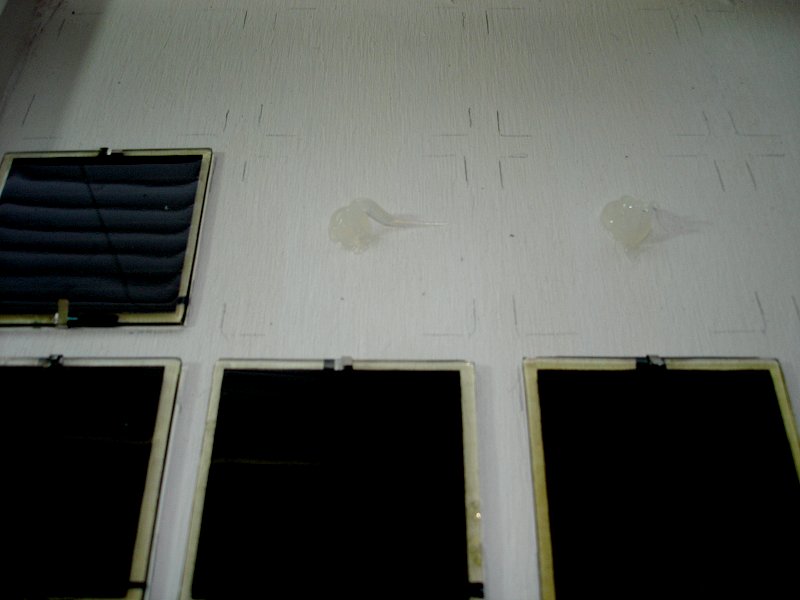
to add a finishing touch. I had some adhesive backed felt disks on hand. I use a lot of them in my various
telescope projects. I added 2 felt disks
to the panel to prevent the two halves from crashing together too hard. They provide cushioning between the two plexiglass panes when the panel
is folded.
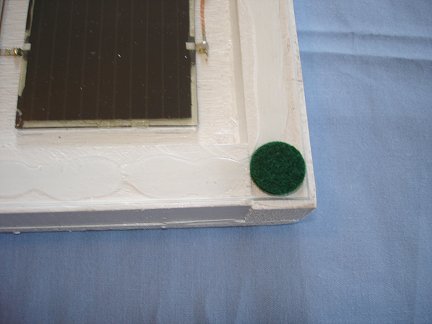
Here is a photo of the gap the felt disks make between the plexiglass panes when the panel is folded.
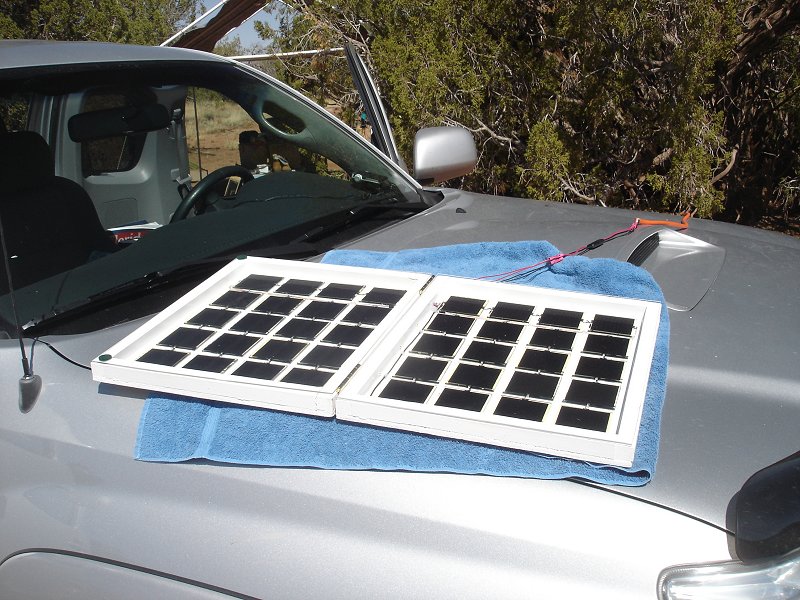
I completed the solar panel just in time to take it with me on vacation to my remote off-grid property in Arizona. My property has previously served
as a testing ground for my home-built wind turbine, and my 60 Watt home-built
solar panel. Here the panel is unfolded and laid out on the hood
of my truck to catch the sun.
I wanted to test the solar panel extensively. I wired it into my charge controller to supplement the power being
produced by the wind turbine and larger solar panel. I also wired the panel to a 12V cigarette lighter type plug and tested it powering various
small appliances like my car cell phone charger and the charger for my MP3 player. The panel worked well, but I noticed something strange.
The voltage output of the panel was only about 14.5 Volts. I had seen over 18 Volts in my earlier testing. The voltage was still high enough to
power the appliances I plugged into it, but I was perplexed about why the voltage had dropped.
I had a theory that the voltage output from the CIS cells was dropping as they heated up inside the enclosed boxes of the solar panel. I tested
the theory by putting the panel in the shade for a while and letting it cool off, then bringing it back out in the sun and monitoring the voltage
as it warmed up. Sure enough, it made about 18 Volts when I first placed it in the sun, but the voltage quickly dropped off back down to about 14.5
volts as it warmed up.
I then pried off the plexiglass panes and tried using the panel without them. Without the plexiglass, the voltage output of
the panel went back up to about 18 Volts. The free air flow and no "greenhouse effect" from the plexiglass allowed the cells to stay cooler.
I may
just leave the panel without the plexiglass. These CIS cells are much more rugged than the thin mono-crystalline cells I used in
my first solar panel.
They had to be protected from the environment. Also, I won't be leaving this panel out exposed to the elements and harsh weather. I will only use
it now and then on camping trips to charge up small appliances. It will probably be ok without the plexiglass.
So how much did all this cost to build? Well, I saved all the receipts for everything I bought related to this project. Also, my
workshop is well stocked with all sorts of building supplies and hardware. I also have a lot of useful scrap
pieces of wood, wire and all sorts of miscellaneous stuff (some would say junk) laying around the shop. So I had a lot of stuff
on hand already. Your mileage may vary.
Part
Origin
Cost
Solar Cells
$30.00*
Misc. Lumber
Already on hand
$0.00
Plexiglass (not really needed)
Homecenter Store
$13.95
Hinges
Homecenter Store
$3.49
Silicone Caulk
Homecenter Store
$3.95
Wire
Already on hand
$0.00
Diodes
$0.40±
Quick disconnect plug
Radio Shack
$5.50
Paint
Already on hand
$0.00
Total
$57.29
Not too bad. That's a bit cheaper than what a commercially made 15 Watt solar panel from someplace like Harbor Freight would cost, ($70 as of this writing).
However, my panel folds up to save space. The Harbor Freight panels don't, and they are nearly as big as my
60 Watt solar panel. This design would be even cheaper to build with the plexiglass omitted. It probably
isn't really needed since these CIS cells are so rugged, and it causes the cells to overheat anyway.
I have plans to further experiment with these CIS cells, and build more panels to add to the capacity of my system. I'll post more here as the project evolves. Stay
tuned
* The price of solar cells on
has gone up quite a bit since I bought these cells.
± This price represents 2 out of a lot of 25 diodes I bought on
for $5.00.
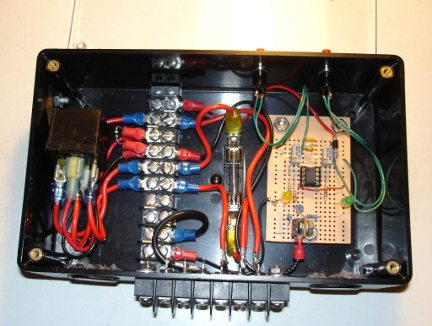
UPDATE 03/20/11
I have designed a simple battery charge controller circuit for use with solar panels and wind turbines. It is a simple circuit, and it uses only easy
to find parts, so it is very easy to build. Click the photo for more information.
 I drew up a layout for 20 of the solar cells and rough dimensions of half of the folding solar panel. The other half would just
be a mirror image of this. I did things a little differently when I actually wired the cells together, but I followed this initial
plan fairly closely. Click for a larger view.
I drew up a layout for 20 of the solar cells and rough dimensions of half of the folding solar panel. The other half would just
be a mirror image of this. I did things a little differently when I actually wired the cells together, but I followed this initial
plan fairly closely. Click for a larger view.

 Several years ago I built a
 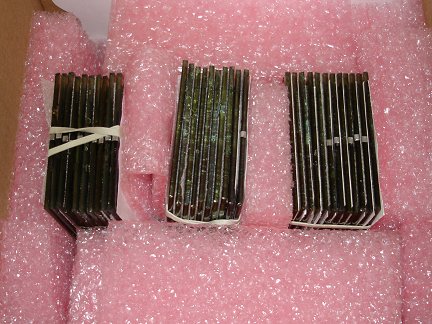 The solar cells arrived from
 Here is a close-up photo of the front of one of the solar cells. The cells are encapsulated in glass. They are delicate, but
not nearly as delicate as the paper-thin silicon solar cells I used in
Here is a close-up photo of the front of one of the solar cells. The cells are encapsulated in glass. They are delicate, but
not nearly as delicate as the paper-thin silicon solar cells I used in 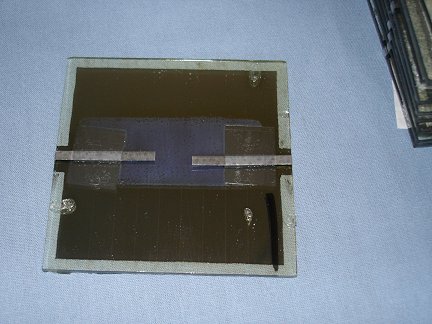 Here is a close-up photo of the back of one of the solar cells. These cells come with wiring tabs already soldered in place and
taped down. Also, the negative terminal is marked, though it is hard to see in this photo.
Here is a close-up photo of the back of one of the solar cells. These cells come with wiring tabs already soldered in place and
taped down. Also, the negative terminal is marked, though it is hard to see in this photo.
 Here I am testing one of the solar cells under my bright workbench lamp. It is producing 4.35 Volts. Not bad.
 Now that I had solar cells in hand, it was time to start building the panel. I used similar construction technique to what
I used on
Now that I had solar cells in hand, it was time to start building the panel. I used similar construction technique to what
I used on 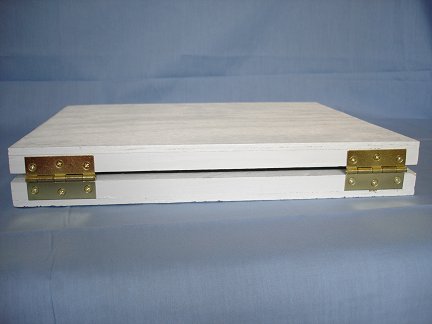 I hinged the the two halves together. I didn't bother mortising out for the hinges. I just mounted them flat against the sides
of the boxes.
I hinged the the two halves together. I didn't bother mortising out for the hinges. I just mounted them flat against the sides
of the boxes.
 Here is the finished hinged box opened up. I painted the box my usual white color that seems to be becoming the signiture
color for all my alternative energy projects.
Here is the finished hinged box opened up. I painted the box my usual white color that seems to be becoming the signiture
color for all my alternative energy projects.
 I marked out the position for each of the 20 solar cells in each half of the panel in pencil.
 After all the cells on one half were glued down, I waited a few hours for the silicone to set up before starting to wire the cells
together. I wanted to complete and debug one half, just in case I ran into problems, before doing the other half.
After all the cells on one half were glued down, I waited a few hours for the silicone to set up before starting to wire the cells
together. I wanted to complete and debug one half, just in case I ran into problems, before doing the other half.


 My next step was going to be to add plexiglass covers to each half to protect
the cells and the wiring from the elements.
I bought two pieces of plexiglass and cut them to fit the two halves of the panel.
My next step was going to be to add plexiglass covers to each half to protect
the cells and the wiring from the elements.
I bought two pieces of plexiglass and cut them to fit the two halves of the panel.
 Here I have peeled off the protective film on one side of the plexiglass covers, run beads of silicone caulk all the way around both halves of the
panel, and set the peeled side of the plexiglass in place over each half. I added some weights in the form of stone coasters to press down the plexiglass
overnight until the silicone set up.
Here I have peeled off the protective film on one side of the plexiglass covers, run beads of silicone caulk all the way around both halves of the
panel, and set the peeled side of the plexiglass in place over each half. I added some weights in the form of stone coasters to press down the plexiglass
overnight until the silicone set up.
 The next day, I peeled the protective film off the other side of the plexiglass. The panel was essentially done at this point. However, I wanted
to add a finishing touch. I had some adhesive backed felt disks on hand. I use a lot of them in my various
The next day, I peeled the protective film off the other side of the plexiglass. The panel was essentially done at this point. However, I wanted
to add a finishing touch. I had some adhesive backed felt disks on hand. I use a lot of them in my various
 Here is a photo of the gap the felt disks make between the plexiglass panes when the panel is folded.