 Anyone who has looked through my web site can see that I am fascinated with glass. I like to melt it, cast it, fuse it and turn it into new things.
Eventually I got the idea of doing the ultimate glass hack and making my own glass from scratch. For that I needed a way of grinding and mixing
the chemicals that would make up a batch of glass into a very fine and homogeneously mixed powder. I needed a ball mill. So naturally I decided
to build my own. Here it is in all it's bodged together glory. It doesn't look like much, but it works great, and it cost almost nothing to build.
Anyone who has looked through my web site can see that I am fascinated with glass. I like to melt it, cast it, fuse it and turn it into new things.
Eventually I got the idea of doing the ultimate glass hack and making my own glass from scratch. For that I needed a way of grinding and mixing
the chemicals that would make up a batch of glass into a very fine and homogeneously mixed powder. I needed a ball mill. So naturally I decided
to build my own. Here it is in all it's bodged together glory. It doesn't look like much, but it works great, and it cost almost nothing to build.
As a bonus, this ball mill can also be used as a rock tumbler, or a glass tumbler to make your own "sea glass" at home. To use the
mill as a rock tumbler, just leave out the steel balls, add rocks, tumbling grit and water, and let it spin.
|
Here is a video of my home-made ball mill in operation with a brief explanation of all the parts and how I put it together. For
detailed descriptions of all the parts, how I built it, and how I use it, read further down this page.
|
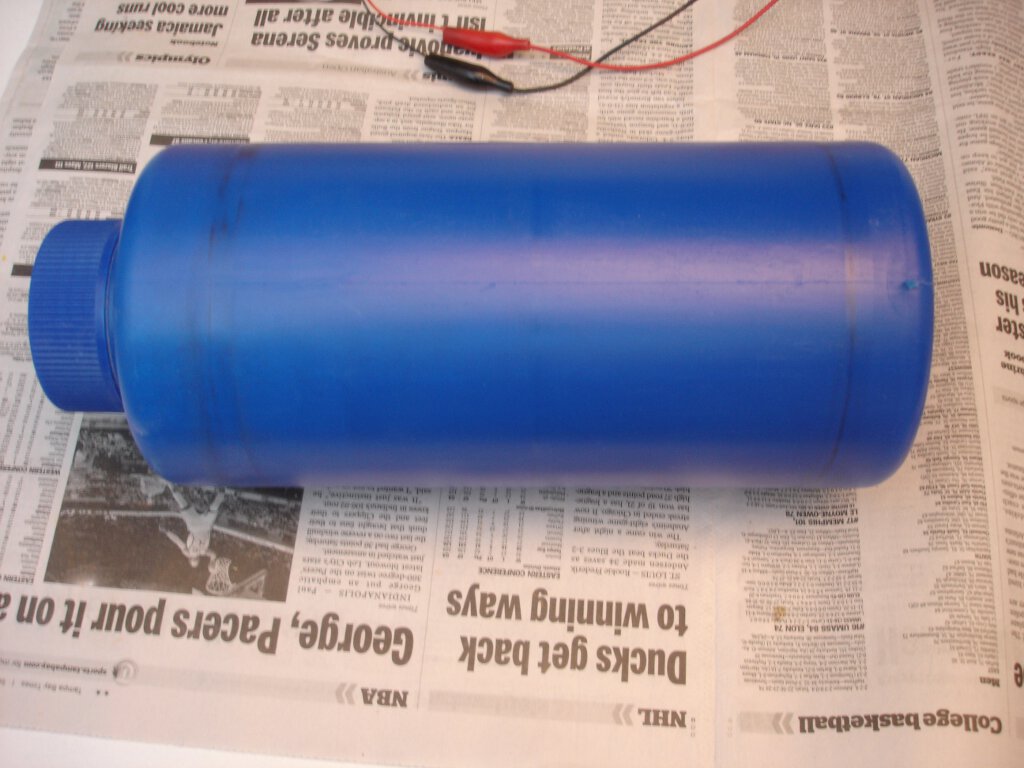
 The drum I used for the ball mill was originally a plastic container that held abrasive grit used in vibratory tumblers. It is about two liters in size.
I had several empty containers of this type,
and decided to put them to use in this project. They work pretty well in this application. There are a few potential problems. The container lids
are not liquid-tight. So use as a rock tumbler would require adding a cork or rubber gasket. Also, a little bit of the plastic does get ground off
the inside surface and contaminates the batch being ground. This is not a problem for my application because anything organic will be vaporized out
of the mix long before it reaches melting temperature in my kiln. Contamination might be an issue for other uses. A steel drum would probably work
better if you can find one, or make one, but it would be a lot louder in use.
The drum I used for the ball mill was originally a plastic container that held abrasive grit used in vibratory tumblers. It is about two liters in size.
I had several empty containers of this type,
and decided to put them to use in this project. They work pretty well in this application. There are a few potential problems. The container lids
are not liquid-tight. So use as a rock tumbler would require adding a cork or rubber gasket. Also, a little bit of the plastic does get ground off
the inside surface and contaminates the batch being ground. This is not a problem for my application because anything organic will be vaporized out
of the mix long before it reaches melting temperature in my kiln. Contamination might be an issue for other uses. A steel drum would probably work
better if you can find one, or make one, but it would be a lot louder in use.
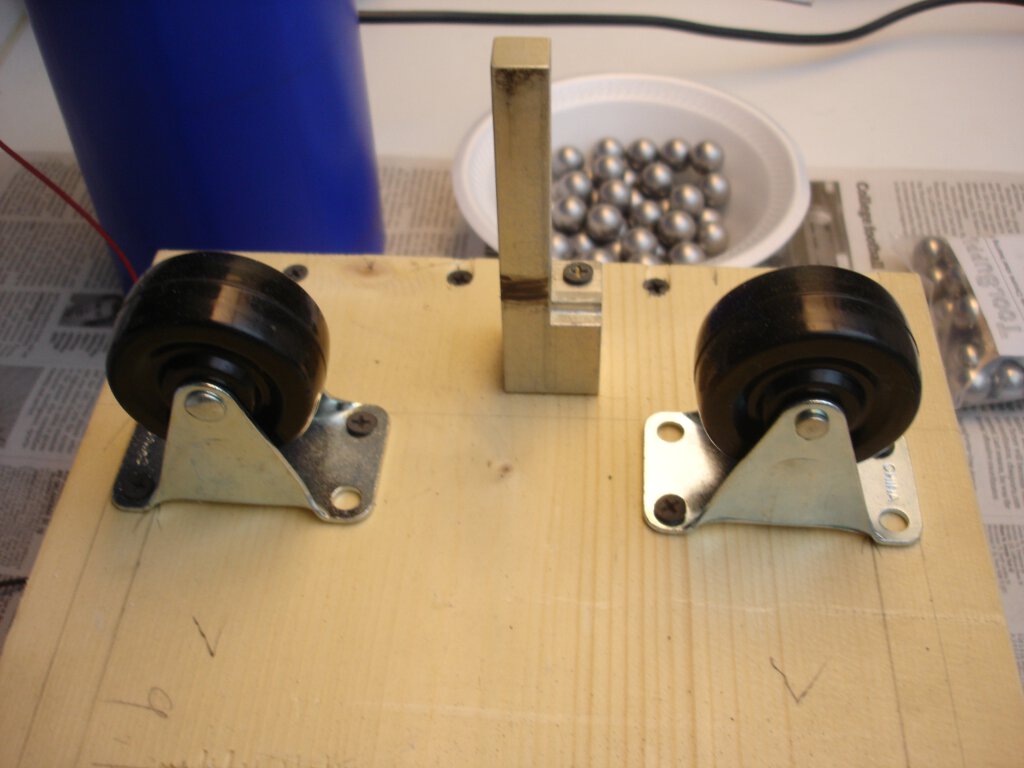
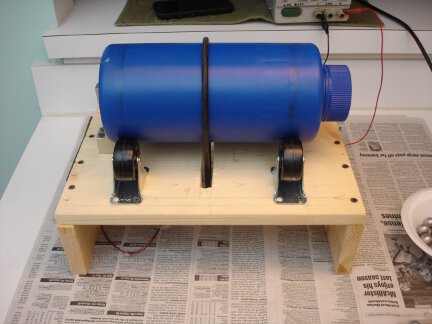
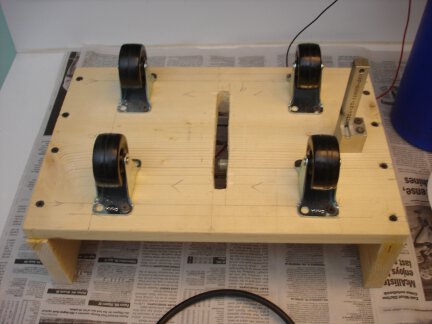 Here you can see an overview of the ball mill with the drum removed. Construction is super simple. Just three pieces of wood plank banged together
to make a platform for mounting all the parts. The platform is made from a 1X10 wooden plank 14 inches long. It sits on two pieces of 1X4 wood.
Here you can see an overview of the ball mill with the drum removed. Construction is super simple. Just three pieces of wood plank banged together
to make a platform for mounting all the parts. The platform is made from a 1X10 wooden plank 14 inches long. It sits on two pieces of 1X4 wood.
Four inexpensive fixed caster wheels were mounted on top of the platform for the drum to roll on. They were mounted about 2 inches in from
the edges of the platform, and 7.5 inches apart.
The drive motor was mounted on the underside of the platform, and the dive belt comes up through a slot in the platform.
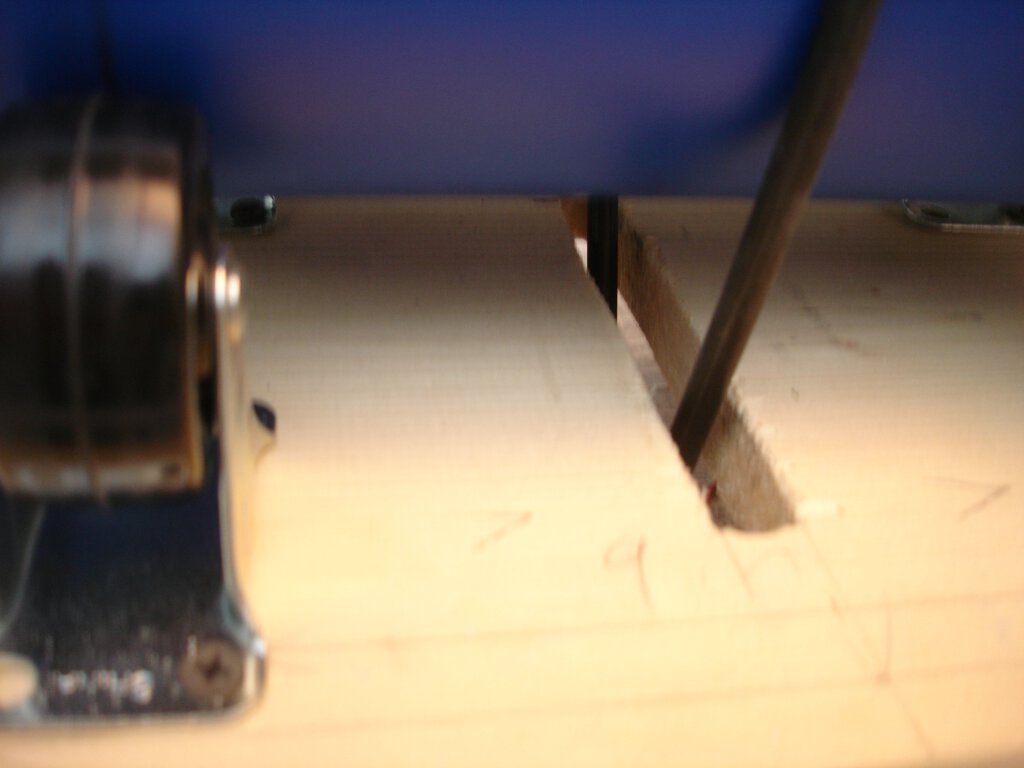
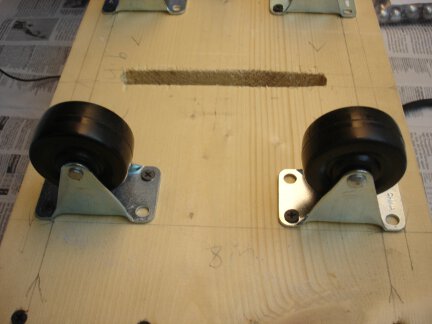 Here is a close-up showing how two of the caster wheels are mounted. The slot in the middle of the platform for the belt to pass through is also
visible. The fixed caster wheels were quite inexpensive, and were one of the few items I actually had to buy to build this project.
Here is a close-up showing how two of the caster wheels are mounted. The slot in the middle of the platform for the belt to pass through is also
visible. The fixed caster wheels were quite inexpensive, and were one of the few items I actually had to buy to build this project.
 Here is a close-up of the other side of the platform and the other two caster wheels. Also shown is a stop mounted on one side of the platform.
It was found early
on in using the mill that the drum tended to slowly walk toward one side and would eventually drop off the wheels. So I found a scrap piece of
aluminum and mounted it the end the drum walked toward to act as a stop. The drum riding against the smooth aluminum surface doesn't seem to
produce much friction.
Here is a close-up of the other side of the platform and the other two caster wheels. Also shown is a stop mounted on one side of the platform.
It was found early
on in using the mill that the drum tended to slowly walk toward one side and would eventually drop off the wheels. So I found a scrap piece of
aluminum and mounted it the end the drum walked toward to act as a stop. The drum riding against the smooth aluminum surface doesn't seem to
produce much friction.
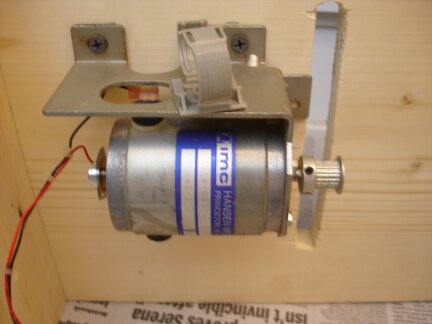 The ball mill is powered by a fairly robust 12V DC motor salvaged from a junked printer. It had a pulley for a fine-toothed belt on it. It was left in place
and it seems to drive the heavy round rubber belt well without slipping. The motor was mounted using screws on only one side, which were deliberately left
loose. This allows the motor to pivot downward under its own weight to put tension on the belt.
The ball mill is powered by a fairly robust 12V DC motor salvaged from a junked printer. It had a pulley for a fine-toothed belt on it. It was left in place
and it seems to drive the heavy round rubber belt well without slipping. The motor was mounted using screws on only one side, which were deliberately left
loose. This allows the motor to pivot downward under its own weight to put tension on the belt.
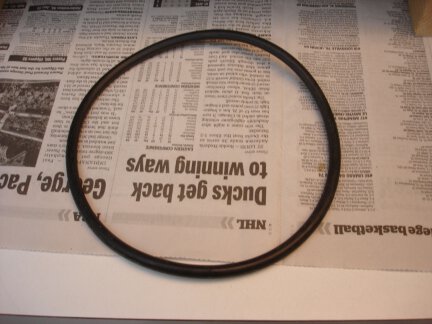 The drive belt is a fairly heavy round, rubber belt. I don't remember where I got it. It may have been salvaged from an old vacuum cleaner.
 A long, narrow slot was cut in the platform for the belt to pass through. I did it by marking out where I wanted it, drilling a hole
at each end, and then cutting out the material between the holes with a jigsaw.
A long, narrow slot was cut in the platform for the belt to pass through. I did it by marking out where I wanted it, drilling a hole
at each end, and then cutting out the material between the holes with a jigsaw.
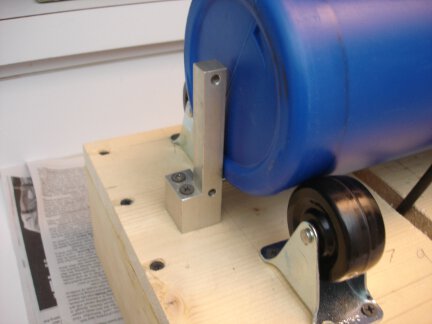 This photo shows the makeshift end stop that prevents the drum from walking off the casters. It is just a random piece of aluminum
I found in my junk collection. It conveniently had some holes already drilled in it which made mounting easy. Just about anything
that the drum will ride against nearly frictionlessly will work for a stop.
This photo shows the makeshift end stop that prevents the drum from walking off the casters. It is just a random piece of aluminum
I found in my junk collection. It conveniently had some holes already drilled in it which made mounting easy. Just about anything
that the drum will ride against nearly frictionlessly will work for a stop.
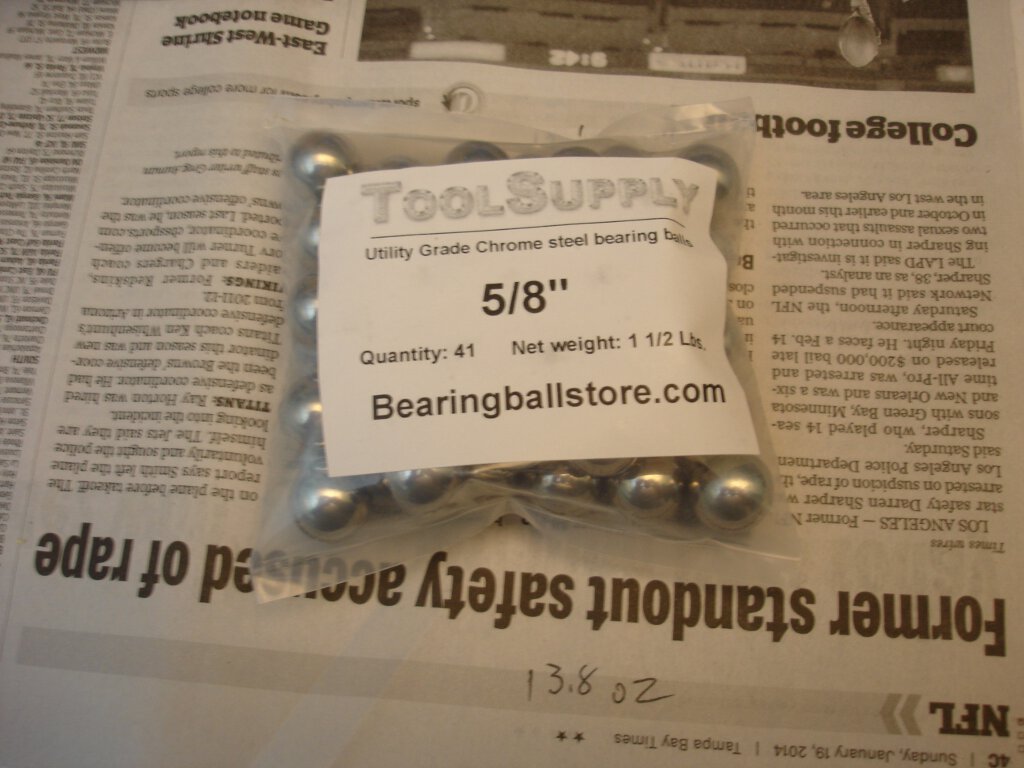
 One of the few things I had to buy for this project, aside from the casters, was the steel balls. I found these online. They were
quite inexpensive. I went with 5/8 inch diameter balls, which seem to work well in a mill this size.
One of the few things I had to buy for this project, aside from the casters, was the steel balls. I found these online. They were
quite inexpensive. I went with 5/8 inch diameter balls, which seem to work well in a mill this size.
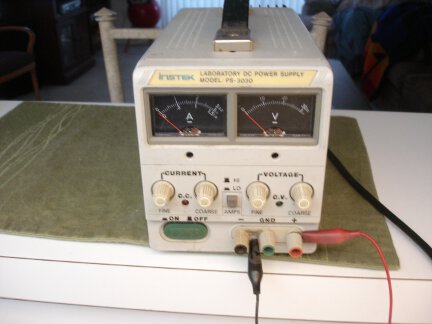 I have been powering the ball mill with my bench variable power supply so I could fine tune the rotation speed. I wanted it to turn as fast
as possible to speed grinding, but not so fast that centrifugal force pins the balls to the wall of the drum preventing them from tumbling
over each other. With a little experimentation, the correct speed was found.
I have been powering the ball mill with my bench variable power supply so I could fine tune the rotation speed. I wanted it to turn as fast
as possible to speed grinding, but not so fast that centrifugal force pins the balls to the wall of the drum preventing them from tumbling
over each other. With a little experimentation, the correct speed was found.
So far, this makeshift mill has worked well for me. It has been run for long periods with no problems. It does a good job of reducing
even fairly chunky material into a very fine powder, and thoroughly mixing everything. The only real problem I have faced is accidentally
over-filling the drum a few times. The drum should not be too full or the balls and material to be ground won't have enough free space
to tumble around.
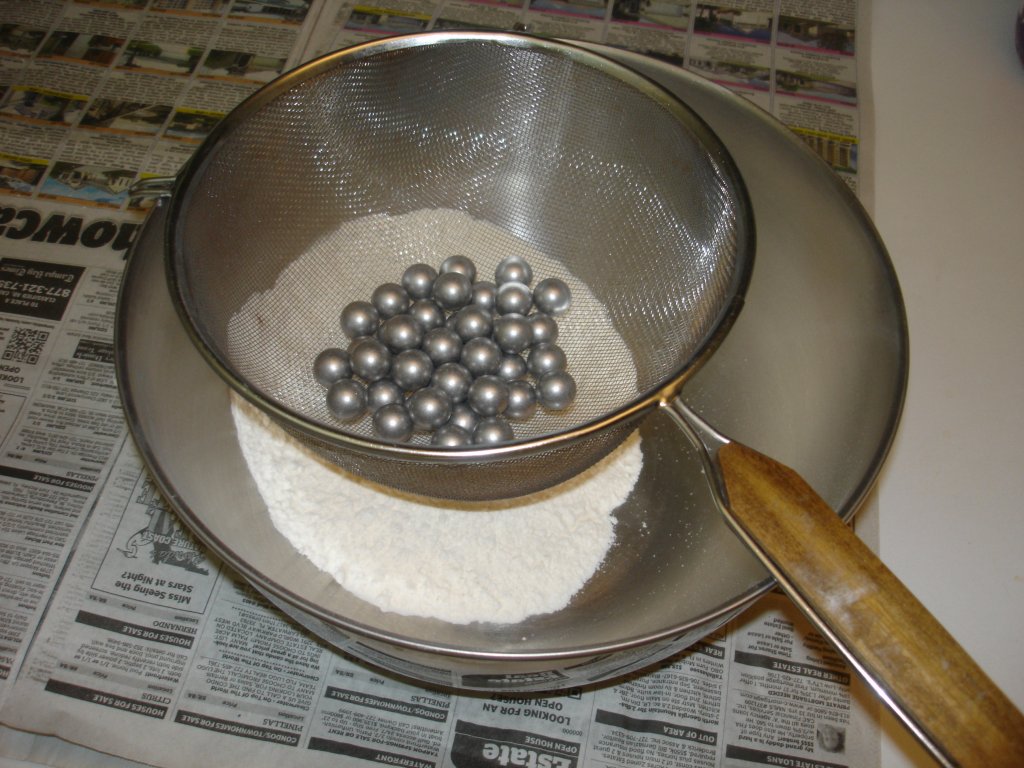
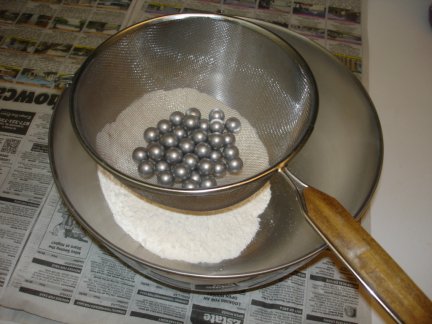 After a milling run, the contents of the drum are dumped out into a sieve over a bowl. With a few shakes of the sieve, the powder drops
through the mesh into the bowl leaving the balls behind to be put back in the drum. The sieve also catches any bits that haven't been
sufficiently ground down.
After a milling run, the contents of the drum are dumped out into a sieve over a bowl. With a few shakes of the sieve, the powder drops
through the mesh into the bowl leaving the balls behind to be put back in the drum. The sieve also catches any bits that haven't been
sufficiently ground down.
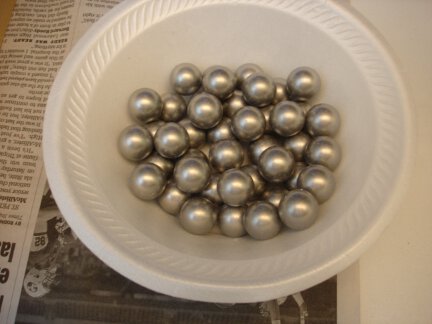 After many hours of hard use, the balls have lost their factory fresh shine, but are otherwise unharmed and should last indefinitely.
This mill is going to come in really handy for lots of future projects. I hope this page gives helpful ideas to anyone in need of a
ball mill. They are quick, easy, and cheap to build yourself.
I need to add a disclaimer here for anyone thinking of using this sort of ball mill for milling gunpowder or other
flammable or explosive powders. First of all, it is really not a good idea. You could cause a fire or explosion and
destroy your place, or maybe even get yourself hurt or killed. So don't do it, and if you do it, don't blame me if
something bad happens. I'll be saying I told you so.
Also do not to use steel, ceramic or glass balls to grind flammable or explosive materials because they can create sparks
as they bang against each other while they tumble.
Future improvements: The plastic container I am using is really thick-walled and sturdy, but using it in this application will eventually wear it out. I also get some plastic
contamination in the materials I grind in it. So in the future I would like to replace the plastic container with a piece of large diameter steel or iron pipe with end caps.
That should also help improve the grinding action as the steel balls bash against the hard walls of the pipe. If I switch to a steel or iron container, which would be heavier,
I might also have to beef up the motor driving the unit. We'll see,
Other applications: As I mentioned at the top of the page, and in the attached video, this setup could also be used as a rock tumbler. The plastic container would be ideal for
that. Another possible application for this unit is for grinding samples of gold ore, and maybe other metallic ores. One of my many hobbies is gold prospecting.
It's often necessary to grind an ore sample to release all the fine particles of gold it contains so they can be separated. This unit may get used for that in the future too.