 I've been doing a lot of grilling lately. The weather here in central Florida has finally started cooling down a little bit. It's no longer 150
degrees on my patio in the afternoon sun. Being able to fire up the grill and grill some dinner without worrying about dying from heat stroke
is a wonderful thing. I really like grilling, and do it as often as I can. I cook lots of things on the grill, even
my meatloaf recipe. Just about
anything that you would ordinarily cook in an oven or on the stovetop can be cooked on a grill. Now I don't claim to be a
world-class grillmaster, but I have learned a few things about grilling over the years. Here are some tips I learned the hard way.
I've been doing a lot of grilling lately. The weather here in central Florida has finally started cooling down a little bit. It's no longer 150
degrees on my patio in the afternoon sun. Being able to fire up the grill and grill some dinner without worrying about dying from heat stroke
is a wonderful thing. I really like grilling, and do it as often as I can. I cook lots of things on the grill, even
my meatloaf recipe. Just about
anything that you would ordinarily cook in an oven or on the stovetop can be cooked on a grill. Now I don't claim to be a
world-class grillmaster, but I have learned a few things about grilling over the years. Here are some tips I learned the hard way.
1. Use charcoal, not gas.
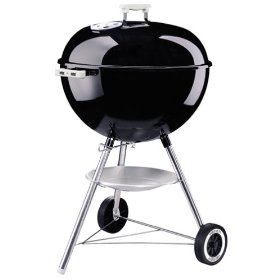
I dislike gas grills. I've owned a lot of them over the years. None have worked as well for me as even a cheap charcoal grill. I paid $10 for my
current Weber charcoal grill at a yard sale, and I love it far more than any of the expensive gas grills I have owned in the past. I think my
dalliances with gas grills came about because I was just being lazy. I wanted instant heat, without having to build a fire, and no ashes to clean
up afterwards. The inferior results with gas eventually sent me back to charcoal to stay.
The main problem with gas grills that they burn gas. Why is that a problem you ask? Because one of the combustion products of gas is water vapor.
Cooking on a gas grill is like trying to cook your food in a steam bath. Charcoal, by comparison, is almost pure carbon. The only combustion
byproducts are carbon dioxide and lots of nice, dry heat. Charcoal works much better for searing and browning, and just cooking in general, in my opinion.
2. Use lump charcoal, not briquettes.
I far prefer to use natural lump charcoal for grilling, rather than briquettes. Once you try it, you'll never
go back. Lump charcoal starts easier, and burns hotter and cleaner than briquettes, producing very little ash. Briquettes have all sorts of additives in them to make them hold
together in those cute little pillow shapes. I'll use briquettes if lump charcoal is not available, but I make sure the fire is good and hot and the
additives have burned out of the briquettes before starting to cook over them. I don't want that stuff flavoring my food. If there is one disadvantage to
lump charcoal, it is that it burns up faster than briquettes.
3. Don't use charcoal lighter fluid.
Why pour foul smelling and toxic petroleum by-products on the stuff you are about to cook your food on? What's
your food going to taste like? How much of that nasty stuff will get into your body? Use a charcoal chimney and a wad of newspaper. Simple, easy, no
chemicals, no smell. The chimney will probably pay for itself after only a few grilling sessions, since you won't be buying lighter fluid anymore.
Lump charcoal is so easy to light that I often put a few lumps in my grill and then just hit them with a propane torch for a few seconds. Once those
few lumps are going, I pile more on top of them, and in a few minutes I have a rip-roaring fire going, no chemicals required.
4. Build a bigger fire than you think you will need.
Charcoal fires only get cooler over time. There's no turning them up. So I always make the fire
a little bigger than I think it needs to be, just in case. That way I always have plenty of heat just in case I get delayed in starting cooking, decide
to throw on some extra items, or it gets windy and blows away a lot of my heat. If the fire ends up being too hot, I can always re-arrange the coals
to make cooler spots, or raise the cooking surface up away from the coals. Remember, steaks are expensive, but charcoal is cheap. Don't skimp on the charcoal.
5. Be prepared.
Grilling is done outside, in the back yard or on the patio. It's not like cooking in the kitchen where everything you might need is
only an arm's-length, or at most, a couple of steps away. The important thing you forgot will be far, far away. In the time it takes to dash
back inside, run to the kitchen, hunt for what you need, and then run back outside, your expensive steaks or carefully assembled kabobs
can turn into burnt offerings. Gather everything you'll need and take it outside before you start cooking.
 6. Let the food warm up before grilling.
If you just throw a big, thick steak on the grill straight out of the refrigerator, the outside may be toast by the
time the inside is done. This is because the inside of the steak is starting out so cold. In the time it takes for the inside to heat up those extra
30 or 40 refrigerator cooled degrees, the outside can easily get over-done. If possible, let the food warm up to near room temperature before you start grilling.
Don't leave the food sitting around at room temperature for any length of time, or spoilage may occur.
7. Close up your grill when finished.
As I said above, charcoal is cheap, but still there's no need to waste it. When finished cooking, put the lid on your grill and close the air vents.
The fire will quickly go out, and the unburned charcoal can be used next time. I find that partially burned charcoal starts easy and burns hot
and clean. It has already had all the moisture and volatile compounds cooked out of it in the previous grilling session.