It's easy. You can do it too
|
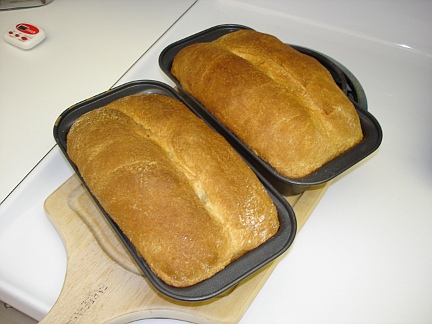
This recipe will make 2 small loaves, or one large loaf. Here are the necessary ingredients:
The method for making this bread closely follows my how-to on baking white bread. So consult that page if you need detailed instructions on bread making. I start by measuring out the flour and salt into the bowl of my stand mixer and attaching the dough hook. I then add the sugar and yeast into the warm water and stir vigorously. Set that aside for a few minutes for the yeast to bloom. It is ready when a froth begins to form on top of the water. Once the yeast has bloomed, add the honey and oil to the liquid mixture and again stir it vigorously. The honey tends to sink to the bottom and stick like glue to the container. Make sure it is fully dissolved in the liquid Now you are ready to make the dough. Start your stand mixer at low speed and pour in the liquid mixture in. Once the dough comes together into a ball, speed up the mixer to kneed the dough. Kneed it for at least 5 minutes. Once finished kneeding, drizzle a little olive oil in the bowl and turn the dough ball several times to coat it and the inside of the bowl. Cover the bowl with a damp cloth and set aside somewhere warm for the dough to rise. Wait for it to double in size. It usually takes about an hour for me. Once the dough has doubled in size, turn it out onto a floured surface and punch it down. Divide it into two more or less equal halves. Flatten each half out into a rectangle and then roll it up into a loaf shape, with the seam down, and pat the ends together. Place each loaf into a loaf pan that has some corn meal sprinkled in the bottom. Place the two loaf pans on the top rack of your oven. On the bottom rack place a wide pan filled with boiling hot water. Close the oven door and leave the loaves to do their second rise in the warm, moist oven. After about another hour, the loaves should have doubled in size again and should be well above the tops of the loaf pans. Remove the loaves from the oven, but leave the pan of water in the oven. Preheat the oven to 425 degrees. While waiting for the oven to warm up, you can slash the tops of the loaves if you so desire. Sometimes I do, sometimes I don't. When the oven gets up to temperature, spritz a little water on the tops of the loaves with a spray bottle. Put the loaves on the top rack of the oven above the water pan. Put the loaves in as quickly as possible so you don't lose all the heat from the oven. After the loaves are in, turn the oven temperature down to 350 degrees and set your timer for 15 minutes. When your timer goes off, remove the pan of water from the oven. Be careful not to splash yourself with the hot water. Set your timer for an additional 30 minutes of baking time. When the timer goes off again, check the bread. The crust should be dark brown and crispy. Thump the bread. It should be firm and hollow sounding. Leave it in for a few more minutes if it doesn't seem done enough yet. When done, remove the loaves from the oven and allow them to cool in the pans until cool enough to handle without getting burned. turn the loaves out of the pans. This bread tends to stick in the pans worse than my white bread recipe. sometimes they need a little persuasion to leave the pans.
|
|
Unlock the key of your success for Pass4sure 642-813 exams and Pass4sure 642-832 by using our latest Testking 642-832 and Testking 70-680 prep resources.Our Testking SY0-301 is rare in IT world.
[Back to Mike's Cooking & Recipe Page]
[Mike's Homepage]
[Email me]
Other places to visit:
[Mike's telescope workshop]
[Mike's home-built jet engine]
[Mike's Home-Built Wind Turbine]
[Mike's Home-Built Solar Panels]
[Mike's gold prospecting page]
© Copyright 2009-2013 Michael Davis, All rights reserved.
 I grew up eating a honey wheat bread made by a famous national brand company (who shall remain unnamed because I am pissed at them, and
I don't want to give them any free advertising). I loved that bread.
When we moved to Florida from Indiana when I was young, we couldn't get that bread anymore. It just wasn't available in the
South. Then, a few years ago, the stores here in Florida began selling that brand of bread. When I first saw it for sale in the bread
aisle at the grocery store I let out a whoop. I was in heaven, for a while. A year or so later, the company changed the recipe
of the bread.
At first, I thought maybe I got a bad loaf, or the bakery had made a bad batch. After a while though, the sad realization set in that
in an effort to jump on the high-fiber nutritional bandwagon, they had totally ruined the bread. It tasted like the main ingredient they
were using now was sawdust. For me, the bread was inedible. I went back to the inadequate substitutes I had been buying before, and
mourned the loss of my childhood friend.
I grew up eating a honey wheat bread made by a famous national brand company (who shall remain unnamed because I am pissed at them, and
I don't want to give them any free advertising). I loved that bread.
When we moved to Florida from Indiana when I was young, we couldn't get that bread anymore. It just wasn't available in the
South. Then, a few years ago, the stores here in Florida began selling that brand of bread. When I first saw it for sale in the bread
aisle at the grocery store I let out a whoop. I was in heaven, for a while. A year or so later, the company changed the recipe
of the bread.
At first, I thought maybe I got a bad loaf, or the bakery had made a bad batch. After a while though, the sad realization set in that
in an effort to jump on the high-fiber nutritional bandwagon, they had totally ruined the bread. It tasted like the main ingredient they
were using now was sawdust. For me, the bread was inedible. I went back to the inadequate substitutes I had been buying before, and
mourned the loss of my childhood friend. As I said above, this bread is not an exact match for the bread I loved so much as a kid. Let me tell you though, the smell of
this bread fresh from the oven is to die for. The texture is a little coarser and the flavor is missing some undefinable thing
that I remember in the other bread. Too bad I can't get the other bread anymore to do a side by side taste test to try to figure
out what the difference is. I may experiment with using different types and amounts of honey and seeing how that changes the flavor.
Even if I can't improve on this bread, it is still damn good, and I like it a lot. I hope you do too.
As I said above, this bread is not an exact match for the bread I loved so much as a kid. Let me tell you though, the smell of
this bread fresh from the oven is to die for. The texture is a little coarser and the flavor is missing some undefinable thing
that I remember in the other bread. Too bad I can't get the other bread anymore to do a side by side taste test to try to figure
out what the difference is. I may experiment with using different types and amounts of honey and seeing how that changes the flavor.
Even if I can't improve on this bread, it is still damn good, and I like it a lot. I hope you do too.